Flourish-Everyday
Search Results
Search this site
346 results found with an empty search
- How to Do Reverse Lunges for a Stronger Lower Body
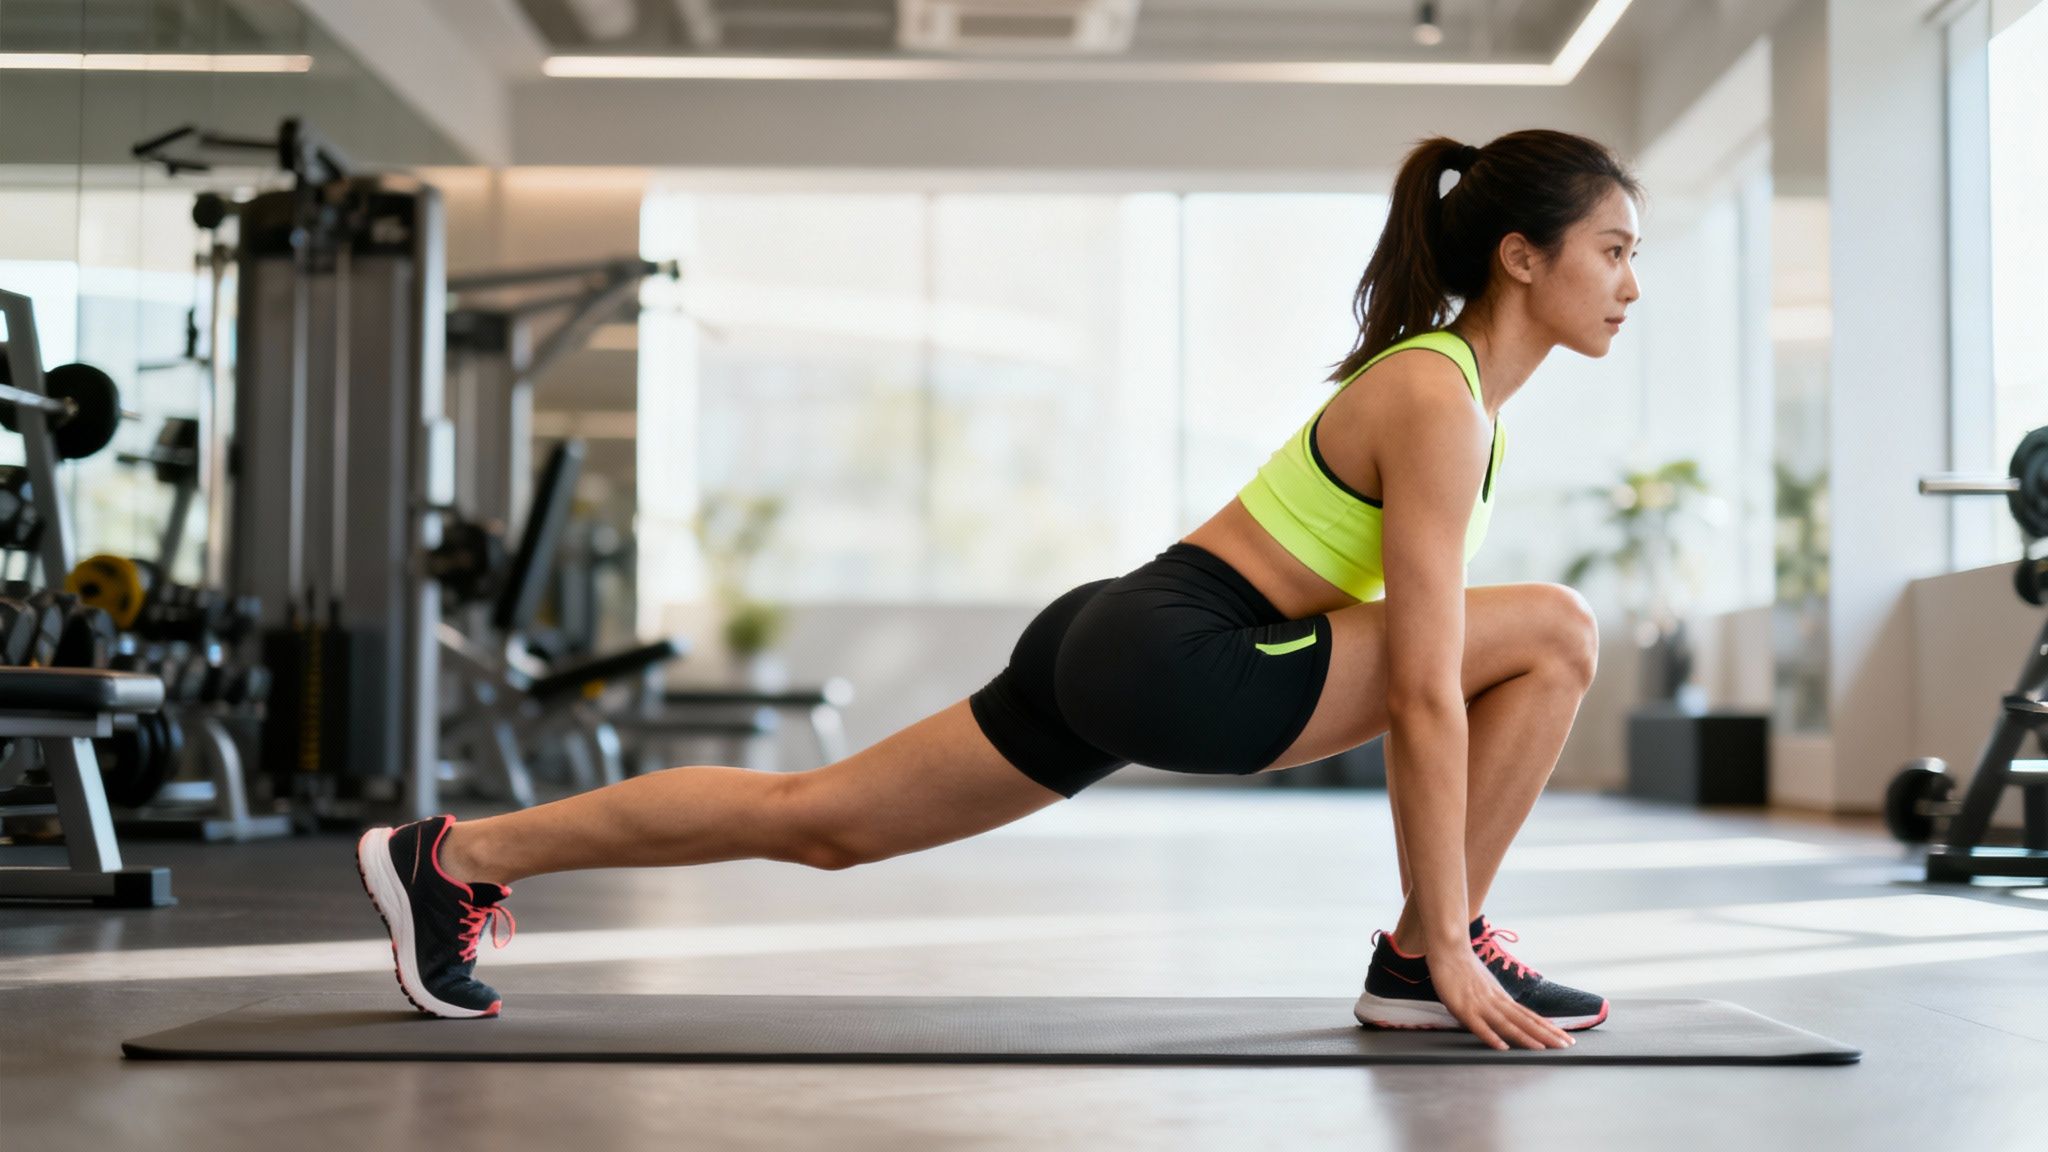
The reverse lunge is a cornerstone for building lower body strength and stability. To perform it, take a large step back with one foot, lower your hips until both knees are at a 90-degree angle, then push through your front heel to return to the start. This exercise effectively targets the glutes and hamstrings. Table of Contents Why Reverse Lunges Deserve a Spot in Your Workout Executing The Perfect Reverse Lunge Functional Benefits for Runners and Athletes Fixing the Most Common Form Mistakes How to Progress and Program Your Lunges Your Reverse Lunge Questions Answered References Why Reverse Lunges Deserve a Spot in Your Workout The reverse lunge is more than just another leg day exercise; it's a foundational movement that builds functional strength, improves balance, and is notably joint friendly. By stepping backward, the movement becomes more controlled and stable compared to a forward lunge. This makes it an excellent choice for individuals at all fitness levels, from beginners to seasoned athletes. This controlled backward step is precisely why the reverse lunge is a safer option for many people, especially those with sensitive knees. A Knee-Friendly Powerhouse One of the most significant benefits of the reverse lunge is its kindness to your joints. Forward lunges can place considerable stress on the knee, but stepping backward naturally helps keep your front shin more vertical. This alignment change can reduce pressure on the knee joint by approximately 30% . This is particularly beneficial for runners who accumulate high mileage, such as 20+ miles a week. The movement also shifts the muscular focus to the posterior chain, the hamstrings, glutes, and calves. A 2022 study found these muscles showed 20-40% greater activation in reverse lunges compared to forward movements [1]. You can find more details on lunge benefits at Healthline . The reverse lunge is a secret weapon for building a resilient lower body. It trains your body to decelerate and stabilize under control, which translates directly to better performance in sports and everyday life. Correcting Imbalances and Building Stability Most people have a dominant leg, which can lead to muscular imbalances and increase the risk of injury over time. As a unilateral exercise, working one leg at a time, the reverse lunge is the perfect solution. It compels your weaker side to work independently and build strength. This single leg focus offers several advantages: Enhanced Balance: Stepping backward challenges your proprioception, your body’s awareness of its position in space. Improved Core Engagement: Your core must activate significantly to maintain an upright torso and prevent instability. Better Hip Mobility: The lunge provides a gentle stretch for the hip flexor of the back leg, helping to counteract tightness from prolonged sitting. Incorporating this move into your routine is a strategic way to build a balanced, powerful, and injury resistant lower body, setting the stage for more advanced strength training. It's useful to compare the reverse lunge with the more common forward lunge. While they appear similar, they target the body in subtly different ways. Quick Guide Reverse Lunge vs Forward Lunge Feature Reverse Lunge Forward Lunge Stability More stable; stepping back is a controlled motion. Less stable; requires more deceleration to control momentum. Muscle Focus Emphasizes glutes and hamstrings more. Places more emphasis on the quads. Joint Impact Easier on the knees due to a more vertical shin angle. Can place more stress on the front knee joint. Both exercises are effective. However, if you need a knee friendly option that specifically targets the glutes and hamstrings, the reverse lunge is an excellent choice. Executing The Perfect Reverse Lunge Proper execution of the reverse lunge is about control, not speed. Every part of the movement, from the initial setup to the final push, is crucial for maximizing benefits and ensuring safety. When form is correct, this exercise becomes a true powerhouse for the lower body. Begin by standing tall with your feet hip width apart and a slight bend in your knees. Before moving, engage your core by drawing your belly button toward your spine. This action creates the solid foundation needed for the exercise. Mastering The Descent And Ascent From your braced stance, take a deliberate step straight back with one foot, landing on the ball of that foot. The step should be long enough to allow both knees to form approximately 90-degree angles as you lower your body. Allow your back knee to hover about an inch from the floor without touching it. As you descend, focus on keeping your torso upright with your chest lifted. A common error is leaning too far forward, which shifts the work away from your glutes and strains your lower back. Ensure your front knee remains aligned directly over your ankle; do not let it collapse inward or drift past your toes. This alignment is vital for joint protection. To return to the starting position, drive forcefully through the heel of your front foot. This is where your glutes and hamstrings engage most intensely. Squeeze your glutes and think about pushing the floor away as you bring your back foot forward to meet the front. This infographic breaks down the main benefits you achieve with this controlled movement: enhanced knee safety, better balance, and significant muscle activation. The mechanics of the lunge directly contribute to a stronger posterior chain and improved stability, making it a well rounded and effective exercise. Essential Cues For Flawless Form To master how to do reverse lunges correctly, using internal cues can be very effective. Think of these as reminders from a personal trainer during each set. "Chest Up, Shoulders Back" : This cue helps prevent your back from rounding and keeps the focus on your legs. Imagine a string pulling the top of your head toward the ceiling. "Push the Floor Away" : Instead of just thinking "stand up," concentrate on driving your front heel down into the floor to generate maximum power from your glutes. "Keep Your Hips Square" : Your hips should always point straight ahead. Avoid twisting or opening your torso as you step back. A good reverse lunge should feel smooth and intentional. If you find yourself wobbling or rushing, you're missing the stability benefits. Slow down and control every inch of the movement. Start with your body weight to master the form before adding resistance. If you're building a routine, you can find other great foundational bodyweight exercises to complement your workout. Focusing on these details will make every rep more effective. Functional Benefits for Runners and Athletes The reverse lunge offers more than just muscle growth. For runners and other athletes, it provides specific, functional advantages that improve performance. It is a precision tool for correcting weaknesses, generating explosive power, and increasing injury resilience. One of its key benefits is its ability to target and correct muscle imbalances. As a unilateral movement, it prevents the dominant leg from taking over, forcing the weaker side to build equal strength. This is crucial for runners who need a balanced gait to prevent overuse injuries. Building Posterior Chain Power The true value of the reverse lunge lies in its intense focus on the posterior chain, the group of muscles including your glutes and hamstrings. This group is the engine for explosive movements like sprinting, jumping, and accelerating. When you learn how to do reverse lunges with proper form, you target these critical muscles more effectively than with many other common exercises. The backward motion naturally places the load on your glutes and hamstrings, building the raw strength needed for a powerful finish in a race. My guide on strength training for distance runners provides more detail on how a strong posterior chain can boost speed and endurance. Reverse lunges became a staple in physical therapy following the post-2005 ACL injury epidemic, which still affects over 200,000 athletes in the US annually [2]. Studies show they activate the glutes and hamstrings 28% more than forward lunges, which helps significantly reduce stress on the knee joint. Enhancing Mobility and Core Stability For athletes who spend significant time sitting, the reverse lunge also serves as a dynamic stretch for tight hip flexors. As you step back, the hip on your trailing leg opens, helping to counteract the effects of prolonged sitting and improve overall mobility. Simultaneously, the movement requires significant core engagement. Your abs and obliques must work to keep your spine stable and prevent you from wobbling. A strong, stable core is the foundation for almost every athletic movement. The reverse lunge trains your core to stay braced and active during a dynamic, single-leg motion, which is exactly what it needs to do when you're navigating a technical trail run or powering through a CrossFit WOD. This combination of benefits makes the reverse lunge essential for any serious athlete. It builds balanced strength, develops explosive power, and improves the mobility and stability needed to perform at your peak. Fixing the Most Common Form Mistakes Even with knowledge of the steps, small errors can compromise your reverse lunge results. Correct form is essential for protecting your joints and ensuring the right muscles are engaged. Let’s review common mistakes and how to fix them. A major issue is allowing the front knee to collapse inward. This often indicates weak glute medius muscles, which are crucial for hip stabilization. When the knee caves in, it places excessive stress on the joint, potentially leading to pain. To fix this, consciously push your front knee slightly outward, keeping it aligned with your second and third toes. Imagine trying to spread the floor apart with your feet. Adding exercises like clamshells and lateral band walks to your warm-up can also help strengthen these key hip stabilizers. Maintaining an Upright Torso Another frequent problem is leaning the torso too far forward. While a slight forward hinge is natural, excessive leaning shifts the focus from your glutes to your lower back. This often occurs due to a disengaged core or tight hip flexors. To correct this, keep your chest lifted and shoulders back throughout the movement. Brace your core as if preparing for an impact; this tension will provide the stability needed to stay upright. Pro Tip: If possible, perform your lunges in front of a mirror. Instant visual feedback is one of the best ways to identify and correct a forward lean or a caving knee in real-time. Tight hip flexors are often the primary cause, pulling your torso forward and making good posture difficult. For additional help, see our post on how to improve hip flexibility . It offers targeted stretches that can significantly improve your lunge form. Correcting Your Push-Off The final major mistake is pushing off from the wrong part of your foot. Many people push from the ball of their back foot or the toes of their front foot, which wastes energy and fails to engage the target muscles. All power to return to the starting position should come from driving through the heel of your front foot. This ensures your glutes and hamstrings are activated to complete the movement. Imagine squishing a bug under your front heel as you press back up to a standing position. This simple cue can instantly improve the effectiveness of each rep. How to Progress and Program Your Lunges Once you've mastered the bodyweight reverse lunge with solid form, it's time to progress. Advancing the exercise is essential for continued strength gains and avoiding performance plateaus. This progression should be strategic, not just about lifting heavier weights. The core principle for improvement is progressive resistance training , which involves gradually increasing the challenge to your muscles over time. This consistent challenge forces them to adapt and grow. Adding Resistance for Strength Gains The most straightforward way to make the lunge more challenging is by adding weight. This forces your muscles to work harder, which is key for building both strength and size. Here are some effective ways to load your lunges: Dumbbells or Kettlebells : Holding a weight in each hand is a classic method that also challenges your grip strength and core stability. Goblet Hold: Holding a single heavier weight at your chest is excellent for core activation and naturally promotes an upright torso. Barbell : For advanced strength development, a barbell across your upper back allows for the heaviest loads. Always choose a weight that makes the last two reps of each set challenging but achievable with good form. Quality of movement should always take priority over quantity of weight. Dynamic Variations for Athleticism Beyond adding weight, you can make the reverse lunge more dynamic to improve coordination, balance, and explosive power, all of which enhance athletic performance. A popular progression is the reverse lunge with a knee drive. After lunging back, drive forcefully through your front heel to stand up, bringing your back knee forward and up toward your chest in a single, fluid motion. This variation adds a significant balance challenge and mimics running mechanics. Another great option is the slider reverse lunge . Placing your back foot on a slider disc forces your front leg to control the movement during both the descent and ascent, creating constant tension in the glute and hamstring. For more ways to target these key muscles, explore our ultimate guide to powerful exercises for hamstrings . 24oz Steel Water Bottle Structuring Your Workouts How you incorporate reverse lunges into your routine depends on your fitness goals. The sets, reps, and rest periods should be tailored to what you aim to achieve. Below is a simple table to guide your programming. Reverse Lunge Programming for Different Goals Fitness Goal Sets Reps per Leg Recommended Variation Rest Period Strength 3-4 6-8 Barbell or Heavy Dumbbells 90-120 seconds Hypertrophy 3-4 8-12 Goblet or Dumbbell Lunge 60-90 seconds Endurance 2-3 15-20 Bodyweight or Light Weight 30-45 seconds By intelligently adding weight, incorporating dynamic variations, and programming sets and reps for your specific goals, the reverse lunge can remain a staple in your routine that consistently delivers results. Your Reverse Lunge Questions Answered Even after mastering a new exercise, questions can arise. To ensure you feel confident with your reverse lunges, here are answers to some of the most common inquiries. Which Muscles Do Reverse Lunges Work The Most? The reverse lunge is a comprehensive lower-body exercise that targets several major muscle groups simultaneously. The primary muscles engaged are the gluteus maximus (the largest muscle in your buttocks) and the quadriceps (the front of your thighs). However, the hamstrings are also heavily involved, controlling the descent and powering the ascent. Additionally, your calves, core, and hip stabilizer muscles work to maintain balance and stability throughout the movement. Are Reverse Lunges Better Than Forward Lunges For Bad Knees? For many people, the answer is a resounding, yes! Stepping backward instead of forward alters the exercise's mechanics, making it significantly more knee friendly. The backward motion helps maintain a more vertical front shin, which reduces pressure and shearing force on the kneecap. A forward lunge involves momentum that must be decelerated, which can be stressful on the knee joint. In contrast, the reverse lunge is a more controlled, deliberate movement, making it a preferred variation for individuals with sensitive knees or those undergoing rehabilitation. Fitness experts often point out that the controlled backward step is inherently more stable. This reduces strain on the patellar tendon, making it a fantastic choice for building strength without flaring up old knee issues. How Many Reverse Lunges Should I Do In My Workout? The ideal number of reps and sets depends on your specific fitness goals. Here are some general guidelines: For General Strength: Aim for 3 sets of 8-12 reps per leg . This range is effective for building a solid strength foundation. For Muscular Endurance: To build stamina for activities like running, perform 2-3 sets of 15-20 reps per leg . For Maximal Strength: When lifting heavy to build raw power, reduce the reps. Focus on 3-4 sets of 5-8 reps per leg . Regardless of your goal, prioritize perfect form over hitting a specific number. Quality always surpasses quantity. Can I Do Reverse Lunges Every Day? It is not recommended. Like any strength exercise, your muscles require time for recovery and rebuilding. Training the same muscles daily can lead to overtraining, which hinders progress and increases injury risk. For optimal results, incorporate reverse lunges into your routine 2-3 times per week , allowing at least one day of rest in between sessions. This gives your lower body the necessary 48 hours to recover and grow stronger. References [1] Schutz, P., et al. (2022). "Joint-angle-specific muscle-tendon interaction in the human triceps surae during jumping." Journal of Biomechanics .[2] Prodromos, C. C., et al. (2007). "A meta-analysis of the incidence of anterior cruciate ligament tears as a function of gender, sport, and a knee injury-reduction regimen." Arthroscopy: The Journal of Arthroscopic & Related Surgery , 23(12), 1320-1325. At Flourish-Everyday , we're committed to providing the information you need to build a stronger, healthier lifestyle. From exercise guides to reviews on the best athletic shoes, find everything you need to support your fitness journey at https://www.flourish-everyday.com .
- Best Running Shoes for Pavement: A Guide for Hard Surfaces
Finding the best running shoes for pavement is all about cushioning and durability. You need something that can handle unforgiving surfaces. Top contenders like the Brooks Ghost 17 , HOKA Clifton 10 , and New Balance Fresh Foam 1080 v14 are favorites because they deliver the shock absorption needed for concrete and asphalt, protecting your joints mile after mile. This guide provides a complete roadmap to finding that perfect pair. For a more general look at shoe selection, our expert guide on how to choose running shoes is a great place to start. Index of Sections The Unforgiving Nature of Running on Pavement Common Pavement Related Injuries Decoding The Anatomy Of A Great Shoe Top Shoe Recommendations (Men & Women) : Reviews of our top picks. Running Health & Wellness : Tips for injury prevention and shoe care. FAQs & Final Thoughts : Common questions answered. References The Unforgiving Nature of Running on Pavement Running on pavement is a different challenge compared to softer surfaces like trails. With every stride on concrete, a significant shockwave travels up your body. This constant impact is why finding the best running shoes for pavement is essential for staying off the injured list. The Science of Impact Forces Harder surfaces return more energy back into the runner's body. A 2023 study published in Scientific Reports found that running on concrete generates significantly higher peak impact forces compared to softer surfaces like grass or a synthetic track. This increased impact is directly tied to overuse injuries common among runners (Agresta et al., 2023). Without proper cushioning, every mile on pavement delivers thousands of tiny, forceful blows to your joints. It's the accumulation of that stress that often leads to chronic pain. Common Pavement Related Injuries The unyielding nature of hard surfaces contributes to specific aches that can halt your training. Shin Splints: This sharp pain along the shin bone is frequently caused by the repetitive stress of pounding the pavement. Our guide on how to prevent shin splints and run pain-free can help. Stress Fractures: These tiny bone cracks develop from cumulative strain. Pavement running increases the risk, especially in the feet and lower legs. Joint Pain (Knees & Hips): Constant pounding can wear down cartilage, leading to aches and inflammation. Choosing shoes with advanced cushioning and durable, shock absorbing outsoles is your most effective defense, acting as a suspension system for your body. Decoding the Anatomy of a Great Pavement Shoe Shopping for road running shoes can feel complex. Let's break down the essential features you need to know for running on hard surfaces. Pavement doesn't give, it pushes back. Your shoe’s construction is your first line of defense. Cushioning: Your First Line of Defense Cushioning is the foam in the midsole that absorbs shock. Pavement shoes offer a spectrum of cushioning: Maximum Cushioning: Plush, cloud like shoes (e.g., HOKA Clifton, Brooks Ghost) ideal for long runs or recovery days. Responsive Cushioning: Bouncier, energetic foam that returns energy, great for faster paced training. Stack Height and Heel Drop Stack height is the amount of material between your foot and the ground. A higher stack usually means more cushion. Heel-to-toe drop is the height difference between the heel and forefoot, which influences your running mechanics. You can learn more in our guide explaining what heel-to-toe drop is and why it matters . Outsole: Durability and Grip The outsole is the rubber bottom of the shoe. For road running, you need an outsole that is tough enough for abrasive asphalt and grippy in wet conditions. Look for durable carbon rubber in high wear areas to ensure longevity. Matching Your Shoes to Your Running Style The best running shoe for your friend could be the worst one for you. Finding the right shoe for pavement depends on understanding your biomechanics, particularly your pronation, the natural inward roll of your foot as it strikes the ground. Some feet roll inward too much ( overpronation ), while others don't roll in enough ( supination ). A neutral gait is the ideal, distributing impact forces efficiently. Understanding Your Arch Type at Home Your arch type (high, normal, or flat) heavily influences your pronation. You can use the "wet test" at home to get a good idea: Dip the sole of one foot in a shallow pan of water. Step firmly onto a piece of cardboard. Examine the footprint. A full footprint suggests a flat arch (overpronation), while seeing only the heel and ball of the foot suggests a high arch (supination). A balanced footprint with a distinct curve indicates a neutral arch. Top Athletic Shoe Reviews for Pavement Let's put theory into practice. I've broken down top recommendations into three categories: the Daily Cruiser , the Speed Demon , and the Comfort King . Top Men's Pavement Running Shoes Shoe Model Category Key Feature Best For Brooks Ghost 17 Daily Cruiser DNA LOFT v3 foam for balanced cushion Reliable workhorse for all types of runs Saucony Ride 18 Speed Demon Responsive PWRRUN+ midsole Tempo runs and faster-paced training Hoka Clifton 10 Comfort King High-volume EVA foam for max absorption Long distances and joint protection Top Women's Pavement Running Shoes Shoe Model Category Key Feature Best For New Balance 1080v14 Daily Cruiser Fresh Foam X for soft, versatile cushion Everyday training and high-mileage comfort ASICS Novablast 5 Speed Demon FF BLAST+ ECO foam for a bouncy ride Up-tempo efforts and energetic daily runs Hoka Bondi 9 Comfort King Maximum stack height for ultimate protection Recovery runs and runners prioritizing plushness Informative Health Information & Wellbeing Trends The right shoes are just one piece of the wellness puzzle. A holistic approach is key to long term running health. A simple strategy is rotating between two pairs of shoes, allowing the midsole foam to decompress and extend the life of both pairs. Comparison Review: Traditional Training vs. Heart Rate Zone Training A major trend in runner wellbeing is the shift towards data driven training. Traditional Training: Focuses on pace and distance (e.g., "run 5 miles at a 9-minute pace"). It's simple but can lead to overtraining. Heart Rate Zone Training: Uses a heart rate monitor to guide effort levels, ensuring easy days are truly easy and hard days are effective. This method promotes better recovery and reduces injury risk by preventing runners from pushing too hard too often. While it requires more equipment, zone training provides a more personalized and sustainable approach to improvement. Top Rated Running Socks Knowing When to Retire Your Shoes Most running shoes last between 300 and 500 miles . Pushing them further increases injury risk as the protective foam degrades. Watch for these signs: Visible Midsole Wrinkles: Deep creases in the foam indicate it has lost its cushioning. Worn Down Outsoles: When the rubber tread is worn to the midsole, grip and durability are gone. New Aches and Pains: If your feet or shins suddenly hurt after runs, your shoes are likely the cause. Building a Body Built for Pavement Your body is your best defense against the pounding of pavement. Cross-training (swimming, cycling) gives your joints a break, while consistent strength training for your core, hips, and legs builds a powerful support system. For a complete picture, consider exploring the best recovery tools for athletes . Answering Your Pavement Running Shoe Questions Let's clear up some final doubts so you can buy with confidence. Can I Use My Trail Running Shoes on Pavement? You can, but it's not recommended. Trail shoes have deep lugs designed for soft surfaces. On pavement, these lugs wear down quickly and can feel unstable. Road shoes have flatter, more durable rubber outsoles designed for the friction of asphalt. How Do I Know When It's Time to Replace My Shoes? The 300-500 mile rule is a good guideline, but also look for physical signs. Deep creases in the midsole foam or a worn smooth outsole are clear indicators. Most importantly, listen to your body. New, nagging aches are often a sign that your shoes are finished. What's the Deal with Zero-Drop Shoes for Concrete? Zero-drop shoes can promote a more natural running form but require a very slow transition. They place more demand on calves and Achilles tendons, and jumping into them too quickly on hard surfaces is a recipe for injury. They are best suited for experienced runners already adapted to a minimalist style. References Agresta, C., Giacomazzi, C., Harrast, M., & Zendler, J. (2023). The effects of running surface on running kinetics. Scientific Reports , 13 (1), 2235. https://doi.org/10.1038/s41598-023-28941-5 Jenkins, D. W., & Cauthon, D. J. (2011). Barefoot running claims and controversies: a review of the literature. Journal of the American Podiatric Medical Association , 101 (3), 231–246. https://doi.org/10.7547/1010231 Here at Flourish-Everyday , our goal is to help you find the perfect gear for your fitness journey. We have expert reviews and guides to help you lock in the ideal pair for your runs. Discover Your Next Pair of Running Shoes at Flourish-Everyday
- Hydration Tips for Athletes: Quick Tips for Peak Performance
If you're thirsty, drink. Common sense, right? How important is it, and does it really matter to optimal performance? Fluid balance is more than just quenching thirst; it's the bedrock of athletic performance, influencing everything from muscle function to cognitive focus. For dedicated athletes, a mere 2% loss of body weight through sweat can significantly impair endurance and reduce power output. This guide moves beyond generic advice like "drink eight glasses a day" and offers a collection of actionable, science-backed hydration tips for athletes designed for peak performance. Best Workout Water Bottles We will explore personalized strategies that empower you to calculate your specific sweat rate, master electrolyte balance, and create a dynamic hydration plan that fuels your goals. The difference between a personal best and a subpar performance often comes down to these crucial details. This comprehensive listicle provides the tools you need to build an elite hydration strategy, ensuring you are prepared to perform at your absolute best. Article Index: Pre-Exercise Hydration Protocol : Starting your workout optimally hydrated. Real-Time Sweat Rate Assessment : Personalizing your fluid intake. Sodium and Electrolyte Supplementation : Why water isn't always enough. Carbohydrate-Electrolyte Drinks for Performance : Fueling and hydrating simultaneously. Individualized Hydration Schedules : Creating a plan unique to you. Hyperhydration and Fluid Loading Techniques : Advanced strategies for extreme conditions. Post-Exercise Rehydration Recovery Protocol : Maximizing recovery for your next session. Temperature-Adjusted Hydration Strategies : Adapting to your environment. Gut Training and Tolerance Development : Training your stomach to handle more. Hydration Monitoring Through Urine Color and Body Weight : Simple, daily checks for success. Men's and Women's Top Athletic Shoe Reviews Comparison of Wellbeing Trends: Hydration vs. Other Methods References 1. Pre-Exercise Hydration Protocol Optimal performance begins long before the first rep or stride. A structured pre-exercise hydration protocol is a foundational strategy to ensure you start training sessions in a state of euhydration (optimal body water content). This isn't about chugging water right before you start; it's a timed approach designed to maximize fluid absorption while giving your body time to excrete any excess. This method, endorsed by leading organizations like the American College of Sports Medicine (ACSM), prevents the performance crushing effects of starting an activity already dehydrated. It also helps avoid the discomfort of drinking too much too close to your start time. How to Implement a Pre-Hydration Strategy The goal is to gradually increase your fluid levels. A proven approach involves a two stage process: 2 to 4 Hours Before Exercise: Consume approximately 5-10 milliliters of fluid per kilogram of body weight (or about 400-600 mL for most athletes). This gives your kidneys time to process the fluids. 10 to 20 Minutes Before Exercise: Drink another 200-300 mL (about 7-10 oz). This final top off ensures your fluid stores are full as you begin. Practical Application and Key Tips This protocol is highly adaptable. For intense workouts lasting over an hour, consider a beverage containing sodium and carbohydrates. The sodium helps your body retain fluid, while carbohydrates top off muscle glycogen stores. Your hydration strategy should work with your overall fueling plan. Understanding how fluids and nutrients interact is key to unlocking peak performance. For a deeper dive, explore this guide to pre- and post-workout nutrition for maximum results . 2. Real-Time Sweat Rate Assessment Generic hydration advice fails to account for one crucial variable: you. A real time sweat rate assessment is a personalized method for determining how much fluid you lose during exercise. It moves beyond one-size-fits-all recommendations, allowing you to create a hydration strategy tailored to your unique physiology and training conditions. This evidence based approach involves a simple before and after weigh in to calculate your fluid loss per hour. It provides invaluable data, transforming your hydration plan from guesswork into a precise science. For athletes, understanding this personal metric is one of the most effective hydration tips for improving endurance. How to Implement a Sweat Rate Assessment The goal is to precisely measure your body weight change over a set period of exercise, typically one hour. The Calculation: The formula is: (Pre-exercise weight - Post exercise weight) + Fluid consumed - Urine output = Total sweat loss. To find your hourly rate, divide this total by the exercise duration in hours. Each kilogram of weight lost equals about one liter of fluid. The Process: Weigh yourself nude right before your workout. Perform a one hour session at your typical training intensity. Track every milliliter of fluid you drink. Afterward, towel off completely and weigh yourself nude again on the same scale. Practical Application and Key Tips This method is essential for any serious athlete. A marathon runner might discover they lose 800 mL/hour, while a CrossFit athlete might lose over 1.5 L/hour during an intense session. For the most accurate data, perform this test on three separate occasions under similar conditions and average the results. Re-test every 2-3 months or when your fitness or environment changes. Your sweat rate provides the foundation for your in activity hydration plan. To explore the relationship between sweat and training, read more about optimal workout duration for maximum gains . 24oz Steel Water Bottle 3. Sodium and Electrolyte Supplementation While water is the cornerstone of hydration, for sustained athletic efforts, it's often not enough. Strategic electrolyte supplementation, particularly with sodium, is a critical component of advanced hydration tips for athletes. This approach maintains the delicate balance of minerals essential for nerve signaling, muscle contraction, and fluid retention. When athletes sweat, they lose not just water but also crucial electrolytes like sodium, potassium, and magnesium. Replenishing with plain water alone can dilute blood sodium, a dangerous condition known as hyponatremia. Adding electrolytes ensures your body can absorb and hold onto the fluid you consume. How to Implement an Electrolyte Strategy The key is to match your intake with your sweat losses, especially during workouts over 60-90 minutes or in hot conditions. During Exercise: Aim to consume 300-600 mg of sodium per hour. This often means drinking a sports beverage containing 500-700 mg of sodium per liter. Start Early: Begin sipping your electrolyte drink 30-45 minutes into your activity to stay ahead of losses. Choose a Blended Solution: For endurance events, a beverage with a 4-8% carbohydrate solution alongside sodium is ideal. Practical Application and Key Tips An ultramarathoner might use a precise electrolyte powder mix, while a CrossFit athlete may rely on a ready to drink option. Trail runners often carry lightweight electrolyte tablets. To fully grasp their importance, it's beneficial to learn about understanding what electrolytes do for the body. Always test your electrolyte strategy during training to avoid gastrointestinal distress on race day. For workouts under an hour, plain water is typically sufficient. 4. Carbohydrate-Electrolyte Drinks for Performance For endurance activities lasting over an hour, hydration and fueling are deeply intertwined. Carbohydrate electrolyte drinks are engineered to solve two problems at once: they replace fluids and electrolytes while supplying working muscles with energy. This dual action approach prevents both dehydration and glycogen depletion. This strategy, backed by decades of research, is the cornerstone of modern endurance nutrition. By combining fluids, electrolytes, and carbohydrates, these beverages optimize absorption rates in the gut, delivering fuel and hydration more efficiently than water alone. How to Implement a Carb-Electrolyte Strategy The goal is to provide a consistent stream of fuel and fluids. Timing Your Intake: For efforts over 60 minutes, begin sipping your drink around the 30-minute mark. Continue consuming 150-250 mL every 15-20 minutes. Carbohydrate Concentration: Aim for a 4-8% carbohydrate concentration (4-8 grams of carbs per 100 mL of fluid). This range is ideal for rapid absorption without causing stomach issues. Practical Application and Key Tips This approach is highly effective for marathon runners, triathletes, and CrossFit competitors. For exercise lasting over 2.5 hours, aim for a total carbohydrate intake of 60-90 grams per hour. To achieve this, use products with multiple carbohydrate sources (e.g., glucose and fructose) to increase your body's maximum absorption rate. Integrating this strategy is crucial for endurance events. To build a comprehensive plan, explore this guide to developing your marathon training nutrition plan . 5. Individualized Hydration Schedules Moving beyond generic advice is a hallmark of an advanced athletic strategy. An individualized hydration schedule is a personalized fluid intake plan based on your unique physiology, including sweat rate, body weight, exercise intensity, and environmental conditions. It ditches one-size-fits-all rules for a data driven approach. This method, a cornerstone of coaching guidelines from organizations like USA Track & Field, acknowledges that every athlete's fluid needs are different. Customizing your plan prevents both under hydration and over hydration. How to Implement an Individualized Schedule The core of this strategy is understanding your personal sweat rate. Once you have a baseline, you can create a structured plan. Calculate Your Sweat Rate: As described in section 2, weigh yourself before and after a one-hour training session to determine your fluid loss. For example, losing 1.5 lbs is equivalent to about 24 oz (or ~700 mL). Create a Timed Plan: Based on your sweat rate, devise a drinking schedule. The goal is to replace 75-90% of fluid losses during exercise. If your sweat rate is 800 mL/hour, a plan to drink 200 mL every 15 minutes would be a good start. Practical Application and Key Tips This approach requires some initial effort but pays significant dividends. A CrossFit athlete might discover their sweat rate is 30% higher on high humidity days and can proactively increase intake. Keep a log of conditions, intensity, intake, and how you felt to refine your plan over time. For more on how elite athletes manage this, explore resources from Running USA . 6. Hyperhydration and Fluid Loading Techniques For athletes facing extreme endurance challenges or intense heat, standard protocols may not be enough. Hyperhydration, or fluid loading, is an advanced strategy to deliberately increase total body water content before an event. This creates a fluid reservoir, delaying the onset of dehydration. This technique is a proactive defense, particularly valuable when fluid intake opportunities are limited or sweat rates are high. It works by expanding plasma volume, which enhances cardiovascular function and improves the body's ability to regulate core temperature. How to Implement a Hyperhydration Strategy Proper execution is crucial to gain benefits without negative side effects. 2 to 3 Hours Before the Event: Drink 400-600 mL of a beverage containing a small amount of carbohydrates and sodium. Optional Glycerol Protocol: For elite protocols, some athletes add glycerol (1.0-1.2 g/kg of body weight) to their fluid. Glycerol helps the body retain more water, but it must be tested extensively in training due to potential side effects. Practical Application and Key Tips This is not a daily strategy; it is reserved for the most demanding conditions, such as desert ultramarathons or multi day competitions in summer heat. Always test your hyper hydration strategy multiple times during training sessions that mimic race day intensity and conditions. 7. Post Exercise Rehydration Recovery Protocol Recovery is a race against time to restore what was lost. A post exercise rehydration protocol is a systematic approach to replenish fluids and electrolytes, ensuring you’re prepared for the next session. This is an aggressive strategy to fully rehydrate the body, especially when recovery time is short. This method, supported by research from the International Society of Sports Nutrition, is critical for athletes with multiple daily sessions. It aims to replace 150% of the fluid lost during exercise to account for ongoing urinary losses. How to Implement a Rehydration Recovery Strategy The goal is rapid and complete fluid restoration. Calculate Your Needs: Weigh yourself before and after exercise to determine fluid loss. For every kilogram (2.2 lbs) of body weight lost, consume 1.5 liters (50 oz) of fluid. Time Your Intake: Begin rehydrating within 30-60 minutes post-exercise. Spread your total intake over the next 4 to 6 hours to maximize absorption. Practical Application and Key Tips This protocol is essential for athletes in demanding scenarios. A CrossFit competitor might drink a 1.5-liter electrolyte beverage over several hours after losing 1kg during a workout. Your rehydration beverage should contain sodium (approx. 300-500mg per 500ml) to help the body retain fluid and stimulate thirst. Pairing fluids with a meal containing carbohydrates and protein can enhance recovery. For more on optimizing this, review this guide to mastering post-exercise nutrition and hydration. 8. Temperature Adjusted Hydration Strategies Your body’s hydration needs fluctuate dramatically with the environment. A temperature adjusted hydration strategy involves proactively modifying your fluid and electrolyte intake based on external conditions like heat, cold, humidity, and altitude. This approach is critical for athletes who train or compete in diverse climates. This strategy, supported by research from the National Athletic Trainers' Association (NATA), moves beyond a one-size-fits-all plan. It acknowledges that environmental stress directly impacts sweat rate and fluid loss. How to Implement Environment-Specific Hydration The core principle is to anticipate the environment's impact and adjust accordingly. Heat & Humidity: Increase fluid intake by 15-20% and prioritize beverages with higher sodium content. Altitude: Increase daily fluid intake by 1.0-1.5 liters to compensate for increased respiratory fluid loss. Cold: Thirst response is often blunted. It is crucial to drink on a schedule, not by thirst. Using warm or room-temperature fluids can help. Practical Application and Key Tips This strategy is non-negotiable for athletes pushing their limits. For hot conditions, use the Wet Bulb Globe Temperature (WBGT) if available, as it provides a more accurate measure of heat stress. Testing these adjustments during training is essential to avoid GI distress on race day. 9. Gut Training and Tolerance Development The most sophisticated hydration plan is useless if your gut can't handle it. Gut training is the systematic process of "teaching" your digestive system to absorb more fluids and nutrients during exercise, minimizing the risk of cramps, bloating, and other gastrointestinal (GI) distress. This concept treats the gut like a muscle: it adapts to the stress you place upon it. By progressively increasing the volume and concentration of fluids and fuel during training, you enhance its ability to process them efficiently. How to Implement a Gut Training Strategy This requires a patient, structured approach over a 6-8 week training block. Start Conservatively: Begin with a fluid and fuel intake you know you can tolerate (e.g., 400-500 mL of fluid and 30g of carbs per hour). Increase Incrementally: Each week, increase your intake by a small amount, roughly 5-10%. Practice Specificity: Use long workouts to simulate race day conditions exactly, consuming the same drinks and gels you plan to use. Practical Application and Key Tips This strategy is vital for endurance athletes. Always train with the combined nutrition strategy you plan to use on race day. The interaction between sugars and fluid volumes is what often triggers GI issues. Your gut's overall health is the foundation of this training. Supporting it by understanding what prebiotics and probiotics are for gut health can provide an advantage. 10. Hydration Monitoring Through Urine Color and Body Weight Some of the most effective tools for assessing hydration are a scale and a toilet. Monitoring urine color and daily body weight are simple, evidence backed methods promoted by the National Athletic Trainers' Association (NATA) for assessing your hydration status in real time. This low-tech approach provides immediate, actionable feedback. These daily checks empower you to make informed adjustments to your fluid intake, preventing dehydration before it compromises training. How to Implement Daily Hydration Monitoring The goal is to establish a consistent baseline and recognize deviations. The Urine Color Test: Aim for a pale yellow or light lemonade color (levels 1-3 on a 7-point chart). Dark apple juice or brown colors signal significant dehydration. The Body Weight Test: Weigh yourself at the same time each morning after urinating to establish a baseline. A drop of more than 2% after a workout indicates dehydration. For every kilogram of weight lost, replenish with 1.25-1.5 liters of fluid. Practical Application and Key Tips Integrating these checks into your daily routine makes hydration management intuitive. Keep a log of your morning weight and urine color alongside training notes to reveal patterns. Be aware that factors like B vitamins can skew urine color results. Consistency is the most crucial part of this monitoring strategy. For more on this, the CDC offers guidelines on heat illness prevention using these methods. Top Ankle Socks 11. Men's and Women's Top Athletic Shoe Reviews While hydration is critical, proper footwear is foundational to performance and injury prevention. A great shoe provides support, cushioning, and responsiveness tailored to your sport and foot mechanics. Top Athletic Shoes for Men Brooks Ghost 15 (Running): Known for its balanced cushioning and smooth ride, making it a reliable daily trainer for neutral runners. Nike Metcon 9 (Cross-Training): Offers a stable base for lifting, flexibility for agility drills, and durability for rope climbs, making it ideal for CrossFit and HIIT. Hoka Clifton 9 (Max Cushion Running): Provides exceptional shock absorption for long-distance runners seeking to reduce impact on their joints. Top Athletic Shoes for Women ASICS GEL-Kayano 30 (Running): A top choice for runners needing stability to counter overpronation, featuring excellent support and adaptive cushioning. New Balance Fresh Foam X 880v13 (Running): A versatile workhorse for neutral runners, balancing softness with responsiveness for various distances. On Cloud X 3 (Cross-Training): A lightweight and agile shoe that excels in mixed workouts, from short runs to gym-based circuit training. Choosing the right shoe is highly individual. It depends on foot type (neutral, overpronation, supination), arch height, and the primary activity. Visiting a specialty running store for a gait analysis is recommended to find the best fit. 12. Comparison of Wellbeing Trends: Hydration vs. Other Methods In the pursuit of peak performance, athletes often explore various wellbeing trends. While many offer benefits, proper hydration remains an important biological necessity. Here's how it compares to other popular methods. Trend/Method Core Principle Primary Benefit for Athletes Scientific Support Complementarity with Hydration Proper Hydration Maintaining optimal fluid and electrolyte balance in the body. Sustains performance, regulates temperature, aids nutrient transport, prevents cramping. Overwhelmingly strong Foundational; all other methods are less effective in a dehydrated state. Cryotherapy Exposing the body to extremely cold temperatures for short periods. Reduces inflammation and muscle soreness, speeds up recovery. Mixed but growing High; proper rehydration post-workout should precede cryotherapy to support recovery. Mindfulness/Meditation Training the mind to improve focus and reduce stress. Enhances mental resilience, focus, and reduces performance anxiety. Strong High; hydration supports cognitive function, which is the goal of mindfulness training. Infrared Saunas Using infrared light to heat the body directly. Promotes relaxation, may improve circulation, and aid in detoxification through sweat. Moderate Caution needed. Causes significant fluid loss. Aggressive rehydration post-sauna is critical. Plant Based Diets Consuming foods primarily from plants. Can reduce inflammation, improve cardiovascular health, and support lean body mass. Strong High; many plant-based foods have high water content, aiding hydration efforts. Conclusion: While trends like cryotherapy and mindfulness offer significant advantages, they are performance optimizers. Hydration is a performance essential. An athlete can perform well without cryotherapy, but performance will inevitably crash without adequate hydration. The most effective approach integrates a solid, science backed hydration plan as the foundation upon which other wellbeing practices are built. Your Blueprint for Hydration Excellence We've covered ten key strategies for transforming your approach to fluid intake. The core principle is personalization . Your body is not a static machine. True mastery lies in becoming a student of your own physiology by using techniques like sweat rate assessment and consistent monitoring. The most significant takeaway is to shift from a reactive to a proactive mindset. Elite performance is the result of deliberate and informed preparation. From Knowledge to Action: Your Next Steps Conduct a Sweat Rate Test: Pick a typical training session and perform the simple pre and post workout weigh-in. This is a powerful personalization tool. Log Your Fluids: For three days, track what and when you drink. Compare this log to how you feel during workouts. Experiment with Electrolytes: If you're a heavy sweater, introduce an electrolyte supplement during a long session. Note the difference in your energy levels. By adopting this methodical approach, you build a robust, adaptable strategy. These hydration tips for athletes are designed to empower you with control over a critical performance variable. You are the architect of your own athletic potential. Embrace this role and build a new standard of hydration excellence. 13. References American College of Sports Medicine. (2007). ACSM Position Stand: Exercise and Fluid Replacement . Medicine & Science in Sports & Exercise, 39(2), 377-390. Casa, D. J., Armstrong, L. E., Hillman, S. K., et al. (2000). National Athletic Trainers' Association Position Statement: Fluid Replacement for Athletes . Journal of Athletic Training, 35(2), 212–224. Centers for Disease Control and Prevention (CDC). (2017). Criteria for a Recommended Standard: Occupational Exposure to Heat and Hot Environments . DHHS (NIOSH) Publication No. 2016-106. Gatorade Sports Science Institute (GSSI). (2004). Hydration and Rehydration for the Athlete . SSE #95. Jeukendrup, A. E. (2011). Nutrition for endurance sports: marathon, triathlon, and road cycling . Journal of Sports Sciences, 29(sup1), S91-S99. Ready to simplify your electrolyte and recovery strategy? The principles of precise hydration are built into every product we display at Flourish-Everyday , offering clean, effective, and science-backed formulas designed for athletes who demand the best. Explore our website for hydration, gear, and wellness supplements to support your new personalized plan at Flourish-Everyday .
- What Is Heel-To-Toe Drop and Why It Matters for Your Run
Every time I read about athletic shoes, they talk about Heel-To-Toe Drop. I had no idea what they were talking about and didn't think it really mattered as long as I got a decent shoe. I suppose I reached a point a few years ago where I had better learn about the importance and relevance of this term. I am sure glad I did. The Heel-To-Toe Drop is extremely important in picking the right shoe for the right job and preventing injury. Heel-to-toe drop, sometimes called "shoe offset," is the height difference between your shoe's heel and its forefoot, measured in millimeters (mm). This single number, typically between 0mm and 14mm, significantly impacts your body's mechanics with every step. Understanding it is critical for everyone from marathon runners to CrossFitters. Index Unpacking The Basics Of Heel To Toe Drop How Heel Drop Changes the Way You Move Decoding the Different Heel Drop Categories Matching the Right Drop to Your Workout The Truth About Lower Drops and Injury Risk Our Top Shoe Picks for Men and Women Still Have Questions About Heel Drop? References Unpacking The Basics Of Heel To Toe Drop Think of heel drop as a small ramp built into your shoe. A higher drop means a steeper ramp, while a zero-drop shoe is completely flat. This design dictates how your foot strikes the ground and how impact travels up your body. The focus on drop grew during the 1970s running boom, as companies added heel cushioning for runners who landed on their heels. However, what's printed on the box isn't always reality. Independent lab tests have found inconsistencies, with some shoes off by over 50% from the brand's claim. You can see details in this study on shoe measurement discrepancies at RunRepeat.com . For example, a shoe listed at 5mm might actually be 8mm, a 60% difference, while another might measure 2.7mm, which is 46% less. Heel Drop Explained at a Glance Concept Brief Explanation Heel-to-Toe Drop The height difference (in mm) between the heel and the forefoot of a shoe. Zero Drop (0mm) A completely flat shoe, promoting a midfoot or forefoot strike. Low Drop (1-4mm) A minimalist feel that encourages a more natural gait. Mid Drop (5-8mm) A versatile option that balances cushioning and natural foot movement. High Drop (9mm+) Traditional design that offers significant heel cushioning, ideal for heel strikers. Why This Measurement Is Important So, what is heel-to-toe drop in real world terms? It’s a feature that shapes how a shoe performs and whether it's right for your body. Understanding your shoe's drop helps you: Manage Injury Risk: The right drop can help take pressure off sensitive spots like your knees, shins, or Achilles tendon. Optimize Performance: It can make you more stable during a heavy lift or encourage a more efficient foot strike when running. Make Smarter Purchases: Understanding drop lets you choose footwear based on functional design. Heel drop isn't just a number, it's a tool that can either work with your body's natural movement patterns or against them. Getting it right is a foundational step toward better performance and long term joint health. This guide will explain how drop affects your movement, break down the different categories, and help you match the right shoe to your workout. How Heel Drop Changes the Way You Move Think of your body as a suspension system. Your feet, ankles, knees, and hips work together to absorb shock. The heel-to-toe drop of your shoe is like an adjustment knob, changing how impact forces are managed. This measurement directly affects your foot strike , how your foot hits the ground. A change in foot strike alters joint angles and shifts which muscles do the most work. Finding a shoe that works with your body is key. The Biomechanics of High and Low Drops Shoes with a higher drop ( 8-12mm ) create a noticeable ramp. This design guides your foot into a heel strike . The built up heel takes some of the initial jolt, but that force travels up the kinetic chain, putting more load on the knees and hips. A high drop can ease the burden on your lower legs, specifically the Achilles tendon and calf muscles. Conversely, a lower drop shoe ( 0-4mm ) provides a flatter platform, encouraging a midfoot or forefoot landing. In this case, your calf muscles and Achilles tendon work more like natural springs to absorb impact. The core principle is simple: lower drops load the ankle joint and lower leg structures more, while higher drops shift that load further up to the knee and hip. Neither is inherently "better", it's about matching the shoe's mechanics to your body's needs. Biomechanics research supports this. Studies have shown that switching from a 12mm to a 4mm drop shoe can significantly alter foot strike patterns. You can read more about these biomechanical findings to see the data for yourself. How Heel Drop Affects Different Activities This concept extends beyond running and has implications for all types of training. For Running: A heel striker prone to Achilles pain might prefer a high drop shoe. A midfoot striker might prefer a lower drop to engage lower leg muscles. For Weightlifting: For squats or deadlifts, stability is non-negotiable. A zero or low drop shoe provides a flat, stable base for power generation. A high drop would tilt you forward, compromising form and safety. For Cross-Training: For workouts mixing running, jumping, and lifting, a mid range drop ( 5-8mm ) is often ideal. It offers enough stability for lifting without feeling awkward for short runs. Ultimately, understanding these shifts in biomechanics allows you to pick a shoe that aligns with your activities and long term health. Decoding the Different Heel Drop Categories Not all shoe drops are created equal. Figuring out the different categories is the first step in matching shoes to your fitness goals. Let's break down the four main categories. Each offers a unique feel and encourages different movement patterns. Heel Drop Categories and Their Ideal Use Cases Drop Range (mm) Category Best For Potential Pros Potential Cons 0mm Zero Drop Powerlifting, heavy squats/deadlifts, minimalist running Maximum stability, promotes natural foot mechanics High strain on calves/Achilles; requires a long adaptation period 1-4mm Low Drop CrossFit, functional fitness, runners transitioning to minimalist Good stability with some versatility for dynamic movement Still demanding on lower legs; not ideal for heavy heel strikers 5-8mm Mid Drop Daily running, general gym training, recreational athletes The "do-it-all" option; balances cushion and ground feel Not specialized enough for elite lifting or marathon running 9mm+ High Drop Heel-striking runners, individuals with Achilles/calf issues Maximum heel cushioning and shock absorption Can promote over-striding; less stable for lateral moves Picking the right drop isn't about finding the "best" one, but about finding the best one for you . Bluebird Botanicals Zero Drop (0mm) Zero drop shoes are completely flat, putting your foot in a natural, neutral position. Who It's For: A favorite among powerlifters and minimalist runners aiming for a midfoot or forefoot strike. Pros: Delivers incredible stability and can help build strength in your feet and lower legs. Cons: Puts significant strain on the calves and Achilles tendon, requiring a long, careful transition period. If you're curious about this style, our guide on Grand Attack Barefoot Shoes dives deeper into minimalist footwear. Low Drop (1-4mm) Low drop shoes offer a slight heel lift while keeping you close to the ground, providing more versatility than a true zero drop shoe. Who It's For: Perfect for CrossFit athletes and runners transitioning toward minimalist shoes. Pros: Stable enough for lifting, with cushion for dynamic movements. They encourage a midfoot strike without being as extreme as a 0mm shoe. Cons: Can still feel unforgiving for dedicated heel strikers. A transition period is still needed. Mid Drop (5-8mm) This is the do-it-all category. Mid-drop shoes balance cushioning and responsiveness, making them popular for a wide range of activities. Think of a mid drop shoe as the versatile hybrid. It’s stable enough for most gym work yet cushioned enough for daily runs, making it an excellent starting point for those unsure of their ideal drop. Who It's For: Daily runners, recreational athletes, and those who mix running with general training. Pros: Extremely versatile, working well for different foot-strike patterns. Cons: A jack-of-all-trades, master of none. They may lack the specialized features for elite lifting or marathoning. High Drop (9mm+) High-drop shoes are the traditional running shoe, featuring a significant ramp for maximum heel cushioning. Who It's For: Heel striking runners and anyone needing extra cushioning to reduce load on their Achilles and calves. Pros: Excellent shock absorption for the heel, providing relief for those with tight calves. Cons: The steep angle can encourage over striding and shift stress to the knees and hips. Less stable for lateral movements. Matching the Right Drop to Your Workout Applying your knowledge of heel-to-toe drop is where you'll see the benefits. The ideal drop is a personal choice based on your workouts, body mechanics, and injury history. For the Dedicated Runner For runners, the right heel drop is crucial. Your choice should be guided by your running style and any persistent aches. If you deal with sensitive knees or hip pain, a higher-drop shoe ( 9mm+ ) might help by absorbing impact at the heel. Conversely, if you're battling Achilles tendonitis or calf tightness, a high drop can reduce strain on your lower legs. For those transitioning to a mid-foot or forefoot strike, a lower-drop shoe ( 1-4mm ) can be a useful tool, but it requires strength and a gradual transition. For most runners, a versatile mid range drop of 5-8mm offers a good balance. For a deeper look, check our guide on how to choose running shoes for your specific needs . For the CrossFit Athlete CrossFit workouts are varied, and your shoes need to be adaptable. For CrossFitters, stability is everything. A low or zero-drop shoe is your go-to on heavy lifting days, giving you a flat, solid platform to generate maximum power for squats, deadlifts, and Olympic lifts. Lifting in a high-drop shoe can pitch you forward, ruining your form and increasing injury risk. When the workout includes box jumps or short sprints, a drop in the 4-6mm range can provide enough cushion without sacrificing stability. Heavy Lifting Days: Stick to a 0-4mm drop for optimal stability. Mixed-Modal WODs: A 4-6mm drop offers a great mix of support and flexibility. Running-Heavy WODs: Consider swapping to a dedicated running shoe with a mid-range drop. For the General Gym Goer If your routine includes a mix of cardio, strength training, and fitness classes, you need a versatile shoe. A mid range drop of 5-8mm is often the perfect fit. This provides enough cushioning for treadmill runs and enough stability for moderate lifting. It's a reliable foundation for a varied routine, saving you from changing shoes for every exercise. The Truth About Lower Drops and Injury Risk Many runners are curious about lower-drop shoes but worry about injury risk. The problem is rarely the shoe itself, but rather a too rapid transition . Switching from a high-drop to a low-drop shoe shifts the workload from your knees and hips down to your calves, Achilles tendons, and feet. A quick change can overload these tissues before they adapt. The idea that lower-drop shoes are inherently dangerous isn't supported by science. A 2016 randomized controlled trial of 553 runners found that shoes with reduced drops (6mm and 0mm) did not cause a higher overall injury rate compared to traditional 10mm drop shoes over six months. You can read the full research about these injury rate findings for a deeper dive. Making a Safe and Successful Transition The key to trying a lower heel-to-toe drop is a gradual, patient approach. Give your lower leg muscles time to build the required strength. The rule of thumb for transitioning is simple: listen to your body, not the calendar. If you feel any sharp or persistent pain, especially in your calves or Achilles, back off immediately and give yourself more time. Slowly work the new, lower-drop shoes into your routine. Start by wearing them for short periods, like your warm-up, and gradually increase the duration over several weeks. Your Action Plan for Lower Drops Here’s a practical plan for a safe transition. Adjust it based on how your body feels. Weeks 1-2: Wear new lower-drop shoes for your warm-up and cool down only ( 10-15 minutes per workout). Use your old shoes for the main part of your training. Weeks 3-4: Use lower-drop shoes for one short, easy run or workout per week. Keep volume low, about 20-25% of your normal distance for that run. Weeks 5-8 (and beyond): If your body feels good, slowly increase duration and frequency. Add a second short workout or lengthen the first one. Continue this gradual increase. To help your body adapt, you must focus on strengthening the right areas. Essential Exercises: Calf Raises: Build calf strength. Eccentric Heel Drops: Strengthen the Achilles tendon. Foot Doming: Build intrinsic foot muscles. A smart transition combined with targeted exercises is the best way to explore what heel-to-toe drop works for you without getting sidelined. Our Top Shoe Picks for Men and Women Now that you understand heel-to-toe drop, let's find your perfect pair. Here are my favorite recommendations, sorted by drop, with picks for both men and women. Top Zero-Drop (0mm) Picks Zero-drop shoes provide a natural, grounded feel, great for heavy lifting and minimalist running. Remember to allow for a gradual break-in period. For Men: Altra Solstice XT 2 This shoe is a beast in the gym. The Solstice XT 2 combines Altra's FootShape toe box for natural toe splay with a tough cage for lateral support, perfect for workouts mixing heavy lifts with agile movements. Best For: CrossFit, functional fitness, and gym sessions. Pros: Excellent stability and a comfortable fit. Cons: Minimal cushioning isn't ideal for longer runs. For Women: Xero Shoes Prio For a true connection to the ground, the Prio is a great choice. Its minimalist design and flexible 5.5mm sole let your foot move naturally while offering just enough protection. Best For: Minimalist running, gym training, and casual wear. Pros: Incredibly lightweight and flexible, helping to build foot strength. Cons: Requires a slow transition to avoid calf strain. Top Low to Mid Drop (4-8mm) Picks The 4-8mm range offers a balance of stability for lifting and cushioning for dynamic work, making these shoes excellent all rounders. For Men: Nike Metcon 9 A legend in the CrossFit community, the Metcon 9 delivers a solid heel for stability and a flexible forefoot. With a 4mm drop, it’s built for heavy squats, box jumps, and more. Best For: CrossFit and high intensity interval training (HIIT). Pros: Unbeatable durability and stability. Cons: A bit stiff for running longer distances. For Women: Brooks Ghost 15 A beloved daily trainer, the Ghost 15 has an 8mm drop and is known for its soft, balanced cushioning, providing a smooth ride for a wide range of runners. Best For: Daily running, long walks, and general fitness. Pros: Supremely comfortable with reliable, plush cushioning. Cons: Not built for heavy lifting; lacks stability. Top High Drop (9mm+) Picks High-drop shoes maximize heel cushioning, making them a go-to for heel strikers or anyone with tight calves or Achilles pain. A higher drop can significantly reduce the strain on the lower leg by absorbing more impact at the heel. This makes it a popular choice for runners seeking maximum shock absorption on long road runs. For Men: ASICS GEL-Kayano 30 With a 10mm drop, the GEL-Kayano is an icon of stability. It offers incredible support and plush cushioning, making it ideal for runners who overpronate or need extra shock absorption. Best For: Long distance running and recovery runs. Pros: Top tier stability and a luxurious, cushioned feel. Cons: Can feel a bit bulky for faster paced running. Ankle Socks Still Have Questions About Heel Drop? Let's tackle a few common questions about heel-to-toe drop to help you choose your next pair of shoes with confidence. How Can I Find My Current Shoe's Drop? The quickest way is to check the manufacturer's website. Look for the technical specs on your shoe's product page, where it's usually listed as "drop" or "offset." While independent tests sometimes show discrepancies, the official spec is the best starting point. Is It Okay to Use the Same Shoes for Running and Lifting? You can, but it’s not ideal if you're serious about performance and injury prevention. Heavy lifting requires a stable, flat base, making a low-drop shoe (0-4mm) the gold standard. For running, your ideal drop depends on your stride and comfort. Most athletes benefit from owning separate pairs for each activity. A big mistake I see in the gym is people trying to squat heavy in high-drop running shoes. That elevated heel can easily pitch your weight forward, messing up your form and putting you at a greater risk for injury. It's much safer to lift in a flatter shoe, or even just your socks! I Have Calf Pain, Should I Stay Away from Zero Drop Shoes? Yes, it's wise to be cautious. If you have tight calves or Achilles tendonitis, a zero-drop shoe can increase strain on those areas. A shoe with a higher drop (8mm or more) can often provide relief by reducing the load on the calf and Achilles. If you are set on switching to a lower drop, a very slow transition is crucial, paired with specific strengthening exercises for your feet and calves to build resilience. References Malisoux, L., Gette, P., Urhausen, A., & Theisen, D. (2016). Influence of the Heel-to-Toe Drop of Standard Cushioned Running Shoes on Injury Risk in Leisure-Time Runners: A Randomized Controlled Trial With 6-Month Follow-up. The American Journal of Sports Medicine , 44(11), 2933-2940. https://doi.org/10.1177/0363546516654690 Matias, A. B., & Taddei, U. T. (2022). The influence of minimalist and maximalist shoes on running biomechanics: a systematic review. Journal of Foot and Ankle Research , 15(1), 11. https://doi.org/10.1186/s13047-022-00518-3 Richert, J., Heaslet, M. W., & Tucker, J. (2022). The Effect of Heel-Toe Drop on Running Biomechanics: A Review of the Literature. International Journal of Exercise Science , 15(6), 1431–1443. Retrieved from https://pmc.ncbi.nlm.nih.gov/articles/PMC9749964/ Here at Flourish-Everyday , our goal is to help you find the perfect gear for your fitness journey. Check out our expert reviews and health guides to support a healthier, happier you. You can find your next pair at https://www.flourish-everyday.com .
- Finding the Best Shoes for Supination
Hi Runners, for many years I didn't pay attention to the basics of wearing the right shoe for my workouts. Shoes were shoes. My first proper workout shoes were running shoes. What a difference they made. From that point on, buying the correct workout shoes is my first priority when it comes to athletic heath. The best shoes for supination are almost always neutral running shoes that offer significant cushioning and flexibility. Models like the Brooks Ghost or HOKA Clifton are prime examples; they are engineered to absorb the shock that comes from the foot rolling outward. These features are essential for protecting joints and preventing common injuries. Table of Contents Understanding Supination and Why Shoes Matter Core Features of an Ideal Supination Shoe Top Athletic Shoe Reviews for Supination Health Information: Running vs. Cross-Training Shoes Comparison: The Role of Orthotics How to Fit and Test New Shoes Frequently Asked Questions References Understanding Supination and Why Your Shoes Matter If the outer edges of your old sneakers are significantly worn down, you likely have supination. Also known as underpronation, it's a gait pattern where your weight rolls onto the outside of your foot with each step. An ideal gait wears down the shoe sole evenly, but supination concentrates all the force on the outer edge, sending shockwaves up the body. The Impact of an Outward Roll When the foot rolls outward, it becomes a poor shock absorber. This concentrates impact on a small area, leading to potential problems in the ankles, shins, knees, and hips. Common issues tied to supination include: Plantar Fasciitis: Strain on the ligament connecting the heel to the toes. Shin Splints: Aching pain along the shinbone. Ankle Sprains: Increased instability from the outward roll. Stress Fractures: Tiny bone cracks from repetitive, focused impact. The right shoe provides the specific support your foot needs to function correctly and avoid injury. Why the Right Shoe Is a Game Changer Proper footwear acts as a mechanical correction for your gait. Affecting roughly 10% of the population , supination is a common issue for active people [1]. Shoes designed for this foot type, especially those with neutral platforms and ample cushioning, can significantly reduce injury risk by encouraging better alignment and absorbing shock. For more on how foot mechanics impact your whole body at Samurai Insoles , this resource offers valuable insights. This guide will detail what to look for in a shoe for supination. The Core Features of an Ideal Supination Shoe Finding the right shoe for supination means understanding key design features, not just brands. Each feature has a specific job: to counteract the foot's outward roll and absorb the resulting shock. Supination's primary issue is poor shock absorption, which places uneven stress on your joints. This can lead to a higher risk of nagging injuries. This effect makes finding a shoe with the right features essential for staying pain free. Let’s break down those features. Exceptional Cushioning for Shock Absorption For a supinator, cushioning is the top priority. Since the foot doesn't roll inward to naturally distribute impact, the shoe must perform this function. A thick, forgiving midsole acts as a suspension system, absorbing the force of each footstrike before it travels up the body. Look for materials like EVA foam or a brand's proprietary high rebound foam. A Flexible Design for Natural Motion A stiff shoe is detrimental for supinators. Supination already makes the foot more rigid, so you need a shoe that allows natural movement. Good forefoot flexibility is key, enabling a smooth roll through your stride. To test this, hold the shoe by the heel and press the toe against a surface; it should bend easily where the ball of your foot would be. The Importance of a Neutral Platform While "support" sounds good, the type of support is critical. Supinators almost always need neutral shoes , not stability or motion control models. Those categories are built to correct overpronation (inward roll). Using a stability shoe can worsen supination by pushing the foot even further onto its outer edge. A neutral shoe provides a balanced platform without incorrect "fixes." For more details, see this guide to running shoe stability . Supportive Heel Counters for Stability While the forefoot needs flexibility, the back of the shoe requires stability. A supportive heel counter, the firm cup cradling your heel, is critical. It locks your heel in place, preventing lateral wobble upon landing and promoting better alignment. Durable Outsoles for Longevity Supinators exert most pressure on the outer edge of their shoes, requiring a tough outsole. Look for high abrasion rubber , especially on the lateral (outer) side. This reinforcement ensures the shoe wears evenly and maintains its support for longer. Bluebird Botanicals Top Athletic Shoe Reviews for Supination Now, let's connect these features to real world shoe types that excel for supinators. This is a guide to what these features look like in action, helping you find a model that absorbs shock and promotes natural movement. For the Maximalist Cushioning Seeker If shock absorption is your main concern, a shoe with maximalist cushioning is your best bet. A model like the HOKA Clifton exemplifies this, packing ample soft foam between your foot and the ground. This directly addresses supination's biggest problem, poor shock absorption, by letting the shoe do the work. For the Balanced and Responsive Ride For those who prefer a more connected feel, a classic daily trainer like the Brooks Ghost offers a perfect middle ground. This shoe uses adaptive foam technology, providing cushioning where needed without feeling sluggish. For a supinator, this means excellent shock absorption, smooth heel-to-toe transitions, and solid neutral support. For Everyday Versatility and Comfort You often need a shoe that can handle a jog, errands, and a light gym session. A versatile, well cushioned shoe like the New Balance Fresh Foam 880 is ideal. It combines a plush feel with a durable, neutral foundation, offering the shock absorption a supinator needs for a run, plus the comfort and stability for all day wear. For Long Distance Durability For high mileage runners, durability is paramount. The ASICS GEL-Nimbus is a legendary choice, delivering plush cushioning and rugged construction. It uses gel pods and foam to absorb impact and features a reinforced outsole with high abrasion rubber on the outer edges, directly countering the wear pattern of a supinator. Health Information: Running vs. Cross-Training Shoes Choosing the right athletic shoe is crucial, especially if you supinate. A shoe for running and one for a gym class are designed for different movements. Using the wrong shoe can increase injury risk. Running shoes are specialists engineered for forward motion. They feature thick, cushioned midsoles and a design that promotes a smooth heel-to-toe stride. However, this design becomes a liability in a gym setting. The high, plush heels can cause instability during squats or lunges. The Needs of the Cross-Trainer Cross-training shoes are built for multi directional movement. They feature: A flatter, wider sole: Creates a stable platform for lifting and lateral movements. Less cushioning: A firmer feel keeps you grounded and stable. Durable uppers: Tougher materials withstand abrasive gym activities. For a supinator, the risk of an ankle sprain increases during lateral movements. A cross-trainer's stable base is designed to prevent this, whereas a running shoe's soft heel offers little protection. Matching Your Shoe to Your Workout Using the right shoe for the right activity is vital for injury prevention. Research shows supinators have a higher risk of ankle sprains during lateral movements in the wrong footwear [2]. One study noted a 13% prevalence of supinated feet in professional dancers, highlighting the need for proper support during agile movements [3]. The takeaway is simple: if you primarily run, get a neutral, cushioned running shoe. If you're mostly in the gym, a dedicated cross-training shoe provides necessary stability. For more, see our running vs. cross-training shoes comparison guide . Owala 32oz Comparison: The Role of Orthotics While the right shoe is your first line of defense, sometimes orthotics (shoe inserts) are needed. A good shoe is the foundation, but an orthotic can fine tune alignment. If you still experience pain with proper shoes, or if your supination is severe, an orthotic can provide personalized support that a shoe alone cannot. Understanding Your Orthotic Options There are two main types of inserts: Over-the-Counter (OTC) Inserts: Available at drugstores, they offer extra cushioning and basic arch support. Custom Orthotics: Prescribed by a podiatrist and molded to your foot, these correct more serious biomechanical issues but are more expensive. An orthotic for supination should gently guide the foot toward a neutral position. Look for inserts with a deep heel cup and supportive cushioning along the outer edge. Making an Informed Decision If new, neutral shoes resolve your discomfort, you likely don't need inserts. However, if pain persists, an orthotic may be the solution. Supination affects a significant portion of the population, and while studies show custom orthotics can be highly effective, a well chosen shoe is often sufficient [4]. Start with the right shoes. If problems continue, consult a specialist about inserts. How to Fit and Test New Shoes for Supination A great fit goes beyond knowing your size. It requires a hands-on approach to ensure the shoe supports your foot properly. Shop for shoes in the afternoon or evening when your feet are naturally swollen. This ensures a comfortable fit during a workout. Setting Yourself Up for Success To get an accurate feel for a shoe, replicate workout conditions. Bring Your Gear: Wear the socks you typically use for exercise. Use Your Inserts: If you use orthotics, test the shoe with them inside. Ensure there is about a half-inch of space (a thumb's width) between your longest toe and the shoe's end. This prevents your toes from hitting the front. A proper fit should feel secure, not tight; your heel should be locked in, but your toes should have room to wiggle. For more tips, check out this expert guide on choosing running shoes . The In-Store Test Drive Always test a shoe before buying if possible. Use a store's treadmill or an open aisle. Walk and Jog: Start with a walk, then a light jog, to feel the cushioning and response. Mimic Your Moves: Perform lunges or side shuffles to test stability during multi directional movements. This hands-on process is the final check to confirm you’ve found the best shoes for supination. As technology in gyms is transforming fitness, i.e. smart watches , and workout apps, we may see better in-store analysis tools soon, but for now, a personal test is essential. Frequently Asked Questions Here are answers to common questions about supination and footwear. Can The Wrong Shoes Make Supination Worse? Yes. Shoes with stability or motion control features are designed for overpronation (inward roll). When a supinator wears them, they can push the foot further outward, worsening the issue and increasing injury risk. Stick with neutral, cushioned shoes. How Often Should I Replace My Shoes? The general rule is every 300-500 miles . For supinators, visual inspection is key. Look at the outer edge of the sole. If the tread is worn flat or the foam looks compressed, the shoe has lost its supportive qualities and needs replacing. Are Zero-Drop Shoes A Good Choice? It depends on your body mechanics. For some, zero-drop shoes encourage a midfoot strike that can help with supination. However, they place more load on the Achilles tendon and calf muscles. If you try them, transition slowly to allow your lower legs to adapt and prevent injury. Here at Flourish-Everyday , we help you find the right gear to support your active lifestyle. Explore our expert guides to find the best shoes for you. Find your perfect pair at https://www.flourish-everyday.com . References [1] Uden, H., Jones, S., & Grimmer, K. (2012). Foot Pain and Foot Type in a Community-Based Sample of Younger Adults. Journal of the American Podiatric Medical Association , 102(5), 384-390. [2] Brizuela, G., Llana-Belloch, S., & Pérez-Soriano, P. (2013). The influence of the fit of a running shoe on the distribution of plantar pressure. Footwear Science , 5(2), 103-110. [3] Shah, P. A., & Kage, V. (2024). Prevalence of Foot Posture and its Association with Biomechanical Variables among Professional Dancers. The Yogic Journal , 9(2), 27-31. Available: https://www.theyogicjournal.com/pdf/2024/vol9issue2/PartC/9-2-27-214.pdf [4] Sahu, A., & Ahmad, I. (2022). Frequency of Foot Posture and its Management Options in Urban Young Adults. International Journal of Health Sciences and Research , 12(10), 209-215. Available: https://www.ijhsr.org/IJHSR_Vol.12_Issue.10_Oct2022/IJHSR21.pdf
- Running Shoe Comparison Guide to Find Your Perfect Fit
Finding the right pair of running shoes can feel like a marathon, but this running shoe comparison guide is designed to make it a sprint to the finish. My goal is to cut through marketing jargon and provide straightforward, practical advice so you can select a shoe that suits your running style, foot shape, and goals. We'll focus on what truly matters in performance to help you find your perfect pair. Your Guide to Choosing the Right Running Shoe Welcome to the only resource you'll need to navigate the world of running shoes. This guide is packed with clear, side-by-side comparisons to help you find the perfect shoe, whether you’re a beginner or a seasoned marathoner. We’ll explore key differences in shoe technology, compare flagship models from top brands, and provide actionable recommendations. There is a global shift toward healthier lifestyles, highlighting why the right shoe is a critical investment in your performance and long term health. A great running shoe should support your natural movement, not fight it. Understanding features like cushioning, stability, and energy return is the first step toward running stronger and preventing injuries. Article Section Index Section Title What You Will Learn Understanding Core Running Shoe Technologies A breakdown of midsole foams, stability features, and heel-to-toe drop to decode technical jargon. Comparing Top Running Shoe Brands and Models Side-by-side reviews of flagship models from leading brands, focusing on their ideal user and purpose. Top Athletic Shoe Reviews for Men & Women Targeted recommendations for men and women, curated for daily training, race day, and trail running. How the Right Shoe Impacts Your Health and Wellbeing An exploration of the connection between footwear and injury prevention, including how to identify your foot type. Wellbeing Trends: Minimalist vs. Maximalist Shoes A comparison of two popular footwear philosophies and their impact on running form and health. Frequently Asked Questions About Running Shoes Clear answers to common questions about shoe replacement, usage for other workouts, and whether price equals quality. Understanding Core Running Shoe Technologies Before comparing brands, it's essential to understand the technology inside the shoe. The running shoe comparison guide would not be complete unless you know the terminology that helps you look past marketing hype and choose features that benefit your specific running mechanics. The midsole is the engine of any running shoe, dictating cushioning, responsiveness, and stability. While EVA (Ethylene Vinyl Acetate) foam was once the standard, modern shoes often feature advanced compounds like TPU (Thermoplastic Polyurethane) for better durability and energy return. Research indicates that advanced shock absorption technology can reduce injury risk by up to 25% (The American Journal of Sports Medicine, 2018). Cushioning: From Soft to Fast Cushioning should balance comfort with ground contact, and align with your training requirements. Maximum Cushion: Thick, plush midsoles ideal for long distances or recovery days, prioritizing comfort over responsiveness. Moderate Cushion: The versatile sweet spot for most daily trainers, offering a blend of shock absorption and energy return. Minimal Cushion: Lightweight, low profile shoes that provide a connection with the ground feel, encouraging natural foot movement but requiring strong form. Stability and Heel-To-Toe Drop Stability features and heel-to-toe drop are also critical. Stability systems are designed for runners who overpronate (when the ankle rolls too far inward upon landing), often using firmer foam or guide rails to promote a neutral foot position. The heel-to-toe drop is the height difference between the heel and forefoot. High Drop (8-12mm): Traditional design that can reduce strain on the Achilles tendon and calves, often encouraging a heel strike. Low Drop (4-7mm): Common in performance shoes, promoting a midfoot or forefoot strike. Zero Drop (0mm): Places the heel and forefoot on the same level to mimic a barefoot stance, requiring an adjustment period. For more on biomechanics and injury prevention, explore our educational resources at https://www.flourish-everyday.com/education . Comparing Top Running Shoe Brands and Models Now, let's see how brands like Brooks, Hoka, and ASICS apply these technologies. Each brand has a distinct philosophy that translates into a unique running experience. We'll examine what each flagship shoe is built for, whether it's a comfortable recovery shoe or a responsive speed day model. Brooks: The Reliable Daily Trainer Brooks has built its reputation on consistency and dependability. Their BioMoGo DNA foam adapts to a runner's weight and pace, creating a smooth, comfortable ride. The Brooks Ghost is a prime example: a balanced neutral daily trainer known for its durability and predictable feel, making it a workhorse for logging miles. Hoka: The Maximalist Cushioning Pioneer Hoka revolutionized the industry with its maximalist cushioning. Their oversized midsoles provide exceptional shock absorption and a plush feel. The Hoka Bondi epitomizes this approach, offering a marshmallow-soft ride perfect for recovery runs and long distances where comfort is paramount. The trade-off can be less responsiveness on faster runs. ASICS: The Fusion of Tradition and Innovation ASICS combines decades of biomechanical research with modern tech. Their signature GEL cushioning absorbs impact, while newer foams like FF BLAST+ provide a lighter, more energetic feel. The ASICS GEL-Kayano is a legendary stability shoe that offers structured support for overpronators without feeling clunky. Saucony: The Responsive Speed Specialist Saucony excels in creating responsive, lightweight shoes. Their PWRRUN foam family is engineered for high energy return, giving their shoes a snappy, propulsive feel ideal for tempo runs and race day. The Saucony Endorphin Speed , with its responsive foam and nylon plate, makes running fast feel almost effortless. Our collection of in-depth product reviews covers even more options from leading brands to help you compare. Top Athletic Shoe Reviews for Men & Women Choosing a running shoe requires understanding the biomechanical differences between men and women. Gender specific designs address these anatomical distinctions to improve comfort, support, and injury prevention. For instance, women often have a wider Q-angle (the angle where the femur meets the tibia), which can increase pronation. Many women's shoes account for this with tailored midsole densities or support features. Top Athletic Shoe Reviews for Women Women's running shoes are often designed with a narrower heel, more forefoot space, and softer cushioning to accommodate a generally lighter body mass. Softer Midsole Foam: Ensures lighter runners receive adequate shock absorption. Accommodating Upper: A flexible upper hugs the typical female foot shape (narrower heel, wider forefoot). Targeted Support: Stability features are tuned for pronation patterns associated with a wider Q-angle. Top Athletic Shoe Reviews for Men Men's shoe design typically focuses on durability and robust support for a higher average body weight and a wider, longer foot shape. Firmer Cushioning: Midsoles are engineered to withstand greater impact forces without compressing over time. Wider Base of Support: A wider platform provides a stable foundation for a heavier frame. Durable Outsole: Tougher rubber compounds handle increased abrasion. Top Shoe Recommendations by Runner Profile This table highlights top picks for specific running goals. For more detailed comparisons, check out our full top lists of athletic shoes . Runner Profile Top Recommended Shoe (Men) Top Recommended Shoe (Women) Key Feature Highlight Daily Training Brooks Ghost 15 Hoka Clifton 9 Balanced cushioning perfect for consistent, comfortable miles. Race Day Speed Saucony Endorphin Speed 3 Nike Vaporfly 3 A responsive plate and energetic foam for maximum performance. Trail Running Salomon Speedcross 6 Altra Lone Peak 7 Aggressive lugs for superior grip and a durable upper. Stability/Support ASICS GEL-Kayano 30 Brooks Adrenaline GTS 23 Medial support systems that guide the foot for a stable ride. Bluebird Botanicals How the Right Shoe Impacts Your Health and Wellbeing A running shoe is more than gear, it's a critical tool for your long term health. The right pair acts as your first line of defense against the repetitive impact of running. Improper footwear is a contributing factor in a significant number of running related injuries, making the right choice essential for staying healthy (British Journal of Sports Medicine, 2015). Preventing Common Running Injuries Many common injuries can be traced back to shoes that don't match a runner's mechanics. Plantar Fasciitis: Heel pain often caused by inadequate arch support. A shoe with proper cushioning and support can distribute pressure evenly. Shin Splints: Pain along the shin bone from impact shock, often exacerbated by overpronation. Stability shoes can help control this motion. Achilles Tendinitis: An overly low heel-to-toe drop can strain the Achilles tendon. A shoe with sufficient heel cushioning can absorb impact and reduce pressure. Understanding Your Foot Type and Gait The "wet test" is a simple way to identify your arch type. Wet your foot, step on cardboard, and examine the footprint. Neutral Pronation: A clear curve along the inside of your foot. Your foot rolls inward just enough to absorb shock. Neutral shoes are ideal. Overpronation: A flat footprint with little to no curve. Your arch likely collapses inward. A stability shoe provides necessary support. Supination (Underpronation): A high arch with only the outer edge visible. Your foot doesn't roll inward enough. A highly cushioned, flexible neutral shoe is best. Proper shoe care, like maintaining foot hygiene and shoe freshness , is also crucial. Wellbeing Trends: Minimalist vs. Maximalist Shoes The debate between minimalist and maximalist running shoes is a key trend in runner wellbeing. Minimalist shoes, with their thin soles and zero drop, aim to mimic barefoot running, promoting a forefoot strike and strengthening foot muscles. Proponents believe this leads to a more natural, efficient gait. However, transitioning requires caution to avoid injuries like stress fractures. Maximalist shoes, pioneered by brands like Hoka, take the opposite approach. Their thick, heavily cushioned midsoles are designed to absorb maximum impact, reducing stress on joints. They are favored for ultra marathons and by runners seeking extra protection. Critics argue that the thick cushioning can reduce ground feel and potentially alter natural biomechanics. The best choice depends on your body, running style, and injury history. Your Running Shoe Questions, Answered To wrap up, here are answers to some frequently asked questions. How Often Should I Replace My Running Shoes? The general guideline is every 300 to 500 miles . However, your body weight, gait, and running surfaces affect a shoe's lifespan. Look for signs of wear: a compressed midsole with visible creases, a worn down outsole tread, or a "flat" feeling during runs. Running in worn out shoes increases your risk of injury as the cushioning and support structures degrade. Can I Use Running Shoes For Gym Workouts? It's not recommended. Running shoes are built for forward motion. Their high, cushioned heels can create instability during lateral movements common in gym workouts or weightlifting. A cross-training shoe with a flatter, more stable base is a safer and more effective choice for the gym. Is A More Expensive Shoe Always Better? No. The "best" shoe is not determined by its price but by its suitability for you . A high end racing shoe might be perfect for an elite athlete but a poor choice for a beginner who needs stability. Focus on finding a shoe that matches your foot shape, gait, and running goals. Mid-range daily trainers often provide the best combination of durability, comfort, and value for most runners. Here at Flourish-Everyday , our mission is to help you find the perfect gear for your fitness journey. Check out our expert reviews and guides to find the best shoes for running, training, savings, and everything in between. https://www.flourish-everyday.com References Persistence Market Research. (2024). Running Shoes Market Outlook (2024 to 2034) . The American Journal of Sports Medicine. (2018). Influence of Shoe Technology on Injury Rates in Runners . British Journal of Sports Medicine. (2015). Running shoes and running injuries: mythbusting and a proposal for two new paradigms .
- Finding Your Footing with the Top Cross-Training Shoes in 2026
When you're hunting for the top cross training shoes, your choice is easily the most critical piece of gear in your gym bag. The best pairs offer stability for heavy lifts, flexibility for explosive movements, and enough cushion for high impact drills. Getting it right boosts your performance and helps sidestep injuries. Table of Contents Your Foundation for Every Workout The Anatomy of a High Performance Shoe Top Cross Training Shoes for Men Top Cross Training Shoes for Women How to Choose Your Perfect Training Partner Making Your Investment Last Common Questions About Cross Training Shoes References Your Foundation for Every Workout Think of your shoes as the foundation of a house. A weak base compromises everything built on top of it. Similarly, the wrong shoe can wreck your form, sap your power, and lead to unnecessary strain. The right cross-training shoe, however, acts as a solid, reliable platform for your entire fitness routine. This guide will walk you through everything you need to know. We'll break down the anatomy of a great performance shoe, share our top picks for both men and women, and give you practical tips for matching footwear to your workout style. My goal is to help you find a shoe that not only fits your feet but elevates your training. For a deeper dive into the basics, check out our guide on what cross- training shoes are . Navigating the Competitive Market The athletic shoe market is crowded, making it tough to distinguish between genuine performance features and clever marketing. Big brands invest heavily in technology and design to create versatile, durable shoes for any gym activity. A great shoe is a versatile tool. It needs to be stable enough for a heavy squat but flexible enough for a box jump, all while keeping you comfortable and secure. This multi purpose design is what sets a true cross-trainer apart. Knowing the key players provides helpful context. Nike still dominates the global cross-training shoe market, holding an impressive 30% market share , with Adidas as the second major player at around 22% (Market Report Analytics, 2023). Other brands like New Balance and Under Armour keep the market competitive. You can explore more insights about the cross-training shoe market on marketreportanalytics.com . This guide will help you look past brand names and zero in on features that matter for your fitness goals. The Anatomy of a High Performance Shoe What separates a decent gym shoe from one of the top cross training shoes? The secret is in the engineering. Smart construction supports every squat, jump, and sprint. Understanding the components helps you see past the hype and find footwear that truly performs. A cross-trainer's sole is built for the varied "terrain" of a gym floor, needing a specific blend of grip for quick pivots and toughness for abrasive surfaces. Stability for lifting, flexibility for dynamic movements, and injury prevention are the three pillars of an effective cross-training shoe. The Foundation: The Outsole and Midsole The outsole is the rubber part that hits the floor. Quality cross-trainers have a multi-directional tread pattern for solid grip during lateral shuffles or sled pushes, preventing slips during quick directional changes. The midsole is the shoe's cushioning and stability engine. Unlike a plush running shoe, a cross-trainer's midsole is much firmer. This creates a stable platform, preventing the foam from compressing during heavy lifts like squats. A shoe that's too soft is like trying to lift weights while standing on a mattress, it's unstable and inefficient. The firm midsole of a cross-trainer provides a solid, responsive base that translates your force directly into the ground. While firmness is crucial for lifting, the midsole still needs to absorb impact from activities like box jumps. This dual purpose design makes these shoes incredibly versatile. The Upper and Heel Counter The upper wraps around your foot. In top cross-training shoes, it’s a protective shell made from engineered mesh for breathability, reinforced with tough overlays in high wear zones, like the inner side for rope climbs. The heel counter , a rigid insert at the back, cups your heel to prevent lateral movements. This feature is vital for stability during exercises like lateral lunges or burpees. These components work in harmony to handle the demands of modern fitness, making your workouts safer and more effective. Top Cross-Training Shoes for Men Landing the perfect pair of athletic shoes is paramount for performance and safety. The best cross training shoes for men are built with a specific cocktail of stability, toughness, and versatility. This is a breakdown of what makes select models rise above the rest. Men's Top Cross Training Shoe Comparison This table provides a snapshot of our top picks, breaking down their strengths and best use cases. Shoe Model Best For Stability Rating (1-5) Flexibility Rating (1-5) Key Feature Reebok Nano Versatile WODs, functional fitness 4 4 Wide toe box for natural splay Nike Metcon Heavy lifting, powerlifting, stability focus 5 2 Firm, flat heel for maximum ground contact NOBULL Trainer Durability, rope climbs, all-around use 4 3 SuperFabric® upper for extreme abrasion resistance Each shoe offers unique benefits. The right choice depends on your primary gym activities. The Versatile All-Rounder For those who mix squats, box jumps, and treadmill sprints, a versatile cross-trainer is essential. The Reebok Nano series is a prime example, striking an incredible balance. Its roomy toe box allows natural toe spread for power and stability, while responsive cushioning up front supports plyometrics. Key features of a versatile shoe include: Moderate Heel-to-Toe Drop (4-7mm): A sweet spot between a flat lifting platform and the lift needed for dynamic moves. Durable Upper: Reinforced mesh and TPU overlays withstand abrasion from activities like rope climbs. Flexible Forefoot: The front of the shoe bends easily, preventing a stiff feel during agility drills. These are the staples for CrossFit WODs or any functional fitness plan. The Stability Specialist for Heavy Lifting When moving serious weight, stability is nonnegotiable. Shoes built for heavy lifting create a rock solid connection to the floor. The Nike Metcon line exemplifies this, with a firm, flat, and wide heel that resists compression under heavy loads. A stable lifting shoe acts like a concrete foundation for your body. It ensures every ounce of force you generate is transferred directly into the ground to move the weight, rather than being lost in the shoe's cushioning. Key features of stability focused models include: A removable Hyperlift insert (in some Metcons) to increase heel-to-toe drop, improving ankle mobility for deeper squats. A low profile heel for a grounded feel, improving balance and control. Rope guards up the sides for grip and protection during rope climbs. While suitable for short cardio bursts, their stiffness makes them less ideal for running. For more guidance, pick the best gym shoes for your feet with guides focused on matching features to training needs. Allergy Free Mixes Top Cross Training Shoes for Women Finding the top cross training shoes for women involves more than choosing a smaller size. The best brands design shoes considering female biomechanics. The right shoe should feel like part of your foot, powering every move. We'll explore models praised for their secure fit, supportive design, and technical ability. Tailored for the Female Athlete Leading brands now use data on female foot anatomy to create shoes that fit and function better. This often means a narrower heel, higher arch, and more room in the forefoot. The result is a shoe that locks your heel in place without feeling tight, improving stability and reducing blister risk. A shoe designed specifically for the female foot isn't a luxury; it's a performance essential. Proper fit directly translates to better stability, more efficient power transfer, and a significant reduction in injury risk. This tailored approach ensures the shoe works with your body, not against it. The All-Around HIIT and Class Champion For HIIT, circuit training, or dance fitness, a shoe that balances agility and support is key. The New Balance Minimus TR is loved for its lightweight feel and flexible sole, allowing natural foot movement while providing a stable, low profile base. A winning shoe for this environment has: Lightweight Construction: Lighter builds keep you quick and fight fatigue. Responsive Cushioning: Enough cushion to absorb impact from jumps, but firm enough for floor feedback. Lateral Support: Reinforced uppers and a wider base prevent foot rolling during lateral movements. The Stable and Supportive Strength Trainer For strength training, stability is paramount. Models like the ASICS MatBlazer or Altra Solstice XT are built for this purpose, with firm, flat soles that minimize energy loss and create a solid platform. Key features for a strength focused shoe include: Minimal Heel-to-Toe Drop (0-4mm): Promotes a more stable, natural stance during heavy lifts. Firm Midsole: Prevents compression under heavy loads for a consistent base. Durable Outsole: Provides excellent grip on gym floors. For help matching a shoe to your foot's needs, resources can show you how to pick the best gym shoes for your feet . How to Choose Your Perfect Training Partner Picking the right shoe is like finding a great workout partner, it needs to match your style and support your goals. The global cross-training shoe market was valued at USD 9.5 billion in 2023 and is expected to hit USD 17 billion by 2032 (Market Report Analytics, 2023), driven by the rise of gym workouts and HIIT. This growth means more options, so you need to know what you’re looking for. Match the Shoe to Your Workout Style The most important factor is what you do at the gym. A powerlifting shoe is a brick in a cardio class, and a cardio shoe offers no support for heavy lifts. For the Weightlifter: Prioritize stability. Look for a minimal heel-to-toe drop ( 0-4mm ), a firm, flat sole, and a solid heel. For the HIIT Enthusiast: You need a lightweight, flexible shoe with great lateral support and responsive cushioning for explosive movements. For the All-Rounder: A standard cross-training shoe is ideal. Aim for a moderate drop ( 4-7mm ) that balances stability and flexibility. Note that even the best all-rounders differ from dedicated running shoes. See our guide comparing running vs. cross-training shoes . For more guidance, check this resource on understanding different types of gym trainers . Understand Your Foot Mechanics Your arch type (flat, neutral, or high) is crucial for support and comfort. The wrong shoe can cause pain or injury. A specialty athletic store can help determine your arch type. Your foot's arch acts as your body's natural shock absorber. A shoe that complements your arch type works with your body's mechanics, not against them, leading to better form and reduced strain. Practical Tips for the Perfect Fit Shop in the Afternoon: Your feet swell during the day, so trying on shoes later ensures a fit that won't feel tight mid workout. Wear Your Workout Socks: Bring your typical gym socks. Check for Thumb Width Space: Ensure about a thumb's width of room between your longest toe and the shoe's end. Making Your Investment Last A little care extends the life of your top cross training shoes, preserving the support that protects you from injury. Simple Care for Peak Performance Keep shoes away from washing machines and dryers, as heat and tumbling can destroy the glues and foams. Instead: Wipe Down After Use: Use a damp cloth to remove chalk, dust, or dirt. Spot Clean Stains: Use a soft brush with mild soap and water. Air Dry Naturally: Let shoes air out at room temperature. Stuffing them with newspaper helps absorb moisture. Bluebird Botanicals Knowing When to Say Goodbye Even the best shoes wear out. Using them past their prime increases injury risk as the midsole foam compresses and loses its shock absorption. Think of your shoe's midsole like the suspension on a car. When it's shot, you feel every single bump in the road. Training on worn out cushioning puts all that stress directly on your ankles, knees, and even your back. Look for these signs that it’s time for a new pair: Worn Outsole Tread: If the rubber patterns are smooth, your grip is gone. Visible Midsole Wrinkles: Deep creases in the foam signal it’s compressed. Reduced Comfort and Support: If shoes feel "flat" or cause new aches, they're done. Generally, replace cross-training shoes every 6-12 months or after 300-500 hours of use. See our evidence-based guide on how often to replace your athletic shoes . A Few Final Questions Let's tackle some common questions about athletic shoes. Can I Just Use My Running Shoes for Cross Training? It’s not a great idea. Running shoes are built for forward motion and have soft, elevated heels. This creates an unstable platform for lateral movements or heavy lifts, increasing your risk of rolling an ankle. A proper cross-training shoe offers a flatter, firmer base for stability. How Often Should I Replace My Cross Training Shoes? The general rule is every 6 to 12 months or after 300-500 hours of use. However, your eyes and feet are the best judges. Look for a "flat" midsole, worn tread, or tears in the upper. Training on worn-out shoes transfers impact straight to your joints. What's This Heel-To-Toe Drop Thing, and Why Does It Matter? Heel-to-toe drop is the height difference between your heel and forefoot inside the shoe. Low Drop (0-4mm): Creates a flatter feel, ideal for weightlifting balance and power transfer. High Drop (8mm+): Common in running shoes, it can reduce strain on the Achilles tendon. Moderate Drop (4-7mm): The sweet spot for cross-trainers, balancing stability and cushion. Are More Expensive Cross Training Shoes Always Better? Not necessarily. The "best" shoe fits your foot, budget, and workout style. Many excellent, durable shoes are available at mid range prices. Focus on features that matter to you, like a stable base or flexible forefoot, rather than the price tag. References Flourish-Everyday. (n.d.). How Often to Replace Running Shoes: An Evidence-Based Guide . Retrieved from https://www.flourish-everyday.com/post/how-often-to-replace-running-shoes-an-evidence-based-guide Gymsnack. (n.d.). Understanding Different Types of Gym Trainers . Retrieved from https://gymsnack.com/pages/gym-trainers Market Report Analytics. (2023). Cross Training Shoes Market Report . Retrieved from https://www.marketreportanalytics.com/reports/cross-training-shoes-209018 Here at Flourish-Everyday , our goal is to help you find the perfect gear for your fitness journey. Take a look through our expert guides and recommendations to find the best shoes for your needs. https://www.flourish-everyday.com
- What Causes Runner's Knee and How to Fix It for Good
Runner's knee rarely pops up out of nowhere. It's almost always an overuse injury that builds over time from a perfect storm of factors, usually a mix of muscle imbalances, training errors, and iffy running form that messes with how your kneecap tracks. Think of it less like a sudden breakdown and more like your car's alignment slowly going out of whack. One day, you just notice the wear and tear. Table of Contents What's Really Going On Inside Your Knee? Why Weak Hips Are Your Knee's Worst Enemy How Training Mistakes Overload Your Knees The Critical Role of Footwear and Running Form Actionable Strategies for Recovery and Prevention Common Questions About Runner's Knee Answered References What's Really Going On Inside Your Knee? Clinically, this is called Patellofemoral Pain Syndrome (PFPS), but at its heart, it’s a tracking problem. Your kneecap (patella) is meant to glide smoothly in a little groove on your thigh bone (femur). When different forces start pulling it off center, it begins to grind against the bone, creating that familiar dull, aching pain around or behind the kneecap. That irritation is the real source of your trouble. This is an incredibly common issue, and you're definitely not alone if you're feeling it. Its annual prevalence in the general population is a staggering 22.7% [1]. For new runners, that number jumps even higher. It's often the most frequent injury they face, hitting 19-30% of female runners and 13-25% of male runners [2]. These numbers really show how jumping into a new routine without proper conditioning can overload the knee joint. The Main Culprits Behind That Ache So, what are these forces throwing your kneecap off track? It usually boils down to a few key areas that work together to create the problem. This visual helps simplify how muscle imbalances, poor form, and training mistakes all funnel stress directly to your knee. We're about to dive into each of these, but just seeing how they connect is the first step to figuring out how to fix it. This guide is designed to map out these causes so you can start connecting the dots in your own routine. By breaking down these factors, you can build a smarter training plan. For a bigger picture on staying healthy on your runs, take a look at our guide on how to prevent running injuries with top tips for safe running . Think of your kneecap as a train and the groove in your femur as the track. When weak or tight muscles (especially in your hips and glutes) act like sloppy signal operators, they fail to keep your leg stable. The track shifts just a little with every step, causing the train to grind against the rails. That constant friction is what sparks the pain and inflammation. Runner's Knee Causes At a Glance Cause Category Specific Example How It Contributes to Pain Muscle Imbalances Weak glutes and hips Fails to stabilize the thigh bone, causing the knee to collapse inward. Training Errors Increasing mileage too quickly Overloads the patellofemoral joint before it has time to adapt. Running Form Overstriding or heel striking Increases the braking forces that travel up the leg and into the knee. Structural Issues Overpronation (flat feet) Causes the lower leg to rotate inward, pulling the kneecap off its track. This table gives you a starting point for troubleshooting. By understanding these key areas, you're in a much better position to address the root cause of your pain instead of just treating the symptoms. Why Weak Hips Are Your Knee's Worst Enemy It's a surprising fact for many runners, but the real source of your runner's knee often has nothing to do with your knee. More often than not, the problem actually starts higher up the chain, specifically, with weak hips and glutes. This weakness creates a domino effect, sending instability right down to your kneecap. Think of your leg as a tall building. Strong, stable hips are the solid foundation that keeps the whole structure perfectly aligned. But when that foundation is weak, the entire building gets wobbly, forcing the middle floors, your knees, to take on all the stress from that instability. With every single stride, weak hip muscles can't keep your thigh bone (femur) in its proper place. This allows your knee to drift inward, a pattern known as valgus collapse . This subtle, yet repetitive, inward collapse is one of the biggest reasons runner's knee develops. The Gluteus Medius: The Unsung Hero of Knee Stability When we talk about hip strength, there's one muscle that deserves a special mention: the gluteus medius . This muscle sits on the side of your hip and its main job is to keep your pelvis stable when you're on one leg, which is exactly what happens every time you run. If your gluteus medius is weak or isn't firing correctly, it can't keep your pelvis level. The result? Your opposite hip drops, your thigh rotates inward, and your knee gets pulled out of its happy, neutral alignment. Imagine your kneecap is a train on a track. A strong gluteus medius keeps that track perfectly straight. But a weak one causes the track to veer inward, forcing the train (your kneecap) to grind against the rails. This creates friction, irritation, and eventually, pain. This biomechanical flaw is a huge contributor to patellofemoral pain. The constant inward drift forces the kneecap to track improperly in its groove, leading to inflammation and that dull, achy pain so many runners know all too well. For targeted routines to improve strength and flexibility in this area, you can learn more by checking out our guide on how to improve hip flexibility and unlock movement . Weakness in the hip, glute, quad, and hamstring muscles is a primary culprit behind runner's knee. Research consistently shows that individuals with PFPS often lack strength in hip abductors and external rotators, leading to biomechanical glitches like hip adduction ('knock knees') and poor patellar tracking [3]. Females are particularly affected, with a point prevalence in female adolescent athletes reaching 22.7% , over twice the rate in males, partly due to anatomical differences and relative strength deficits [1]. You can explore more about how muscular weakness impacts knee health by beating runner's knee . Building a strong support system around the knee is non-negotiable for long term joint health. Bluebird Botanicals How Training Mistakes Overload Your Knees While muscle imbalances can definitely set the stage for runner's knee, it's usually a specific training mistake that flips the switch from a potential issue to a painful reality. Pushing too hard, too soon is one of the fastest ways to get sidelined. This is often called the "too much, too soon" syndrome. It’s what happens when the stress you put on your knees outpaces your body’s ability to repair itself and adapt. Your bones, tendons, and cartilage need time to get stronger in response to training, and when you rush the process, they start to break down instead of build up. Think of your fitness like a bank account. Every run is a withdrawal, and every recovery day is a deposit. If you keep making huge withdrawals without making regular deposits (rest), you’ll eventually find yourself in injury bankruptcy. Common Training Errors These common errors are almost always the culprits when runner's knee shows up. Ramping Up Mileage Too Quickly: The 10% rule , which advises against increasing your weekly mileage by more than 10% , is a sound guideline. Ignoring this puts a ton of unfamiliar stress right on the patellofemoral joint. Sudden Intensity Changes: Throwing in hill sprints or track workouts without a solid base can shock an unprepared knee joint with increased force and different muscle recruitment. Ignoring Recovery Days: Rest isn't lazy; it's when your body rebuilds and gets stronger. Skipping recovery means you're constantly breaking down tissue without giving it a chance to heal. These missteps don't allow for the gradual adaptation your connective tissues need. The result is often that dull, persistent ache that’s your body’s way of telling you it’s been pushed past its limit. Why Surface and Terrain Matter The ground you run on also plays a huge part in how much load your knees have to handle. Constantly pounding on hard surfaces like concrete can dramatically increase impact forces. Similarly, jumping from flat roads to hilly trails changes your running mechanics and puts new demands on your quads and glutes. If those muscles aren't ready for the challenge of controlling your body on a steep downhill, all that stress gets dumped directly onto your kneecap. Your body is an incredible adaptation machine, but it demands consistency and patience. Sudden, drastic changes in your training volume, intensity, or terrain are like throwing a wrench in the gears. Your knee joint is often the first part to start screaming. The key to avoiding this is to be methodical with your training. Introduce new challenges like hills or speed work gradually, one at a time. This approach gives your body the chance to adapt and build resilience. The Critical Role of Footwear and Running Form While weak hips and training mistakes set the stage, the real action happens where your feet meet the pavement. Your feet are the foundation of your body’s kinetic chain. When that foundation is shaky, instability shoots right up the leg, and your knee joint is directly in the line of fire. The wrong shoes can make these problems worse. Understanding Your Foot Mechanics Two common culprits that contribute to knee pain are overpronation and supination . If you overpronate , your foot rolls too far inward when it lands. This motion causes your lower leg and thigh bone to rotate inward too, which yanks the kneecap off its happy path in the femoral groove. On the flip side, supination (or underpronation) is when your foot doesn’t roll inward enough. This makes your foot too rigid to absorb shock properly, putting extra stress on the outside of the knee. Your running shoes are more than just cushion, they're critical equipment that can help correct mechanical flaws. A good stability shoe can nudge an overpronating foot back into alignment, while a well cushioned, neutral shoe helps a supinating foot absorb impact. How Poor Running Form Hurts Your Knees Your actual running form plays a massive part in knee health. The goal is to run "lightly" and efficiently, cutting down on the harsh braking forces that hammer your joints. One of the most common form mistakes is overstriding , where your foot lands way out in front of your body with a straight, locked knee. This creates a jarring braking force that rattles the knee joint. Research shows that increasing your step rate, or cadence , by just 5-10% can dramatically reduce the load on your knee [4]. It's a simple fix: shorten your stride and focus on landing with your foot more directly underneath your hips. This small change helps your muscles, not your joints, absorb the impact. Choosing the Right Shoes to Protect Your Knees Picking the right running shoes is nonnegotiable for preventing runner's knee. It's not about the flashiest brand, but about matching the shoe's features to your body's needs. For a complete walkthrough on this, check out our guide on how to choose running shoes for your specific needs . Matching Shoe Types to Your Running Needs Foot Type / Gait Recommended Shoe Feature Why It Helps Your Knees Ideal For Overpronation Stability Shoes Uses guide rails or denser foam (medial post) to prevent the foot from rolling too far inward, keeping the knee aligned. Runners whose feet and ankles collapse inward on impact. Neutral Gait Neutral Cushioned Shoes Provides shock absorption without trying to correct foot motion, allowing the foot to move naturally. Runners with a healthy, efficient gait and good alignment. Supination Highly Cushioned Neutral Shoes Maximizes shock absorption to compensate for the foot's rigidity, reducing impact forces traveling up to the knee. Runners with high, rigid arches whose feet roll outward. Heavy Impact Max Cushion Shoes Features extra thick midsoles to absorb the maximum amount of shock, protecting joints on long runs or hard surfaces. Long distance runners or anyone running primarily on concrete. Your shoes and your form are a team. The right footwear gives your feet the support they need, while good form ensures you’re moving efficiently and putting less stress on your body. Actionable Strategies for Recovery and Prevention Knowing the causes is the first step; taking action is how you recover and build resilience. This is your game plan for getting back on the road safely. First, calm the irritation. This usually means dialing back your running to give the joint a break. This isn't about stopping activity, but shifting to lower impact exercises while you fix the underlying issues. Building Your Foundation With Targeted Strength Since weak hips and glutes are often the main culprits, strengthening them is essential. Here are three powerhouse exercises to get you started: Glute Bridges: Lie on your back, knees bent, feet flat on the floor. Squeeze your glutes and lift your hips until you have a straight line from your shoulders to your knees. Hold for a second, then lower slowly. Clamshells: Lie on your side with your knees stacked and bent at 90 degrees. Keep your feet touching and lift your top knee toward the ceiling without rocking your hips back. This targets the gluteus medius, a key muscle for hip stability. Side Leg Raises: Lie on your side with your legs straight and stacked. Slowly lift your top leg as high as you can without tilting your body, then lower with control. This builds hip abductors, which are critical for stopping inward knee drift. Adding these exercises to your routine 2-3 times per week will build the muscular support your knees need. The Importance of Flexibility and Mobility Muscle tightness can also cause problems. When your hamstrings, quads, or IT band are too tight, they can pull on the kneecap and disrupt its tracking. Think of your muscles and tendons as guide wires supporting a tall tower (your leg). If one wire is too tight, it pulls the whole structure out of alignment. Stretching loosens these wires, allowing your kneecap to glide smoothly. Focus on holding gentle stretches for these key areas after your workouts. Using a foam roller on your quads, hamstrings, and IT band can also help release tightness. Smart Training for Long Term Prevention Once the pain is gone, prevention is key. Warm-Up Properly: Always start with 5-10 minutes of dynamic movements like leg swings and walking lunges. Progress Gradually: Stick to the 10% rule : don't increase weekly mileage by more than 10% . Embrace Cross-Training: Mix in low impact activities like swimming or cycling to maintain cardio fitness while giving your knees a break. Beyond these strategies, some athletes find that using a sauna for recovery helps ease muscle soreness and reduce inflammation. Common Questions About Runner's Knee Answered Getting clear, practical answers can make all the difference in your recovery. Here, we tackle common concerns to separate myth from fact. Can I Still Run With Runner's Knee? Let pain be your guide. Pushing through sharp or worsening pain is a terrible idea. However, if you can run with the pain level at no more than a 2 out of 10 , it's generally okay. If that pain creeps up during the activity or feels worse the next morning, that's your body telling you to back off. This might mean shorter runs or cross-training until things calm down. How Long Does It Take to Heal? Recovery can take anywhere from a few weeks to several months. The biggest factor is how quickly you address the cause. If you only rest without fixing muscle imbalances or training mistakes, the pain will likely return. The fastest way to get better is to be proactive. Healing isn't a passive process; it's an active one. Be consistent with your strengthening exercises, flexibility work, and smart training. Will I Need Surgery for This? It is extremely rare for runner's knee to require surgery. The vast majority of cases, well over 90% , resolve completely with conservative treatments like physical therapy, activity modification, and targeted strengthening. Surgery is a last-resort option, considered only after all other methods have failed over a long period. Focus on strengthening your hips, improving your form, and wearing the right shoes. References [1] Smith, B. E., Selfe, J., Thacker, D., Hendrick, P., Bateman, M., Moffatt, F., Rathleff, M. S., Smith, T. O., & Logan, P. (2018). Incidence and prevalence of patellofemoral pain: A systematic review and meta-analysis. PloS one , 13 (1), e0190892. [2] Taunton, J. E., Ryan, M. B., Clement, D. B., McKenzie, D. C., Lloyd-Smith, D. R., & Zumbo, B. D. (2002). A retrospective case-control analysis of 2002 running injuries. British journal of sports medicine , 36 (2), 95–101. [3] Powers, C. M. (2010). The influence of abnormal hip mechanics on knee injury: a biomechanical perspective. Journal of orthopaedic & sports physical therapy , 40 (2), 42–51. [4] Heiderscheit, B. C., Chumanov, E. S., Michalski, M. P., Wille, C. M., & Ryan, M. B. (2011). Effects of step rate manipulation on joint mechanics during running. Medicine and science in sports and exercise , 43 (2), 296–302. At Flourish-Everyday , we believe the right gear is a key part of a smart, sustainable training plan. Find expert reviews and recommendations on the best shoes to support your knees and keep you running strong by visiting us at https://www.flourish-everyday.com .
- Finding the Best Shoes for Weightlifting: A Complete Guide
Trying to squat heavy in running shoes is like lifting on a bouncy mattress. The force you drive into the ground gets absorbed by the soft cushion, sabotaging your power and increasing risk. The best shoes for weightlifting provide a rock solid, non-compressible base, ensuring every ounce of effort transfers directly into the floor for a stronger, safer lift. This guide will walk you through everything you need to know about finding the best shoes for weightlifting. Below is a quick index to help you navigate each section easily. Article Index Why Your Running Shoes Sabotage Your Lifts The Anatomy of a High Performance Lifting Shoe Matching the Right Shoe to Your Training Style Top Weightlifting Shoes for Men and Women How to Find Your Perfect Fit for Maximum Support Common Mistakes to Avoid When Buying and Using Lifting Shoes Frequently Asked Questions About Weightlifting Shoes References Why Your Running Shoes Sabotage Your Lifts When you lift heavy, your feet are your foundation. The goal is to create an unshakeable base to push against, generating maximum force. The features that make running shoes great for jogging, soft cushioning and flexibility, make them terrible for lifting. The plush foam in a running shoe is built to absorb impact. During a heavy squat or deadlift, that same foam compresses unpredictably. This compression is an energy leak; the force you’re trying to use gets lost in the shoe's sole instead of moving the barbell. That instability can wreck your form and limit your strength potential. The Shift Towards Specialized Footwear More lifters are switching to specialized footwear. The global weightlifting shoes market, valued at around USD 889.2 million , is projected to hit USD 1,500 million by 2035 (Allied Market Research, 2024). This shows a growing understanding that the right shoes are critical equipment, not just an accessory. Your everyday sneakers might be holding you back. For more details, our guide on training shoes versus running shoes breaks it down. Weightlifting Shoes vs. Running Shoes at a Glance Feature Weightlifting Shoes Running Shoes Sole Hardness Firm, non-compressible rubber or plastic Soft, cushioned foam (e.g., EVA, Boost) Heel Height Elevated heel (typically 0.5" to 1.0" ) Varies, but designed for forward motion Midsole Minimal to no cushioning Thick, shock absorbing cushioning Flexibility Stiff and rigid for stability Flexible to allow natural foot movement Primary Goal Maximize force transfer and stability Absorb impact and provide comfort Key Benefits of Making the Switch Switching to proper lifting shoes offers immediate advantages for strength, safety, and performance. Rock-Solid Stability: A firm, flat sole creates a direct connection to the ground. Improved Lifting Mechanics: An elevated heel helps you squat deeper with a more upright torso, protecting your lower back. Greater Power Output: A non-compressible base ensures force is transferred efficiently into the lift. Reduced Injury Risk: A stable foundation helps maintain proper alignment in your ankles, knees, and hips. The Anatomy of a High Performance Lifting Shoe To understand what makes a great weightlifting shoe, you must look at its construction. Every part of a lifting shoe is designed for one thing: creating a rock-solid foundation for moving heavy weight. The Non-Compressible Flat Sole The most critical feature is the non-compressible sole, usually made from dense rubber or hard thermoplastic polyurethane (TPU). When you drive your feet through the floor, this solid base ensures 100% of your force goes into moving the barbell, unlike the spongy foam in running shoes. The Elevated Heel Advantage A defining feature of a traditional weightlifting shoe is its elevated heel, typically between 0.5 to 1.0 inches . This serves a huge biomechanical purpose. A raised heel improves ankle range of motion, making it easier to hit deep squat positions with an upright torso. This posture is crucial for protecting the lower back and improving the bar path. For a deeper dive, check out the ultimate guide to strength training shoes . The Mid foot Strap Lockdown Most quality lifting shoes have a mid foot strap to lock your foot securely. During a lift, even tiny foot movements cause a loss of stability. The strap eliminates internal sliding, making the shoe feel like part of your foot and ensuring a solid base of support. Matching the Right Shoe to Your Training Style Picking the right weightlifting shoe isn't one size fits everyone. What an Olympic lifter needs is different from what a powerlifter requires. Matching your shoes to your training style is key to better performance. A shoe's features, heel height and sole stiffness, should directly support the lifts you do most often. For the Olympic Lifter If you focus on the snatch and clean and jerk, a heeled shoe is essential. These technical lifts demand incredible ankle mobility. A higher heel, usually 0.75 inches or more , helps you sink into a deeper, more upright squat, which is critical for getting under the bar securely. The ultra firm sole and mid foot strap provide the rock solid foundation needed to stick the landing. For the Powerlifter Powerlifting revolves around the squat, bench press, and deadlift. Many powerlifters use different shoes for each movement. Squats: A heeled shoe is often preferred for squats. It helps achieve proper depth while maintaining an upright posture and provides a solid platform for driving force. Deadlifts: For deadlifts, the goal is to be close to the ground. A flat, thin soled shoe is the top choice because it shortens the pull distance. This minimal design offers a better connection to the floor for maximum stability. Proper footwear is just one piece of the puzzle. Other essential deadlift accessories can further enhance performance and safety. For General Strength and CrossFit If your training is a mix of heavy lifting and metabolic conditioning, a versatile hybrid shoe, or cross-trainer, is your best bet. These shoes blend the stability of a lifting shoe with the flexibility needed for dynamic movements. They typically feature a modest heel ( around 0.5 inches ) and a sole that’s firm enough for lifting but has enough give for box jumps or short sprints. Recommended Shoe Features by Lift Type Lifting Style Recommended Heel Height Sole Type Primary Benefit Olympic Lifting 0.75" or higher Rigid, non-compressible Enhances squat depth and torso angle Powerlifting (Squat) 0.6" - 1.0" Rigid, non-compressible Increases stability and helps achieve depth Powerlifting (Deadlift) Flat (0mm drop) Thin and flat Reduces pull distance and improves stability General/CrossFit 0.5" or lower Firm but flexible Versatility for mixed-modality workouts Top Weightlifting Shoes for Men and Women Figuring out the "best" shoe involves balancing performance, durability, and cost. This section highlights top tier options and explains what makes each a great choice. Individual shoes are featured at Best Shoes or Weightlifting Top Picks for Dedicated Lifters If your training is all about heavy squats, Olympic lifts, and powerlifting, stability is paramount. The best shoes in this category are for men : Reebok Legacy Lifter III , Nike Romaleos 4 , and Adidas Adipower 3 . For women: the Nike Romaleos 4 , Adidas Adipower 3 , and the Altra Solstice XT 2 . These shoes offer a rock solid platform, a noticeable heel lift, and a secure lockdown system. High-Stability Models: These are the tanks of lifting shoes. They usually feature a dense TPU heel, a tough synthetic upper, and a large midfoot strap. The raised heel is absolutely necessary for lifters with limited ankle mobility. Ideal User: This shoe is for the serious athlete focused on the squat, snatch, and clean and jerk. The rigid build provides the confidence needed under maximal loads. Potential Drawback: They are stiff, making them impractical for anything besides lifting. For those focusing on squats and deadlifts, our guide on good shoes for squats and deadlifts offers more specific insights. Versatile Options for Hybrid Athletes For those who mix heavy lifting with metabolic conditioning or functional fitness, a hybrid cross-training shoe is the perfect middle ground, stable enough for lifting, flexible enough for everything else. Top shoe series picks for Men and Women: Nike Metcon , and the Reebok Nano . Key Features of Cross-Training Shoes Feature Description Benefit for Lifters Lower Heel Drop A small heel-to-toe drop, typically 4-6mm , provides stability without compromising lifting form. Offers a more natural foot position suitable for various gym movements. Flexible Forefoot The front of the shoe is designed to bend, allowing natural movement during lunges or box jumps. Enables dynamic movements impossible in rigid lifting shoes. Durable Outsole A tough rubber outsole provides excellent grip on gym floors and other surfaces. Ensures solid traction during both fast paced WODs and heavy lifts. Reinforced Upper Durable materials are used to withstand the abuse of activities like rope climbs. Enhances the shoe's longevity, making it a better investment for varied training. This blend of features makes them a practical choice for the everyday gym-goer or CrossFit athlete. How to Find Your Perfect Fit for Maximum Support A high performance lifting shoe is useless if it doesn't fit properly. The goal is a secure, stable platform that locks your foot in place. Any internal movement can lead to a failed lift or injury. Your weightlifting shoes should feel noticeably snugger than your everyday sneakers. Step-By-Step Sizing Guide Now the boring part. Sizing varies between brands, so a consistent process is key. Measure Later in the Day: Feet naturally swell. Measuring them in the evening ensures the most accurate size. Wear Your Lifting Socks: The thickness of your socks affects fit. Always try on shoes with the socks you lift in. Check for Heel Lock: Once laced and strapped, your heel should be completely locked down. Any slipping means the shoe is too big. Mind the Toe Box: While the shoe should be snug, your toes need room to spread slightly for balance. Allow about a thumb's width between your longest toe and the end of the shoe. Avoiding Common Fit Mistakes Going Too Big for "Comfort": Extra room is a stability killer in lifting shoes. Snug is good. Ignoring Brand Differences: A size 10 in one brand might fit like a 10.5 in another. Always check the brand's sizing chart and reviews. Forgetting Width: If you have wider feet, look for brands offering wide fit options to ensure a proper base. Beyond footwear, total stability often involves core and back support. Gear like heavy duty weight lifting belts can complement your setup, but proper footwear is the foundation. Common Mistakes to Avoid When Buying and Using Lifting Shoes Getting quality lifting shoes is a huge step, but common mistakes can negate their benefits. Avoiding these pitfalls ensures your shoes work for you, not against you. Misusing Your Lifting Shoes The most common mistake is treating specialized weightlifting shoes like everyday sneakers. They are purpose built tools. Using them on a treadmill or for a HIIT class is a recipe for disaster. Their rigid soles are designed for stability under load, not for absorbing impact or flexing with a walking stride. This misuse damages the shoe and can be uncomfortable. Keep them strictly for your lifting sessions. Ignoring Your Body's Unique Needs Don't pick a shoe just because it looks cool or is popular. Your foot shape and mobility should guide your choice. Choosing the Wrong Heel Height: If you have great ankle mobility, a high heel might pitch you too far forward. Conversely, if mobility is limited, a flatter shoe might prevent proper squat depth. Find a heel height that complements your natural mechanics. Forgetting Foot Shape: Lifters with wide feet need shoes that allow their toes to spread out to create a solid base. Always consider options for width and arch support. Letting Looks Win Over Function: Prioritize features like sole stiffness, heel height, and lockdown over color or brand hype. The trend toward specialized footwear is global. To discover more insights about the training shoes market, you can explore market analyses showing this worldwide shift toward smarter, safer training. Frequently Asked Questions About Weightlifting Shoes Let's tackle the most common questions to clear up any lingering doubts. How Much of a Difference Do Lifting Shoes Really Make? The difference is night and day. Switching from soft running shoes to solid lifters provides a stable, non-compressible foundation. It’s like pushing a car on solid pavement versus soft sand; all your force goes directly into moving the weight. Can I Wear Weightlifting Shoes for Deadlifts? This is a classic debate. Some lifters prefer the locked-in feel of a heeled shoe for all lifts, including deadlifts. However, many powerlifters argue the heel increases the pull distance. They opt for a completely flat, thin-soled shoe to get as close to the ground as possible. Experiment to see what works best for you. Are Expensive Weightlifting Shoes Worth the Money? Often, you get what you pay for in materials and durability. Pricier models typically use premium materials and ultra-dense TPU heels that won't compress over time, meaning they last longer. However, there are many excellent, budget-friendly options that deliver the core benefits of a firm sole and secure fit, which are great for beginners. References Allied Market Research. (2024). Weightlifting Shoes Market by Material (Leather, Canvas, and Others), Closure Type (Strap, and Laces), and Distribution Channel (Online, and Offline): Global Opportunity Analysis and Industry Forecast, 2024-2035 . Retrieved from https://www.alliedmarketresearch.com/training-shoes-market At Flourish-Everyday , we simplify your search by bringing you recommendations for the best cross-training and athletic shoes all in one place. Explore our guides and find savings and the perfect footwear to support your fitness journey at https://www.flourish-everyday.com .
- Finding Your Best Running Shoe for Comfort and Performance
Finding the best running shoe is about finding the pair that feels made for you, for your feet, goals, and running style. The right shoe balances support, cushioning, and responsiveness. This guide is your personal consultation to help you choose confidently. The global market for running shoes was valued at over $19 billion and is expected to hit nearly $30.5 billion by 2034 , reflecting constant innovation. You can explore more about running shoe market trends here . Index Understanding Running Shoe Anatomy : A breakdown of the upper, midsole, and outsole. Finding the Right Shoe for Your Run : How to match a shoe to your gait, arch, and running surface. Top Picks for Men's Athletic Shoes : Individual reviews of the Brooks Ghost 17, HOKA Clifton 10, and Saucony Ride 18. Top Picks for Women's Athletic Shoes : Individual reviews of the ASICS GEL-Nimbus 27, HOKA Clifton 10, and New Balance Fresh Foam 1080 v14. Health Information & Getting the Perfect Fit : Tips for injury prevention and a checklist for a proper fit. Comparison of Well-Being Trends: Shoe Lifespan & Usage : Guidance on when to replace shoes and why you shouldn't use them for cross-training. Common Questions About Running Shoes : Answers to frequently asked questions. References I realize I have written several articles about this subject, but I feel compelled to help you find the right shoe for the right job. In doing so, you will prevent injury, improve performance, and enjoy your workouts more. Here at Flourish-Everyday, our mission is to provide health and fitness insights to help you thrive. Let's find your perfect shoe. Understanding Running Shoe Anatomy To choose the right running shoe, it helps to understand its basic components. Knowing the function of each part demystifies the technical jargon and helps you select the right tool for the job. Every running shoe consists of three main sections working together for a smooth ride. The Parts of a Running Shoe The Upper: This is the soft, fabric part of the shoe that wraps your foot. Its primary role is to hold your foot securely. Most uppers use engineered mesh or knit materials for breathability, which is crucial for comfort and blister prevention. The Midsole: This is the foam layer between your foot and the outsole. The midsole provides cushioning to absorb impact and responsiveness for a springy feel. It is arguably the most critical component for performance. The Outsole: This is the rubber part that contacts the ground. Like tires, the outsole provides traction and durability. The material and tread pattern vary significantly between road and trail shoes. Key Shoe Metrics Explained Two key metrics, stack height and heel-to-toe drop, tell you a lot about a shoe's feel and performance. Stack Height is the amount of material between your foot and the ground. High Stack: Found in maximalist shoes (e.g., HOKA), offering maximum shock absorption for a plush ride. Low Stack: Common in minimalist shoes, providing a better feel for the ground and more natural foot movement. A biomechanics study noted that while high cushioning reduces foot pressure, it may increase forces on the knees and hips (Nigg, 2015). Finding a balance that suits your body is key. Heel-to-toe drop is the height difference between the heel and the forefoot. High drop (8-12mm): Typical in traditional running shoes, this can reduce strain on the Achilles tendon and calf muscles, often favored by heel strikers. Low or zero drop (0-6mm): Creates a more level platform, encouraging a midfoot or forefoot strike, similar to barefoot running. Understanding these concepts helps you interpret a shoe's specs and predict its performance before trying it on. Under Armour Water Bottle Finding the Right Shoe for Your Run The best running shoe for you depends on your personal running profile, not flashy brand names. A marathoner's ideal shoe differs greatly from a trail runner's. To find your sole mate, you need to understand your body's natural movement. Understanding Your Gait and Pronation Gait is your unique pattern of movement. Pronation is the natural inward roll of your foot to absorb shock. The degree of pronation determines the support you need. Neutral Pronation: Your foot rolls inward just enough to absorb impact and pushes off evenly. Neutral runners have the widest selection of shoes. Overpronation: Your foot rolls inward excessively, causing the arch to flatten. This can stress the ankles, shins, and knees. Supination (Underpronation): Your foot doesn't roll inward enough, placing pressure on the outer edge and impairing shock absorption. Identifying your pronation pattern is the first step to narrowing your search to the right category: neutral, stability, or motion control. Bluebird Botanicals Discover Your Arch Type with the Wet Test Your arch height provides clues about your foot mechanics. The "wet test" is a simple way to check it at home. Pour a thin layer of water into a shallow pan. Step into the water to wet the sole of one foot. Step onto a dry piece of cardboard or a dark towel. Examine the footprint. Normal Arch: About half of your arch is visible. This usually corresponds with a neutral gait. Flat Arch (Low Arch): Almost the entire foot outline is visible, often associated with overpronation. High Arch: Only the heel, ball of the foot, and a thin outer line are visible, commonly linked to supination. Matching Your Shoe to Your Running Surface Where you run is as important as how you run. The surface dictates your shoe's needs for grip, protection, and durability. Road and trail running require different shoes. If you mix up your workouts, understanding the difference between running and cross-training shoes is also vital. Learn more in our complete guide on running and cross-training shoes . Top Picks for Men's Athletic Shoes Now that you understand the basics, let's review some of the best models for men. These shoes are celebrated for their performance and design, suitable for daily miles, or setting personal bests. The Everyday Workhorse: Brooks Ghost 17 The Brooks Ghost 17 is a legendary daily trainer, perfectly balancing soft cushioning with responsiveness. The latest version's nitrogen infused midsole ensures a smooth, consistent ride, making it an excellent choice for long runs, recovery jogs, and varied training. The Max Cushion Champion: HOKA Clifton 10 For runners who prioritize plush protection, the HOKA Clifton 10 is unparalleled. Its signature high stack of soft foam provides a cloud like feel for joint comfort during high mileage weeks. Despite its appearance, the Clifton 10 is surprisingly lightweight, making it ideal for recovery runs or for heavier runners needing extra shock absorption. For more tailored advice, see our guide on the best running shoe for heavy runners . The Responsive Speedster: Saucony Ride 18 The Saucony Ride 18 offers a lively, energetic ride for when you want to pick up the pace. Its midsole is firmer and more responsive than max-cushion models, providing a noticeable "pop" during tempo runs and intervals. It's a versatile choice for neutral runners who need a single pair for both easy days and speed workouts. Men's Running Shoe Recommendations Shoe Model Best For Key Feature Brooks Ghost 17 Daily Training & Versatility Balanced Cushion & Smooth Ride HOKA Clifton 10 Max Cushion & Recovery Runs High-Stack Soft Foam Saucony Ride 18 Tempo Runs & Versatility Responsive & Energetic Feel Top Picks for Women's Athletic Shoes The best women's running shoes are more than just different colorways; they are designed to accommodate biomechanical differences. Brands often use a narrower heel and a female specific "last" (the shoe's mold) for a better fit. The All-Around Performer: ASICS GEL-Nimbus 27 The ASICS GEL-Nimbus 27 is an incredible choice for daily miles, long runs, and recovery days. It is known for its plush, protective cushioning that delivers a consistently smooth ride without feeling sloppy. Its engineered mesh upper offers a breathable, accommodating fit, making it a reliable workhorse for any runner. The Lightweight Cushion King: HOKA Clifton 10 The HOKA Clifton 10 combines maximum cushioning in a lightweight package. Its thick stack of soft foam makes high mileage weeks easier on the joints. The Clifton has a surprising amount of energy, making it the choice for long, slow runs and daily training where comfort is paramount. The Versatile Daily Trainer: New Balance Fresh Foam 1080 v14 The New Balance Fresh Foam 1080 v14 strikes a beautiful balance between soft Fresh Foam X cushioning and a responsive feel. It's perfect for runners who want a shoe that performs equally well on slow jogs and faster tempo workouts. The soft, stretchy upper provides a comfortable, secure fit. Women's Running Shoe Recommendations Shoe Model Best For Key Feature ASICS GEL-Nimbus 27 High-Mileage & Comfort Plush, Protective Cushioning HOKA Clifton 10 Recovery & Long Runs Lightweight Maximal Cushion NB Fresh Foam 1080 v14 All-Around Versatility Soft & Responsive Ride Remember, the best running shoe is a personal decision. You can explore a wide range of expert-tested shoes on sites like Fleet Feet to compare more options . Health Information & Getting the Perfect Fit Even the most advanced shoe is useless if the fit is wrong. An improper fit can lead to blisters, pain, and injury. Finding the perfect fit is the crucial final step that makes all the technology work for you. Your Practical Fitting Checklist Your feet change size throughout the day, and your running shoe size is rarely the same as your dress shoe size. Shop in the Afternoon: Feet naturally swell as the day goes on. Trying on shoes in the afternoon or evening provides a more accurate fit for running. Bring Your Running Socks: The thickness of your sock affects the fit. Always try on shoes with the socks you run in. Go Up a Half-Size: You often need to go up a half or full size from your casual shoes to give your feet room to splay. Nailing the In-Store Test The Thumb's Width Rule: Ensure there is about a thumb's width of space between your longest toe and the front of the shoe. This prevents your toes from hitting the end of the shoe, especially on downhills. Check the Width and Heel Midfoot Security: The shoe should feel snug but not tight around your midfoot. Heel Lock: Walk or jog briefly. Your heel should stay in place with minimal slipping to prevent blisters. Overall Comfort: The shoe should feel comfortable immediately. A quality running shoe does not need a "break-in" period. Comparison of Well-Being Trends: Shoe Lifespan & Usage How Often Should I Replace My Running Shoes? This is a critical question for injury prevention. A running shoe's lifespan is measured in miles, not months. Most shoes are designed to last 300 to 500 miles . The midsole foam is the first component to degrade, losing its shock absorption capabilities. If you feel new aches or the shoes feel "dead," it's time for a replacement. For more detail, read our guide on how often to replace running shoes . Can I Use My Running Shoes for Other Workouts? It is generally not recommended. Running shoes are designed for forward motion and cushioning repetitive impact. Other workouts, like HIIT or weightlifting, involve lateral (side-to-side) movements. Using running shoes for these activities provides inadequate stability, increasing the risk of an ankle or knee injury, and causes premature, uneven wear. It's best to invest in a separate pair of cross-trainers. Bluebird Botanicals Common Questions About Running Shoes Is It Worth Getting a Professional Gait Analysis? Yes, a gait analysis is mandatory, especially for new runners. A professional at a specialty running store can observe you run on a treadmill to analyze your foot strike and pronation. This helps them recommend the correct shoe category (neutral, stability, motion control) for your biomechanics, saving you guesswork and potential injury. Why Are Quality Running Shoes Expensive? The price reflects the extensive research, technology, and engineering in each pair. You are paying for high performance foams that balance cushioning and energy return, durable rubber outsoles for grip, and engineered uppers for a breathable, secure fit. Think of it as an investment in your health, performance, and injury prevention. And after you crush your goals, you can find the best medal display and race bib holders to celebrate your achievements. At Flourish-Everyday.com , we are your trusted resource for shoe recommendations and expert health guidance. Visit us online to explore our guides, discounts, and find the gear that will empower your wellness journey. References Nigg, B. M., Baltich, J., Hoerzer, S., & Enders, H. (2015). Running shoes and running injuries: myth busting and a proposal for two new paradigms: 'preferred movement path' and 'comfort filter'. British Journal of Sports Medicine , 49 (20), 1290–1294. https://doi.org/10.1136/bjsports-2015-095054
- Running Shoes for Flat Feet: Top Picks for Stability and Comfort
If you have flat feet, finding the right running shoe isn't just a good idea, it's nonnegotiable. Runners with fallen arches often experience overpronation, where the foot rolls inward with each step. The best shoes to counteract this are typically stability or motion control models. Running shoes for flat feet are engineered with the specific support you need: firm arch support, a solid midsole, and a structured heel. This combination helps align your stride, takes the stress off your joints, and can be a essential in preventing common running injuries. In This Guide Understanding Flat Feet & Overpronation Essential Shoe Features for Support Top Shoe Reviews for Men & Women Health Info: Orthotics and Strength Training Well-Being Trends: Shoe Replacement & Minimalist Running Questions About Running with Flat Feet Answered The Growing Market for Supportive Footwear The shoe industry is paying attention to foot health, leading to serious innovation in supportive footwear. This means more and better options for runners with flat feet. The global market for orthopedic footwear, which includes specialized shoes for flat feet, was valued at USD 5.11 billion in 2025 and is expected to blow past USD 13.5 billion by 2035. This growth is driven by consumer demand for shoes with better stability, shock absorption, and proper weight distribution, all critical for running with flat feet. The right pair of running shoes does more than just cushion your steps; it corrects biomechanical imbalances, turning potential pain into powerful performance. For a flat footed runner, this isn't a luxury, it's the foundation of every successful run. Choosing the right shoe is an investment in your long term running health. And remember, the features are only half the battle; the fit is just as crucial. For a deeper dive, check out our runner's guide to proper running shoe fit . Bluebird Botanicals How Flat Feet Mess With Your Running Form To understand why the right running shoes for flat feet are essential, you must know what's happening to your body with each stride. Your foot's arch is your body's natural suspension system, designed to absorb shock. With flat feet, or "fallen arches," this system collapses inward and cannot absorb impact effectively. That force travels up your body's kinetic chain. This chain reaction sends stress through your ankles, shins, knees, and even your hips and lower back. Over thousands of steps, this unmanaged impact is a common cause of running injuries. The Problem of Overpronation A collapsed arch leads to a biomechanical issue called overpronation. While some pronation (the natural inward roll of the foot) is normal and helps absorb shock, overpronation is an excessive inward roll. This throws your entire running form out of alignment. A tell tale sign is the inner edge of your old running shoe soles being more worn down than the outer edge. Overpronation isn't just a foot problem; it's a full body alignment issue that starts from the ground up. Using the right footwear to correct it is the first and most important step to protecting your joints and staying on the road pain free. This constant inward collapse forces your lower leg to rotate internally, putting abnormal stress on your shinbone and knee joint, leading directly to nagging running injuries. From Bad Form to Nagging Injuries This mechanical imbalance creates a direct path to injury. Your body tries to compensate for the lack of stability, overloading muscles and tendons not designed for that workload. This leads to problems common for runners with flat feet: Plantar Fasciitis: Strain on the plantar fascia ligament causes sharp heel pain. Shin Splints: Excessive inward rotation of the shin bone overstresses lower leg muscles. Achilles Tendinitis: Overpronation can twist and stretch the Achilles tendon, causing inflammation. Runner's Knee: Misalignment travels to the knee, causing the kneecap to track improperly and resulting in pain. Understanding this chain reaction makes it clear why features like "stability" and "motion control" are engineered solutions to provide missing support, straighten your stride, and protect your body. Decoding Shoe Features For Maximum Support Now that you understand the effects of flat feet, let's focus on the solution. Finding the right running shoe is about identifying the specific technology built to combat overpronation. The two main shoe types are stability (for mild to moderate overpronation) and motion control (for severe overpronation). This concept map illustrates the link between flat feet, overpronation, and potential injuries, highlighting how the right shoe can break the cycle. The key is to address the lack of arch support with the right shoe to prevent pain. Core Components For Arch Support And Stability When selecting a shoe, analyze its construction. Several key parts work together to create a supportive base that guides your foot and absorbs shock correctly. Here are the nonnegotiable features: Firm Midsoles: A soft midsole will collapse under a flat footed runner's weight. You need a firm, dense midsole that resists compression and supports the arch. Medial Posts: This is a section of firmer foam on the inside edge of the midsole. It acts as a guardrail, slowing the inward roll of your foot and promoting a more neutral stride. Robust Heel Counters: The stiff cup wrapping your heel is crucial. It locks the heel in place, preventing wobble and providing rear foot stability. A shoe's ability to control motion is directly tied to the firmness and strategic placement of its support structures. It’s less about propping up the arch and more about guiding the entire foot through a healthier, more aligned gait cycle from landing to toe-off. Essential Shoe Features for Flat Feet at a Glance This quick reference table helps you remember what to look for. Shoe Feature What It Does Who Needs It Most Stability Features Provides moderate support using guide rails or medial posts to gently correct overpronation. Runners with mild to moderate flexible flat feet. Motion Control Offers maximum rigidity with firm posts and a straight last to severely limit excess foot motion. Runners with severe overpronation or rigid flat feet. Firm Midsole Resists compression under the arch, preventing it from collapsing during the stride. Virtually all runners with flat feet. Structured Heel Counter A rigid cup that locks the heel in place to prevent lateral wobble and improve stability. Anyone whose heel feels unstable or slips in their shoe. Wide Toe Box Allows the toes to spread out naturally, which improves balance and reduces pressure on the forefoot. Runners who experience cramped toes or bunions. Understanding the overall shoe geometry is also important. A wide toe box allows your toes to splay, improving balance. For more on these technologies, consult our guide to running shoe stability . Top Running Shoes for Men and Women with Flat Feet Let's apply this knowledge to actual shoes. A few key brands, like Brooks , Hoka , and ASICS, consistently deliver the stability and support needed to manage overpronation. The market reflects this need. According to Running Insight , adult running shoe sales grew by 8% through August 2025, showing that runners are investing in quality gear that addresses their specific needs. Top Stability Running Shoes for Men Men with flat feet need shoes that blend solid support with durable cushioning. These models provide structure to guide the foot into a more natural alignment. Brooks Adrenaline GTS 23 Best For: Daily training and runners wanting a mix of cushioning and reliable support. Key Technology: The GuideRails® system acts like bumpers, gently keeping your feet, knees, and hips in their natural motion path. Why It Works: It provides holistic support without feeling restrictive, making it ideal for mild to moderate overpronation. ASICS Gel-Kayano 30 Best For: Long distance running and maximum protection. Key Technology: Its 4D GUIDANCE SYSTEM™ adapts to your stride, providing stability when your form falters. This is combined with soft FF BLAST™ PLUS ECO foam for superior shock absorption. Why It Works: It offers unwavering support and plush comfort, making it a trusted choice for marathon training. The best stability shoe for a man with flat feet should feel like a natural part of your body, supportive, but not in your face about it. The goal is to control excess motion without making you run in a way that feels unnatural. Top Stability Running Shoes for Women Women's shoes are often built on a different last to better match female anatomy. These picks deliver high level support tailored for a woman's foot. Hoka Gaviota 5 Best For: Runners seeking maximum cushioning or significant stability. Key Technology: Hoka's H-Frame™ is a softer foam frame that cradles and stabilizes the foot, combined with plush cushioning for a forgiving ride. Why It Works: An excellent option for women with significant overpronation or those returning from injury, it offers a supremely cushioned and stable platform. Saucony Guide 16 Best For: All around daily training with support that doesn't feel heavy. Key Technology: The HOLLOW TECH guidance frame provides underfoot support in a lightweight package for a smoother ride. Why It Works: It hits a sweet spot: supportive enough for flat feet but light and responsive enough for faster paced days. A great versatile option. Comparison of Top Picks for Flat Feet Here’s a quick side-by-side comparison to help you decide. Shoe Model Support Level Best Use Case Key Feature Brooks Adrenaline GTS 23 Moderate Daily Training GuideRails® System ASICS Gel-Kayano 30 High Long Distance 4D GUIDANCE SYSTEM™ Hoka Gaviota 5 Maximum Recovery/Max Cushion H-Frame™ Technology Saucony Guide 16 Moderate Versatile Training HOLLOW-TECH Frame This list is a starting point. The best choice depends on your personal overpronation level, cushion preference, and running habits. When to Consider Orthotics and Shoe Insoles Sometimes, even the best running shoes aren't enough. Orthotics and insoles can fine tune your shoe's support. If you still have pain after switching to a good stability shoe, it may be time to consider this partnership. Insoles can provide more precise arch support, add cushioning, and boost your shoe's corrective power. Over-the-Counter vs. Custom Orthotics Over-the-Counter (OTC) Insoles: These pre-made inserts are a great starting point for runners with mild to moderate flat feet needing extra arch support or cushioning. They are affordable and accessible. Custom Orthotics: Prescribed by a podiatrist and molded to your feet, these are medical devices for correcting significant biomechanical issues, severe overpronation, or persistent injuries. "An orthotic insert personalizes your shoe. It fills the specific gaps in support that your unique arch needs, turning a good stability shoe into a great one by creating a more customized fit and function." If you have persistent aches despite good shoes, insoles might be the next step. The demand for them is growing; the global shoe insoles market is projected to reach USD 9.69 billion by 2033, as noted in market research. You can read the full research on shoe insole market trends to learn more. For many, an OTC insert is sufficient, but for stubborn pain, a custom orthotic could be key to pain free running. Building Strength for Injury-Free Running While the right running shoes for flat feet are crucial, they are only one part of the solution. Building your body's own internal support system through strength training is your best defense against injury. Strengthening the muscles in your feet, ankles, and legs naturally stabilizes your stride and can improve your biomechanics over time. Foundational Foot and Ankle Exercises Your feet contain a network of muscles that act as natural arch supports. Simple exercises can make a huge difference. Towel Curls: Sit and use your toes to scrunch a towel toward you, strengthening the intrinsic muscles under your foot. Calf Raises: Stand on a step, lower your heels, then press up onto the balls of your feet to build power in your calves and Achilles tendon. Arch Lifts: While standing, lift your foot's arch without curling your toes to activate the muscles that support it. These exercises target areas weakened by flat feet and can help prevent issues like plantar fasciitis. The most supportive shoe in the world can't fully compensate for weak muscles. True injury prevention for runners with flat feet comes from combining smart footwear choices with consistent strength and conditioning work. The Bigger Picture of Body Mechanics For a full body approach to injury prevention, consider a structured program like a beginner gym routine for women . Pay attention to your running form, such as landing on your midfoot and increasing your cadence. A strong core is also essential for stability. You can find exercises in this guide to 5 essential core strengthening exercises for runners . Finally, listen to your body and avoid overtraining. Pairing supportive shoes with a strong body is the most effective combination for a long and healthy running journey. Your Questions About Running with Flat Feet Answered Let's address some final common questions to ensure you feel confident in your choices. Can I Run in Neutral Shoes If I Have Flat Feet? For most runners with flat feet, this is not recommended. Neutral shoes lack the medial support needed to prevent the arch from collapsing inward. This can lead to overuse injuries like shin splints, knee pain, or plantar fasciitis. Sticking with stability or motion control shoes is the safest and most effective strategy. How Often Should I Replace My Running Shoes? The general guideline is every 300-500 miles . For runners with flat feet, this is more of a suggestion. You rely heavily on the shoe's midsole for support, and once that foam breaks down, the shoe loses its effectiveness. The best indicator is your body; if old aches and pains return, it's likely time for a new pair, even if they look fine externally. Are Minimalist or Barefoot Shoes a Good Option? Minimalist shoes are a risky choice for the vast majority of runners with flat feet. They offer little to no arch support or cushioning, which can amplify stress on your joints. While some argue they can strengthen foot muscles, the transition requires a very slow, careful approach, ideally with professional guidance. For most, a supportive stability shoe is a much safer option for daily training. At Flourish-Everyday , our passion is helping you find the perfect gear for your fitness journey. We believe the right equipment can empower you to live a healthier, happier life, one step at a time. Be sure to explore our other recommendations and health guides at https://www.flourish-everyday.com .
- How to Improve VO2 max: A Practical Guide
Improving your VO2 max requires getting comfortable with being uncomfortable. This means incorporating high intensity training that pushes your heart rate to 80-95% of its maximum . The most effective methods are structured workouts like High Intensity Interval Training (HIIT), tempo runs, and long, steady state cardio sessions. These workouts signal your heart, lungs, and muscles to adapt and become more efficient at using oxygen. Table of Contents What Is VO2 Max and Why Does It Matter Core Training Strategies to Boost Your VO2 Max Supporting Habits That Amplify Your Training Finding the Right Shoes for Your Workouts How to Track Progress and Adjust Your Plan Your Top Questions About Improving VO2 Max References What Is VO2 Max and Why Does It Matter Before diving into workouts, let's define VO2 max. Think of it as the horsepower rating for your body's aerobic engine. Technically, it’s the maximum volume of oxygen (in milliliters) you can consume per minute per kilogram of body weight during maximal exertion. A higher VO2 max is optimal for performance. It allows you to sustain a faster pace for longer because your body is better at delivering oxygen rich blood to your working muscles. This benefits everyone, from elite athletes to individuals wanting more energy for daily activities. Understanding Your Starting Point You can't improve what you don't measure. The first step is determining your current VO2 max. This baseline helps you set realistic goals and track progress. There are several ways to measure your aerobic fitness: Laboratory Testing: The gold standard. It involves running on a treadmill with a mask that analyzes your oxygen intake and carbon dioxide output. Field Tests: The Cooper 12-minute run provides a good estimate. Run as far as you can in 12 minutes, then use a formula to estimate your VO2 max. Wearable Technology: Most modern GPS watches and fitness trackers estimate VO2 max using your heart rate data. While not as precise as lab tests, they are excellent for tracking trends. A strong VO2 max is a key component of overall cardiovascular health. It reflects the efficiency of your entire cardiorespiratory system, from your lungs to your heart and circulatory network. How Much Improvement Is Possible Genetics play a role in your aerobic potential, but consistent training can lead to significant gains. The well known HERITAGE Family Study found that participants improved their VO2 max by an average of about 20 percent after a 20-week training program, though individual responses varied. Your VO2 max is a dynamic number reflecting your current fitness. To learn more about the benefits, read our guide on what cardiovascular fitness is and why it matters . Core Training Strategies to Boost Your VO2 Max With your baseline established, it's time to train. Improving your VO2 max is about targeted training that makes your heart and lungs more efficient. You need to spend time above 90% of your maximum heart rate . This high intensity signals your body to adapt, causing your heart to pump more blood per beat and your muscles to extract oxygen more effectively. Bluebird Botanicals The Power of High Intensity Interval Training High Intensity Interval Training (HIIT) is a powerful tool for boosting VO2 max. It involves short, all out efforts followed by brief recovery periods, allowing you to spend more total time at high intensity. A classic running HIIT workout: Warm-up: 10-15 minutes of easy jogging. Main Set: 4 repetitions of 4-minute runs at high intensity, followed by 3 minutes of active recovery (slow walk or jog). Cool-down: 10-15 minutes of easy jogging. This "4x4" protocol is supported by research. The key is pushing hard enough during the intervals to elevate your heart rate and breathing. For more ideas, see our list of 10 interval running workouts to supercharge your speed . Building Strength with Tempo Runs Tempo runs involve sustaining a "comfortably hard" pace, an effort you could hold for about an hour. This type of workout improves your lactate threshold, the point where lactic acid accumulates faster than it can be cleared. A higher threshold allows you to run faster for longer before fatigue sets in. A simple tempo workout: Warm-up: 10 minutes, easy pace. Tempo Portion: 20-30 minutes at a 7 out of 10 effort. Cool-down: 10 minutes of easy jogging. The Foundation of Long Slow Distance Long Slow Distance (LSD) runs are the foundation of endurance. Performed at a conversational pace, these runs focus on time on your feet rather than speed. They trigger adaptations that shorter workouts cannot. LSD runs improve fuel efficiency by enhancing fat utilization, increasing mitochondrial density, and strengthening the heart muscle, all critical for a high VO2 max. Sample Weekly Training Split to Improve VO2 Max Day Beginner Plan Intermediate Plan Advanced Plan Monday Rest or Active Recovery Rest or Active Recovery Active Recovery (easy 20-30 min run) Tuesday HIIT: 4x2 min hard, 2 min easy HIIT: 4x4 min hard, 3 min easy HIIT: 5-6x4 min hard, 3 min easy Wednesday Easy Run (30-40 min) Easy Run (40-50 min) Easy Run (50-60 min) Thursday Tempo: 15 min at tempo pace Tempo: 25 min at tempo pace Tempo: 2x15 min at tempo pace Friday Rest Rest or light cross-train Easy Run (30-40 min) Saturday LSD Run: 45-60 min easy LSD Run: 60-75 min easy LSD Run: 75-90+ min easy Sunday Rest or Active Recovery Easy Run or Cross-Train Rest or Active Recovery Supporting Habits That Amplify Your Training The real VO2 max improvements happen during recovery. Supporting habits like cross-training, strength work, nutrition, and rest are crucial for maximizing your training adaptations. Strategic Cross-Training for Aerobic Depth Cross-training with activities like swimming, cycling, or rowing builds your aerobic base without the high impact stress of daily running. This helps prevent burnout and overuse injuries. Cycling: Builds leg strength and cardiovascular endurance with zero impact. Swimming: A full body workout that improves lung capacity and core strength. Rowing: A low impact option engaging over 85% of your body's muscles . Building a Resilient Engine with Strength Training Strength training improves running economy, how efficiently your body uses oxygen at a given pace. Stronger muscles mean each stride requires less energy, allowing you to run faster and longer. Focus on compound movements. Strength training builds durability by strengthening the muscles and connective tissues around your joints, creating a more resilient frame. Essential Strength Movements: Squats: Build powerful quads, glutes, and hamstrings. Deadlifts: Develop strength through your entire posterior chain. Lunges: Improve single leg stability and balance. Planks: A strong core is the foundation for efficient running form. Fueling and Recovery: The Final Pieces of the Puzzle Your body can only adapt to the training you recover from. Proper nutrition provides the energy to perform and the materials to rebuild. Use tools to determine your optimal protein intake and adjust your diet to your training load. Prioritize 7-9 hours of quality sleep per night. During deep sleep, your body releases human growth hormone, which is critical for muscle repair and adaptation. These habits are essential for translating your hard work into a higher VO2 max. Finding the Right Shoes for Your Workouts The right gear is a tool that helps you stay consistent, perform better, and avoid injuries. When pushing your limits, your shoes can make or break a training cycle. Building a small rotation of shoes, each designed for a specific type of workout, is more effective than using a single do-it-all trainer. Shoes for Intense Interval Days For HIIT sessions and track repeats, you need a shoe that is fast, light, and responsive. Look for lightweight construction, responsive midsole foam (like Pebax), and a lower heel-to-toe drop ( 0-8mm ) to promote a midfoot strike. For women, some brands offer gender specific fits that account for differences in foot shape, such as a narrower heel. Always check for a women's specific model for better comfort and performance. Long Run and Recovery Day Champions For long, slow distance runs and recovery days, the goal is comfort and protection. These workhorse shoes should feature maximum cushioning, a stable and supportive fit, and a durable outsole to handle high mileage. Top Athletic Shoe Recommendations for VO2 Max Training Navigating the shoe market can be overwhelming. This table highlights well regarded models that fit different training needs. Shoe Model Best For Key Features Gender Focus Saucony Endorphin Speed Interval & Tempo Runs Responsive PWRRUN PB foam, nylon plate for propulsion. Men's and women's specific fits available. Hoka Clifton Long & Easy Runs Maximalist cushioning, smooth rocker geometry. Popular with both men and women. Nike Metcon Cross-Training & Lifting Wide, stable heel; flexible forefoot; durable upper. Tailored men's and women's versions. Brooks Ghost Daily Training & Recovery Balanced DNA LOFT cushioning, smooth and durable. A go-to for male and female runners. Adidas Adizero Adios Pro Race Day & Key Workouts Aggressive rocker, Lightstrike Pro foam, carbon-infused rods. High performance unisex and specific models. How to Track Progress and Adjust Your Plan Improving fitness requires smart adaptation. Your training plan should be a dynamic guide that evolves with you. Listening to your body and analyzing data is key to making sustainable progress and avoiding plateaus or injury. Interpreting Your Fitness Data Modern smartwatches provide a wealth of data. Focus on long term trends rather than daily fluctuations. Key metrics to watch: VO2 Max Estimate: Look for a slow, steady upward trend over several weeks. Resting Heart Rate (RHR): A dropping RHR over time is a classic sign of improving aerobic fitness. Heart Rate Variability (HRV): A higher HRV generally indicates good recovery. Pace at a Given Heart Rate: Running faster at the same heart rate is a clear sign your aerobic engine is improving. Applying Progressive Overload Intelligently Progressive overload is the principle of gradually increasing the demands on your body. You can do this by increasing intensity, duration, or frequency. The biggest mistake is increasing everything at once. Focus on one variable for a few weeks, let your body adapt, then adjust another. This methodical approach is key to consistent, injury-free gains. Listening to Your Body and Adjusting Data is a tool, but subjective feelings are just as critical. On days when your watch gives a green light but your body feels fatigued, it's wise to take it easy. Learning to auto regulate is a vital skill. Swapping a hard workout for a recovery day is a smart, strategic move for long term progress. To understand your effort levels, learn how to calculate target heart rate for workouts . Your Top Questions About Improving VO2 Max Here are answers to common questions about improving VO2 max. How Long Does Improvement Take? Most people see a noticeable difference in their VO2 max within 4 to 12 weeks of consistent, structured training. Initial gains can be significant, especially for beginners. While studies show an average increase of about 20% over 20 weeks , your personal timeline depends on your starting point, genetics, and consistency. Do I Need a Lab Test? A laboratory test provides the most precise VO2 max number, but it is not necessary for tracking progress. The trend is more important than the exact number. Seeing your watch's estimate climb from 42 to 45 over a few months is a clear indicator that your training is effective. Field tests like the Cooper 12-minute run and wearable technology are sufficient for most individuals. Can I Just Walk or Lift Weights? While beneficial for overall health, walking and strength training are not the most direct methods for improving VO2 max. The key is pushing your heart rate into high training zones ( 80-95% of your max ). Activities like running, cycling, rowing, and HIIT are most effective because they directly challenge your cardiorespiratory system to deliver more oxygen. References Bouchard, C., et al. (1999). "Familial aggregation of VO2max response to exercise training: results from the HERITAGE Family Study." Journal of Applied Physiology , 87(3), 1003-1008. Helgerud, J., et al. (2007). "Aerobic high-intensity intervals improve VO2max more than moderate training." Medicine & Science in Sports & Exercise , 39(4), 665-671. Jones, A. M., & Carter, H. (2000). "The effect of endurance training on parameters of aerobic fitness." Sports Medicine , 29(6), 373-386. Here at Flourish-Everyday , we know that having the right gear and knowledge makes all the difference in hitting your fitness goals. From in-depth shoe reviews to training advice backed by science, we give you the tools you need for your journey. Check out all our resources at https://www.flourish-everyday.com and take the next step toward a stronger, healthier you.