Flourish-Everyday
Search Results
310 results found with an empty search
- Wellness Warriors: A Journey to Holistic Fitness
Welcome, Wellness Warriors, to a transformative journey towards holistic fitness. Today, we embark on a path that integrates mind, body, and soul to achieve optimal well-being. Let's explore the realm of holistic fitness and discover how it can revolutionize your approach to health and wellness. We will go through10 steps that will help you on your fitness journey. Yoga Mats Step 1: Aligning Mind, Body, and Soul At the core of holistic fitness lies the belief that true wellness encompasses more than just physical health. It recognizes the interconnectedness of our mental, emotional, and spiritual selves. By aligning these elements, we create a harmonious foundation for overall well-being. Step 2: Nourishing Your Body Fueling your body with wholesome nutrition is key to achieving holistic fitness. Embrace a diet rich in whole foods, vibrant fruits and vegetables, and nourishing superfoods. Remember, food is not just fuel, it is medicine for the body and soul. Step 3: Moving with Purpose Exercise is not just about burning calories; it's about moving with intention and joy. Find activities that resonate with your soul, whether it's yoga, dance, hiking, or strength training. The key is to move your body in a way that brings you joy and enhances your overall well-being. Thick 1/2" Exercise Yoga Mat with Carrying Strap Step 4: Cultivating Mindfulness In the hustle and bustle of daily life, it's essential to take moments of stillness to cultivate mindfulness. Whether through meditation, deep breathing, or mindful movement practices, mindfulness helps us connect with the present moment and relieve stress. Step 5: Embracing Self-Care Self-care is a vital component of holistic fitness. Take time to prioritize self-care activities that nourish your mind, body, and soul. Whether it's a warm bath, a nature walk, or journaling, self-care rituals rejuvenate your spirit and enhance your well-being. Step 6: Connecting with Nature Nature has a profound healing power that can enhance our holistic fitness journey. Spend time outdoors, breathe in the fresh air, soak up the sunlight, and connect with the natural world around you. Nature is a powerful ally in nurturing our well-being. Step 7: Cultivating Gratitude Gratitude is a transformative practice that can shift our perspective and elevate our well-being. Take time each day to reflect on the blessings in your life, big or small. Cultivating gratitude fosters a positive mindset and enhances our overall wellness. Step 8: Seeking Balance Achieving holistic fitness is about finding balance in all aspects of your life. Strive for harmony between work and play, rest and activity, solitude, and social connection. Balance is the key to sustainable well-being. Step 9: Celebrating Progress Celebrate each milestone on your holistic fitness journey. Whether it's mastering a new yoga pose, trying a new recipe, or embracing a self routine, every step forward is worth celebrating. Acknowledge your progress and be proud of how far you've come. Step 10: Embracing the Health Warrior Within As you embrace the path of holistic fitness, remember that you are a Health Warrior, strong, resilient, and committed to your well being. Trust in your inner strength and harness the power of holistic fitness to nurture a healthier, more vibrant you. In conclusion, Wellness Warriors, your journey to holistic fitness is a potent catalyst for transformation and growth. By aligning mind, body, and soul, nourishing your body, cultivating mindfulness, and embracing self-care, you pave the way for lasting well-being. Let holistic fitness be your guiding light towards a healthier, happier, and more vibrant life! Let's embark on this journey together. Are you ready to flourish with holistic fitness?
- How to Start a Running Routine: Weekly Beginner Tips for Success
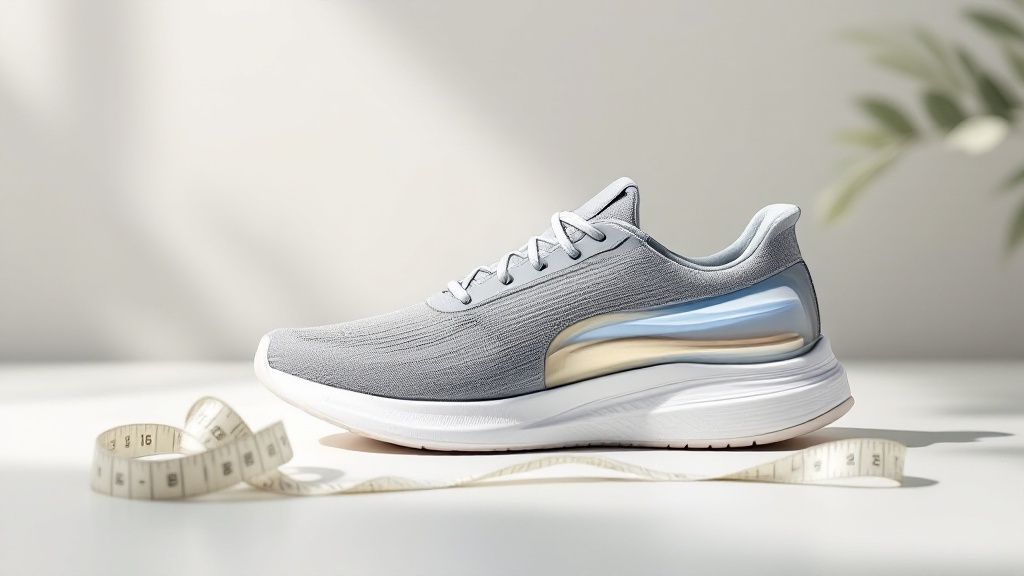
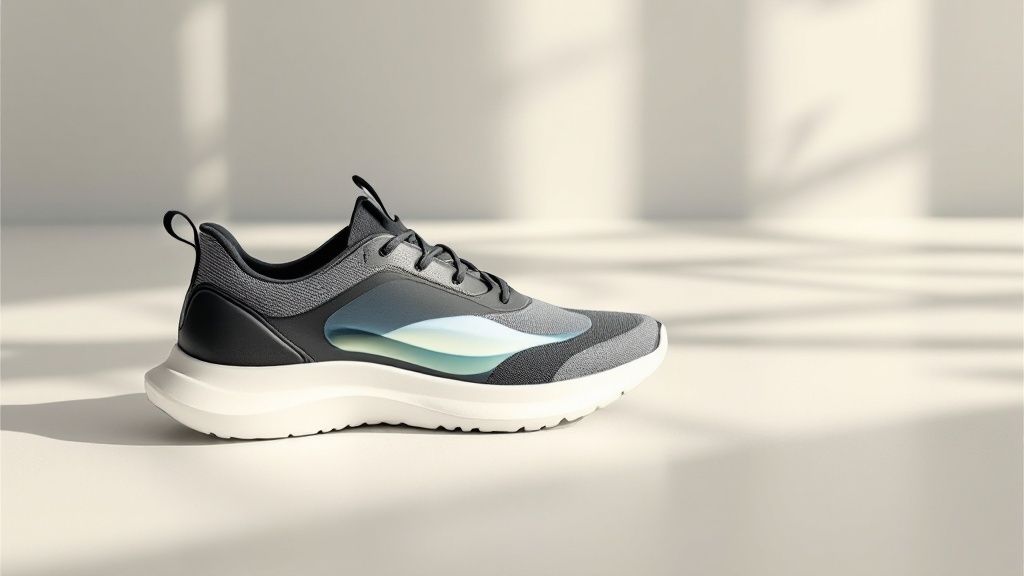
So you want to start running? Fantastic. It's easy to get overwhelmed by all the advice out there, but let's boil it down. Really, all you need are four things: gear that feels good, a smart plan that eases you in (like the run-walk method), a solid warm-up, and the willingness to just keep showing up which can be the hardest part. The whole secret is to focus on progress, not perfection. Once you get that, running stops feeling like a chore and starts becoming a part of your life you actually look forward to. This guide is your roadmap. We’ll cover everything you need to build a running habit that sticks, all by focusing on consistency over crazy intensity. We're talking gear, schedules, injury prevention, and how to celebrate the small wins along the way. Article Index Starting Your Journey From Walker to Runner Choosing the Right Running Gear and Shoes Your First Realistic Running Plan How to Run Without Getting Injured Staying Motivated for the Long Run Got Questions? Every New Runner Does. References Starting Your Journey From Walker to Runner Making that leap from walking to running can feel like a huge hurdle, but it’s really just a series of small, confident steps. Forget the "all or nothing" pressure. The biggest mental shift is moving from "I have to run" to "I get to run." Think of each outing as an opportunity for yourself, not an obligation you have to check off a list. Honestly, the hardest part is just getting out the door. Research even backs this up, suggesting that simple cues—like putting on a motivational playlist right before you plan to head out—can make a huge difference in actually lacing up and going. Setting Yourself Up for a Successful First Week A great start has very little to do with how fast you are and everything to do with being prepared. When you have the basics sorted out, you remove all the little excuses and friction points that can derail you. It just makes the whole experience more enjoyable. In fact, one study found that new runners who simply felt comfortable in their gear were way more likely to stick with it long-term. Think of the following checklist as your game plan for a confident and successful first week. It’s all about getting these core pieces in place so you can just focus on moving. Your First Week Running Checklist A quick-glance table to ensure you have the core components ready before you hit the pavement, setting you up for a successful start. Component Your Key Action Why It Matters for Beginners Proper Footwear Get fitted for running shoes that match your foot type and gait. This is your #1 defense against common injuries like shin splints and knee pain. Comfortable Apparel Choose moisture-wicking clothes that prevent chafing and overheating. Feeling comfortable helps you focus on your form and enjoy the experience. A Simple Plan Decide on 3 non-consecutive days for a 20-30 minute run/walk. Consistency builds the habit, and rest days allow your body to adapt and get stronger. A Safe Route Plan a flat, well lit, and low traffic route for your first few runs. A pleasant environment makes running more enjoyable and keeps your focus on your body, not obstacles. With these four things checked off, you’re not just ready to run, you’re ready to succeed. It's about setting the stage for a positive experience right from the very first step. Choosing the Right Running Gear and Shoes While running has a wonderfully low barrier to entry, there's one area you just can't skimp on: your shoes. Trying to run in your old, beat-up sneakers is a fast track to pain and injury. Seriously, investing in a solid pair of running shoes is the single most important thing you can do to make your new habit stick. Beyond your feet, the right clothes make a huge difference. You don't need a fancy, expensive wardrobe, but you do need to choose the right fabrics. Look for moisture-wicking materials that pull sweat away from your skin. This simple choice helps prevent nasty chafing and keeps you comfortable, whether it’s a hot day or a cool morning. The right gear does more than just prevent blisters; it helps you feel like a runner. Studies have found that when beginners feel comfortable and capable in their apparel, they are more likely to identify as a 'runner' and stick with the habit long-term. Demystifying Running Shoe Terminology Walking into a specialty running store can feel like landing on another planet. You'll hear words like "pronation" and "gait" thrown around, but don't let it intimidate you. Let's break it down. Pronation is just the natural way your foot rolls inward when you land. Figuring out your pronation is the key to finding a shoe that gives you the right support where you need it. Neutral Pronation: Your foot rolls inward just the right amount to absorb shock effectively. Most runners are in this camp and do great with neutral shoes . Overpronation: Your foot rolls inward a little too much, which can create instability. If this is you, stability shoes with more structured support will likely be your best friend. Supination (Underpronation): The opposite of overpronation—your foot doesn't roll inward enough. This means the impact is concentrated on the outer edge. Supinators usually need a neutral shoe with a ton of cushioning . The absolute best way to know for sure is to get a gait analysis at a running store. An expert will watch you run for a few seconds and can immediately recommend the right shoe category for your unique biomechanics. It's a game changer. For a deeper dive into this, check out our ultimate guide to running shoes for beginners . Top Athletic Shoe Picks for Men and Women Finding "the one" is a personal journey, but some shoes are popular for a reason, they consistently deliver comfort, durability, and a great running experience. You will see these same running shoes in many articles, because they have been tried and tested by marathoners through gym goers. Based on tons of user reviews and expert feedback, here are a few standouts that work for different types of runners. Brand & Model Best For Key Feature Brooks Ghost Neutral Runners A true workhorse known for its balanced cushioning and buttery-smooth ride. Perfect for daily runs. Hoka Clifton Maximum Cushioning Feels like running on clouds. It’s ideal if you want a plush, lightweight shoe that soaks up impact. Asics GEL-Kayano Overpronators A legendary stability shoe that offers incredible support and structure to help guide your foot. New Balance Fresh Foam 880 Versatility A durable, do-it-all neutral trainer that provides a reliable and comfy experience for any kind of run. Remember, the best shoe on paper means nothing if it doesn't feel good on your foot. Always try them on before you buy. A good tip is to go shoe shopping at the end of the day when your feet are a bit swollen, and make sure to wear the same type of socks you run in. Why Quality Socks and Apparel Matter It’s so easy to grab any old pair of cotton socks, but please don't. Cotton is a runner’s enemy; it soaks up moisture and is a one-way ticket to blister city. Instead, look for socks made from synthetic blends or merino wool. They’re designed specifically for running, with extra cushioning in high-impact spots and, most importantly, they wick sweat away to keep your feet dry and happy. The same logic applies to your clothes. Technical fabrics that are lightweight and breathable will keep you from feeling weighed down and swampy. In cooler weather, layering with these same moisture-wicking pieces lets you strip off a layer as you warm up. When you're comfortable, you can stop thinking about your gear and just focus on the simple joy of the run. Your First Realistic Running Plan Let's be real: the secret to making running a habit isn't about magically finding more hours in the day. It’s about having a plan that works with the life you already have. A super rigid, unforgiving schedule is just setting yourself up for failure. What you need is a flexible approach that builds momentum and actually keeps you excited to lace up your shoes. The most proven way to get started is the run-walk method. This approach is fantastic. It safely builds your endurance without the burnout or injury that happens when you try to do too much, too soon. It’s all about easing your body into the demands of running, which makes the whole thing a lot more enjoyable. Think of it like getting fitted for new shoes—your plan needs to fit you . This infographic breaks it down visually. Just like the right shoes prevent blisters, a plan tailored to your current fitness level is what keeps you from getting sidelined by strain. Your 8-Week Run-Walk Schedule This plan is built around three workouts a week. Schedule them on non-consecutive days—like Monday, Wednesday, and Friday—to give your body the downtime it needs to recover and get stronger. Before every session, start with a 5-minute brisk walk to warm up. When you're done, finish with a 5-minute cool-down walk. The main part of each workout involves alternating between running and walking intervals. Week 1: Run 1 minute, walk 2 minutes. Repeat 7 times. Week 2: Run 2 minutes, walk 2 minutes. Repeat 6 times. Week 3: Run 3 minutes, walk 2 minutes. Repeat 5 times. Week 4: Run 5 minutes, walk 2 minutes. Repeat 4 times. This isn't about perfectly hitting every interval. It's a gradual progression designed to build your cardio fitness and muscle strength without overwhelming your system. The real goal is to listen to your body and feel good after every workout. As you head into the second month, you’ll really start to see your progress as the running chunks get longer. Week 5: Run 7 minutes, walk 2 minutes. Repeat 3 times. Week 6: Run 9 minutes, walk 1 minute. Repeat 3 times. Week 7: Run 12 minutes, walk 1 minute. Repeat 2 times. Week 8: Run for 25 minutes straight. Listening To Your Body Is Key Treat this schedule as a guide, not a set of strict rules. Life happens. Some days you'll feel tired, get stuck at work, or just won't be feeling it. On those days, it's so much better to adjust than to skip entirely. Maybe you repeat a week. Maybe you shorten the workout or just add an extra walk interval. Success here is about consistency, not perfection. Seeing measurable progress is a huge motivator. It’s what keeps you going. Just look at the data from fitness platforms like Strava . A recent analysis showed that 66% of runners and cyclists set a new personal best, and 42% hit a personal record for a race distance like a 5K or 10K (Runner's World, 2025). This stuff provides powerful positive reinforcement. How to Run Without Getting Injured Starting a running routine is an exciting time, but nothing grinds that momentum to a halt faster than an injury. Building a resilient body is just as important as building your endurance. This means paying attention to how you prepare, how you recover, and how you support your body on your off days. The good news is that most common running injuries are totally preventable. With a few simple habits, you can keep your body healthy and enjoy running for years to come. Think of it as your body’s insurance policy against the physical stress of your new routine. The Power of Smart Warm-Ups and Cool-Downs The first step in fending off injuries happens before you even take your first stride. A proper warm-up is non-negotiable; it gets the blood flowing and prepares your muscles for the work ahead. Forget that old school advice about holding static stretches, before a run, you need dynamic movements. These are active stretches that take your joints and muscles through their full range of motion. Leg Swings (Forward and Sideways): Stand next to a wall for support. Swing one leg forward and backward 10 times, then side to side 10 times. Switch legs and repeat. High Knees: March in place, bringing your knees up toward your chest. Butt Kicks: Jog lightly in place, kicking your heels up toward your glutes. After your run, a cool down is equally crucial. This is where static stretching, which involves holding a stretch for 20-30 seconds , becomes relevant. It helps improve flexibility and kickstarts muscle recovery. Focus on the big players: your hamstrings, quads, calves, and hip flexors. For a more detailed guide, check out our top tips for safe running and injury prevention . Beyond Stretching: Fueling and Strengthening Your Body Injury prevention isn't just about what you do right before and after a run. Your overall wellness habits play a massive role in keeping you healthy. Proper hydration and nutrition are the foundation, giving your body the fuel it needs to perform and repair itself. On top of that, weaving cross-training and strength work into your weekly routine can make you a much stronger, more resilient runner. You don't have to become a bodybuilder. Simple strength exercises build the support muscles that running alone doesn't target. This creates a more balanced and stable physique, which is key to avoiding common overuse injuries like runner's knee. Think of it this way: running is a high impact, repetitive motion. Building strength and mixing in other activities protects your body from that constant stress. Comparison of Wellness Methods for Runners A well-rounded routine is your best defense against getting sidelined. Here’s a quick look at key wellness activities that support your running goals. Wellness Method How It Supports Your Running Example Activities Cross-Training Builds cardiovascular fitness without the high impact of running, giving your joints a break. Swimming, cycling, or using an elliptical machine. Strength Training Strengthens key running muscles (glutes, core, quads) to improve form, power, and stability. Squats, lunges, planks, and glute bridges. Two 20 -minute sessions a week is plenty. Active Recovery Promotes blood flow to tired muscles on rest days, which speeds up recovery and reduces soreness. A gentle walk, foam rolling, or a yoga session. This integrated approach is more important than ever, especially with the growing popularity of the sport. Recently, there has been a significant surge in running participation, marked by a remarkable 39% increase compared to the previous year. This boom was largely driven by beginners, with Gen Z and first-time runners making up 53% of participants (The Great Run Company, 2024). Staying Motivated for the Long Run That initial rush of excitement when you start a new running routine is fantastic, but what truly builds a lasting habit is what you do after that first wave of enthusiasm dies down. Motivation isn't some magical force that just shows up; it's a system you have to build for yourself. It all starts with finding your personal "why" and then putting a few structures in place to keep you lacing up your shoes, even on the days you don't feel like it. This is where setting a clear goal becomes your best friend. Having a real purpose turns a simple jog into a meaningful step toward a much bigger achievement. For a beginner, one of the best ways to do this is to sign up for a race, like a local 5K . The structured calendar of a race provides a tangible finish line that encourages you to stay consistent with your training. According to the latest Global Runner Survey, race participation has bounced back to, and in some cases surpassed, pre-pandemic levels (Running USA, 2025). This means there's a renewed, supportive energy out there that’s perfect for newcomers. Tracking Progress to Fuel Your Drive Seeing how far you’ve come is an incredibly powerful motivator. On days when you feel like you're stuck in a rut, looking back at your data can completely flip your perspective. You don’t need anything fancy to get started. Use a running app : Apps like Strava , Runkeeper , or JustFit are great because they automatically log your distance, pace, and time, creating a digital diary of your runs. Keep a simple journal: A basic notebook works just as well. Just jot down the date, how long you ran, and a quick sentence or two about how you felt. Celebrating the small wins is absolutely crucial. Did you manage to run for one minute longer than last time? Did you stick to your plan on a day you were swamped with work? Acknowledge it. That little bit of positive reinforcement trains your brain to connect running with a feeling of accomplishment. Overcoming the Inevitable Slumps Let's be real: everyone has days where they just don't feel like running. It happens to seasoned marathoners and it will happen to you. The trick is to expect these slumps and have a plan ready for when they hit. When your internal motivation is running low, it's time to lean on your external support systems. You can also dive into some proven strategies for workout motivation to see what clicks for you. Sometimes, all you need is a little variety to reignite that spark. Try exploring a new trail in your area, create a brand new playlist, or even join an online running community for a dose of encouragement. The goal is to build a network that holds you accountable and reminds you that you’re part of something bigger. That's what will keep you going for the long run. Got Questions? Every New Runner Does. If you're just starting out, your head is probably swimming with questions. That's totally normal. Let's clear up some of the most common ones so you can ditch the uncertainty and just focus on hitting the pavement. How Many Days a Week Should I Run? When you're new, three days a week is the sweet spot. The real key is to schedule them every other day: think Monday, Wednesday, and Friday. This approach isn't about being lazy, it's about being smart. That day off gives your muscles, joints, and all that connective tissue time to recover and adapt. Recovery is where the magic happens. This is when you actually get stronger and your best defense against getting sidelined with an injury. Is It Okay to Walk During My Run? It's essential. In fact, you absolutely should. The run-walk method isn't a crutch, it's one of the smartest strategies for new runners to build endurance without breaking down. Stop thinking of walking breaks as a sign of failure. They're a planned, strategic part of your training. These breaks let your heart rate settle, reduce the constant pounding on your joints, and help you cover more ground without feeling completely gassed. It’s the best way to progress without hating every minute of it. Walking intervals are the secret weapon for building a solid aerobic base without risking burnout. This method helps you keep your form in check even when you're tired, which is a game-changer for staying injury-free. Side Stitch vs. Injury: How to Tell the Difference This is a big one, and learning to listen to your body is a skill you'll develop over time. The two sensations are pretty distinct once you know what to feel for. A side stitch is that classic sharp, stabbing pain right below your rib cage. It’s usually temporary and pops up because of your breathing or maybe that snack you had a little too close to your run. The good news? It almost always fades if you slow to a walk and focus on deep, full belly breaths. A potential injury tends to feel different. It might be a dull, persistent ache or a sharp pain in a joint or bone that gets worse as you keep running. If that pain sticks around long after you've stopped or starts bugging you on rest days, that’s your body sending a clear signal to back off and see a professional if it doesn't clear up. What Should I Eat Before a Run? For the shorter runs you'll be doing as a beginner (usually under an hour), you don't need a complex fueling plan. If you've had a meal in the last few hours, your body has plenty of energy stored up. That said, running on a totally empty stomach can feel awful. For a quick energy boost, have a light carb-based snack approximately 30-60 minutes before you leave. Something simple like a banana or a piece of toast is perfect. Just steer clear of anything heavy, fatty, or loaded with fiber—those are a recipe for digestive disaster mid-run. References Runner's World. (2025). Strava mid-2025 fitness data analysis . Runner's World fitness data analysis . Running USA. (2025). 2025 Global Runner Survey findings . latest Global Runner Survey findings . The Great Run Company. (2024). Great Run popularity of running up 39% year-on-year . running popularity report from The Great Run Company . At Flourish-Everyday , we believe the right gear and knowledge are the cornerstones of a successful fitness journey. Explore our expert reviews and guides to find the perfect shoes and wellness information to support every step of your new running routine. Find everything you need at https://www.flourish-everyday.com .
- A Smarter Post Run Stretching Routine
When you have just crushed that run, and you feel incredible, what you do in the next fifteen minutes can make all the difference in how you recover. A smarter post-run stretching routine isn't about forcing yourself into a pretzel; it's a smart cool-down that gently brings your body back from high gear to a state of rest. This simple habit can completely change how you feel for your next run. In This Article : Why Your Cool Down Deserves a Rethink The Essential Runner's Stretching Protocol Mastering Your Stretching Technique Does Stretching Actually Improve Performance? Stretching Versus Muscle Soreness: A Reality Check Frequently Asked Questions Sources and References Why Your Cool Down Deserves a Rethink For a long time, we've been told to stretch to keep injuries at bay. But the real magic of a post-run routine is more complex. While the direct link between stretching and preventing injuries is debated, the benefits for recovery and mobility are undeniable. A proper cool-down is about managing the aftermath of a tough run, turning recovery into your secret weapon. When you stop running abruptly, your heart rate plummets while your blood vessels are still wide open. This can cause dizziness as blood pools in your legs. A gradual cool-down followed by light stretching helps your circulatory system adjust smoothly. This keeps blood flowing, which is exactly what your muscles need to start repairing themselves. The Real Purpose of Post-Run Stretching So, if it's not just about preventing injuries, why bother stretching? The main goals are to return your muscles to their normal length, improve flexibility, and become more in tune with your body. Think of it less as an insurance policy and more as essential maintenance for your body’s engine. Boosts Blood Flow: Gentle stretching enhances circulation, which helps flush out metabolic byproducts like lactate from your muscles. Improves Range of Motion: Regular stretching keeps you limber and improves flexibility in key running muscles like hamstrings, quads, and hip flexors. Reduces Stiffness: It can significantly reduce muscle stiffness and soreness you feel the day after a hard workout. Interestingly, research from Simon Fraser University found identical injury rates between runners who stretched and those who didn't, suggesting stretching may not directly prevent injuries. While stretching is great for flexibility, its role as an injury-prevention tool might have been overstated. A solid post run stretching routine is one piece of the recovery puzzle, alongside hydration and nutrition, and is tied to your overall joint health and what is mobility training and how it boosts performance . The Essential Runner's Stretching Protocol Your recovery kicks into gear here. A solid post run stretching routine doesn't require an hour of your day. It's a focused, 10-minute investment after every run to thank your body for its hard work. We'll focus on static stretching—holding a stretch in a comfortable position. The timing is key; after a run, your muscles are warm and more receptive to stretching. The plan is simple: target the big muscle groups that powered your miles—hamstrings, quadriceps, calves, glutes, and hip flexors. This helps restore their natural length, eases tightness, and improves your range of motion. This straightforward infographic breaks down the simple three-step process to start your recovery the moment you stop your watch. As you can see, it's a natural flow from rehydrating, moving into your active stretching, and finishing with a moment of rest. It's a simple, effective sequence. Your Go-To Post-Run Stretches Let's build a simple, powerful routine. This is about doing a few essential stretches correctly and consistently. Remember to breathe deeply and hold each stretch for 20-30 seconds without bouncing! This quick-reference table covers the non-negotiable stretches for your cool down. Your Core Post-Run Stretches Stretch Name Primary Muscle Targeted Recommended Hold Time Standing Hamstring Stretch Hamstrings 20-30 seconds per leg Standing Quadriceps Stretch Quadriceps 20-30 seconds per leg Wall Calf Stretch Calves 20-30 seconds per leg Figure-Four Stretch Glutes and Piriformis 20-30 seconds per side Standing Hamstring Stretch: Stand with feet close. Step one foot out, keeping that leg straight with a slight bend in your other knee. Hinge forward from your hips—don't round your back—until you feel a gentle pull down the back of the straight leg. Standing Quadriceps Stretch: Stand tall, using a wall for balance. Grab your left foot and gently pull it towards your glute. Feel the stretch in the front of your thigh. Keep your knees aligned and your posture upright. Calf Stretch: Face a wall with your hands on it for support. Step one foot straight back, keeping that leg straight with your heel pressed firmly into the floor. Gently bend your front knee until you feel the stretch in your back calf. Figure-Four Stretch (Glutes): Lie on your back with knees bent and feet flat. Cross your right ankle over your left thigh. Reach through the gap and grab the back of your left thigh, gently pulling it toward your chest. A good stretch should feel like satisfying tension, never sharp pain. Listen to your body. If something doesn't feel right, ease up. Sticking with this routine is also a fantastic mental cool-down. For a deeper dive into optimizing your post-workout habits, check out our guide on the top running recovery tips for peak performance in 2025 . Mastering Your Stretching Technique The quality of your stretch matters more than the quantity. This is about developing a connection with your body and responding to its signals. The golden rule is to only perform static stretches on warm muscles. Your post-run window is the perfect opportunity because your muscles are warm and pliable. Stretching cold muscles risks a strain or injury. Listening to Your Body Learn the difference between productive tension and pain. A proper stretch should create a gentle, sustained pull. It might be uncomfortable, but it should never feel sharp, stabbing, or electric. If you feel pain, you've gone too far. Ease off the stretch immediately. Your breath is your best friend when stretching. As you ease into the position, take a slow, deep exhale. This tells your nervous system to relax, allowing the muscle to lengthen more effectively. Holding your breath tenses your muscles. Fine-Tuning Your Form Good form is everything. It ensures you're stretching the intended muscle without stressing your joints. For a standing quad stretch, keep your knees aligned and your back straight to isolate the quadriceps. Here are a few technique tips: Avoid Bouncing: Bouncing (ballistic stretching) can cause the muscle to tighten as a protective reflex. Ease into each stretch slowly and hold it steady. Hold for 20-30 seconds: This gives the muscle fibers enough time to safely relax and lengthen. Symmetry is Key: We all have imbalances. Pay attention to tightness and give the tighter side an extra repetition. Mastering these details transforms your stretching routine into a powerful way to build body awareness, leading to smarter, more efficient running. Does Stretching Actually Improve Performance? Does a post run stretching routine make you faster? The science is encouraging. When done right, your cooldown can offer real performance boosts through improved running economy, how much oxygen (and energy) you burn at a certain pace. Better running economy means you expend less energy, so you can run faster or longer. A smart stretching routine helps keep your muscles at their ideal length and your joints mobile, paving the way for a smoother, more efficient stride. The Science Backing It Up Researchers are connecting post-run stretching to on-road performance. A 2020 review found that even a single stretching session after a workout led to an average 1.3% improvement in running economy. The same review also pointed to a 2.7% improvement in performance metrics, like distance run or time to exhaustion. The key takeaway is that how you stretch is as important as if you stretch. You can explore the full study about how stretching impacts metabolic efficiency and performance . The right kind of post-run stretching can make you a more efficient runner. It’s not a magic pill, but it's another powerful tool in your training toolbox. By helping your muscles recover and improving mobility, a consistent post run stretching routine supports the mechanics of good running form. That small boost in efficiency can make a huge difference over a marathon or a tough training cycle. Stretching Versus Muscle Soreness: A Reality Check Most of us use a post run stretching routine thinking it’s our best defense against next-day muscle soreness. But is that true? Let’s be real about what stretching does—and doesn’t do—for Delayed Onset Muscle Soreness (DOMS). While fantastic for flexibility, its power to stop DOMS has been overblown. That ache comes from microscopic muscle damage, a normal part of getting stronger. What Research Reveals About Soreness Modern science shows that stretching doesn't do much for muscle soreness. A large 2021 systematic review and meta-analysis concluded that stretching had no significant impact on reducing muscle soreness or helping muscles regain strength compared to doing nothing or a light active recovery. You can read the full research about these post-exercise stretching findings . This doesn't mean you should ditch your post-run stretch. Reframe its purpose: think of stretching as an essential tool for maintaining healthy muscles and good range of motion, not a cure for soreness. If you’re serious about tackling post-workout ache, our guide on how to prevent muscle soreness with top tips for faster recovery is a great place to start. Your stretch is still a key part of your cool-down, but for fighting DOMS, proper nutrition, hydration, and sleep are the real heavy hitters. Frequently Asked Questions Many runners are a bit lost when it comes to a solid post run stretching routine. This section clears up confusion and answers your nagging questions. How Long Should I Really Hold a Stretch? The sweet spot is about 30 seconds per stretch. This gives muscles time to relax and lengthen. Hit each side 2–3 times. Is It Better To Stretch Before or After a Run? Static stretching (holding a position) is strictly for after your run when muscles are warm. Before running, stick to dynamic movements like leg swings or high knees. What if Stretching Hurts? Pain is your body’s signal to stop. If you feel a sharp sensation, back off until it settles into a mild pull. Never force or bounce into a stretch. Do I Need To Stretch After Every Single Run? Consistency is key. Save comprehensive sessions for after key workouts like a long run or speed day. On easier days, focus on a few key stretches for your tightest spots. Applying these answers will take the guesswork out of your routine. The next move is to schedule it. A dedicated 10-minute cool-down after you walk in the door can make a world of difference. Sources and References Brooks Running. (n.d.). The Best Post-Run Stretches . Brooks Running post-run stretches guide De la Cruz-Sánchez, E., et al. (2020). The Effects of a Post-Exercise Stretching Training on Running Economy and Performance. Frontiers in Physiology . Frontiers in Physiology review Afonso, J., et al. (2021). The Effectiveness of Post-exercise Stretching in Short-Term and Delayed Recovery of Strength, Range of Motion and Soreness: A Systematic Review and Meta-Analysis of Randomized Controlled Trials. Frontiers in Physiology , 12, 677581. Full Research on Post-Exercise Stretching Konrad, A., et al. (2021). The Acute Effects of Stretching on the Biceps Femoris Architecture, Rate of Torque Development, and Performance in Running. Sports (Basel) , 9(12), 160. Full Study on Stretching and Performance Enhance your cooldown gear at Flourish-Everyday https://www.flourish-everyday.com
- Your Ultimate Guide to Running Shoes for Beginners: Edition 2
One of the hardest parts of starting a running routine is having to brave a sports store to get your running shoes. "Your Ultimate Guide to Running Shoes for Beginners: Edition 2" will inform you of what you should be looking for and why. Now that you have made this fantastic decision for your health, your most important piece of gear, other than motivation, is the right pair of running shoes for beginners . The best pairs offer a crucial blend of cushioning, support, and durability, setting you up for a consistent, injury-free journey from the start. This guide is your roadmap to finding that perfect first pair without the guesswork. Introduction: Your First Step to Becoming a Runner Before you hit the pavement, your most critical decision is choosing the right footwear. It's easy to feel overwhelmed by the sheer number of brands and confusing technical terms. However, understanding the basics will empower you to make an informed choice. Proper footwear is a direct investment in injury prevention . Running shoes are specifically built to absorb impact, guide your unique foot motion, and provide a comfortable experience that makes you want to run again. A good pair helps you avoid common beginner issues like blisters, shin splints, and knee pain. In This Guide, You Will Find: 1. How to Decode Running Shoe Technology 2. A Practical Guide to Finding Your Perfect Fit 3. Top Athletic Shoe Reviews: Men's Edition 4. Top Athletic Shoe Reviews: Women's Edition 5. Informative Health Information: Injury Prevention 6. Comparison Reviews and Common Questions 7. References 1. How to Decode Running Shoe Technology Stepping into the world of running shoes can feel like learning a new language with terms like "midsole," "heel drop," and "pronation." Understanding these core components is key to seeing past marketing hype and choosing a shoe that genuinely meets your needs. The engine of any running shoe is the midsole , the layer of foam between the outsole (the rubber bottom) and your foot. It acts as the shoe's suspension system, providing cushioning to absorb the shock of each stride. Foams vary from soft and plush to firm and responsive. Cushioning and Support Systems Support in running shoes is categorized based on how much it corrects for "pronation," or the natural inward roll of your foot upon landing. Neutral Shoes: Designed for runners with a balanced gait. They offer cushioning without features intended to correct foot motion. Stability Shoes: Provide moderate support for "overpronators," whose ankles roll too far inward. They often use firmer foam on the inner side to guide the foot. Motion Control Shoes: Offer maximum support for severe overpronators, built to prevent excessive inward rolling. Finding the right shoe is about balancing these elements to match your unique biomechanics. Understanding Key Shoe Specs Another key term is heel-to-toe drop , the height difference between the heel and the forefoot (measured in millimeters). A higher drop ( 10-12mm ) is common in traditional shoes and can reduce strain on the Achilles tendon, making it a safe choice for many beginners. A lower drop ( 0-8mm ) promotes a more natural, midfoot landing but may require a gradual adjustment period. The outsole is the durable rubber on the bottom that provides traction and protects the midsole. The global running shoe market is projected to grow from $15.22 billion in 2023 to $21.89 billion by 2033, driven by such technological innovations ( Source: Market.us, 2023 ). 2. A Practical Guide to Finding Your Perfect Fit The most important factor in choosing a shoe is how it fits your unique foot. An improper fit can quickly lead to blisters, discomfort, and injuries, derailing your new running habit. Shop for shoes in the afternoon or evening, as your feet naturally swell throughout the day. Trying on shoes when your feet are at their largest ensures a comfortable fit when you're actually running. Key Steps for a Perfect Fit Bring Your Running Socks: The thickness of your socks affects the fit, so always try on shoes with the socks you'll wear for running. Check the Length: You should have about a thumb's width (roughly half an inch) of space between your longest toe and the end of the shoe. This prevents your toes from hitting the front. Assess the Width: The shoe should be snug in the midfoot and heel but allow your toes to wiggle and spread. If your foot bulges over the side, you need a wider size. The ideal fit provides a secure lockdown in the heel to prevent slipping and a roomy toe box for comfort. The shoe should feel "just right" in the store—not too tight and not too loose. 3. Top Athletic Shoe Reviews: Men's Edition For new runners, the goal is to find a shoe that balances cushioning, support, and durability at a reasonable price. Here are some top-performing models for men that deliver a reliable and comfortable experience. Individual Brand Shoe Reviews Brooks Ghost : A popular neutral shoe known for its soft cushioning and smooth ride. It’s a dependable workhorse that offers consistent comfort. Hoka Clifton : Famous for its maximalist cushioning, the Clifton provides a plush, protective feel while remaining surprisingly lightweight. It's excellent for minimizing joint impact. ASICS GEL-Kayano : A legendary stability shoe that provides gentle guidance for overpronators without feeling overly rigid. It's known for its durability. New Balance Fresh Foam X 860 : This model offers reliable stability with a soft, cushioned feel, making it a great choice for runners whose feet tend to roll inward. Nike Downshifter: An excellent budget-friendly option that provides ample cushioning and a comfortable fit for new runners. For more details, see our review of the Nike Men's Downshifter 13 Road Running Shoes . The best shoe for a beginner is often the one that feels most comfortable and disappears on your foot. Focus on a great fit and balanced feel over flashy tech. ( Source: Outside Magazine, 2023 ) 4. Top Athletic Shoe Reviews: Women's Edition Women's running shoes are engineered for female biomechanics, often featuring a wider forefoot and narrower heel. The key is to find a comfortable, supportive, and valuable model. Individual Brand Shoe Reviews Brooks Adrenaline GTS: A long-time favorite that blends soft cushioning with reliable support. Its GuideRails system gently guides your body's natural motion path. Saucony Guide : Known for its smooth, stable ride, this shoe offers a touch of guidance that helps build confidence without being intrusive. Adidas Ultraboost : A popular choice for its springy, responsive cushioning and stylish design. It transitions well from a run to everyday activities. See our review of the Adidas Women's Ultraboost 10 Sustain Sneaker. You don’t need the most expensive shoe to have a great experience. Budget-friendly models like the Adidas Questar 3 (around $75 ) perform exceptionally well. Lab tests show it requires 5.3% less force to bend than the average shoe, offering a more flexible ride ( Source: RunRepeat, 2024 ). 5. Informative Health Information: Injury Prevention Your running shoes are your first line of defense against injury. They are designed to absorb the impact of each foot strike, protecting your joints from common ailments like shin splints and runner's knee. The Lifespan of Your Running Shoes Even the best shoes wear out. The midsole foam compresses over time and loses its ability to absorb shock. Continuing to run in worn-out shoes is a common mistake that can lead to injury. As a rule, replace your running shoes every 300 to 500 miles . For a beginner running 15 miles a week, this means a new pair every five to eight months. Recognizing Signs of Wear and Tear Worn Outsoles: If the tread on the bottom is smooth, the shoe has lost its grip and structural integrity. Midsole Creases: Deep wrinkles in the side foam indicate the cushioning is permanently compressed. Loose Fit: If the upper material has stretched and your foot slides around, the shoe no longer provides adequate support. For more on staying healthy, read our guide on how to prevent running injuries . 6. Comparison Reviews and Common Questions Here, we compare different wellness approaches and answer common questions to help you start your running journey with confidence. Comparison of Well-being Trends: Shoe Rotation vs. Single Pair Single Pair Method: Simple and cost-effective initially. The runner uses one pair of shoes for all runs until they wear out. Shoe Rotation Method: Involves alternating between two or more different pairs of shoes. Research suggests this method can reduce the risk of running-related injuries by up to 39% by varying the stresses on the body ( Source: Malisoux et al., 2015, Scandinavian Journal of Medicine & Science in Sports ). The foam also has more time to decompress between runs, potentially extending the life of each pair. Frequently Asked Questions Can I just use my gym trainers? It's not recommended. Running shoes are specifically designed to absorb the high-impact, repetitive forward motion of running. Gym trainers are built for lateral stability and are not suited for the demands of road running. How long do running shoes last? Generally, 300 to 500 miles. Pay attention to mileage, new aches and pains, and visible signs of wear. Do I need a gait analysis? For your first pair, a gait analysis at a specialty running store is highly recommended. An expert will observe your foot's motion and help you choose the right category of shoe (neutral vs. stability), which removes the guesswork. Are more expensive shoes better? Not necessarily. The best shoe is the one that fits your foot, matches your gait, and feels comfortable. Many excellent entry-level models are available at reasonable prices. At Flourish-Everyday , our goal is to help you find the perfect shoes and health information to support your fitness journey. Check out our expert guides to kick off your running adventure with confidence. Find your perfect pair at https://www.flourish-everyday.com . References Market.us. (2023). Running Shoes Market Analysis . Retrieved from news.market.us Malisoux, L., Ramesh, J., Mann, R., Seil, R., Urhausen, A., & Theisen, D. (2015). Can parallel use of different running shoes decrease running-related injury risk?. Scandinavian Journal of Medicine & Science in Sports , 25(1), 110-115. Metz, B. (2023). The Best Running Shoes for Beginners . Outside Magazine. Retrieved from run.outsideonline.com Jens, J. (2024). Best Running Shoes for Beginners . RunRepeat. Retrieved from RunRepeat
- How to Prevent Muscle Soreness: Top Tips for Faster Recovery
We’ve all been there. That deep, satisfying ache after a tough workout feels like a badge of honor, but when it morphs into serious pain, it can completely sideline your fitness routine. This isn't about eliminating that feeling of "I worked hard," but about preventing the kind of debilitating soreness that kills your consistency. The "How to Prevent Muscle Soreness: Top Tips for Faster Recovery" guide offers a practical, science-backed blueprint for preventing muscle soreness that goes beyond the usual "drink more water" advice. Index Your Blueprint for Preventing Muscle Soreness Using Nutrition and Hydration to Fight Soreness Rethinking Your Warm-Up and Cool-Down Routine Advanced Recovery Methods That Deliver Real Results The Hidden Power of Sleep and Active Recovery Common Questions About Muscle Soreness Top Athletic Shoe Reviews References Your Blueprint for Preventing Muscle Soreness It all starts with understanding what’s really going on in your body. That pain you feel a day or two after a workout has a name: Delayed Onset Muscle Soreness (DOMS). This is the official term for the muscle pain that typically peaks 12 to 48 hours after you’ve really pushed yourself. DOMS is caused by microscopic tears in your muscle fibers—which is actually a normal part of the muscle-building process. Your body responds by rushing fluid to the area to start repairs, and that process leads to the familiar stiffness and discomfort (1). The goal isn't to eliminate all feedback from your muscles, but to prevent the kind of pain that keeps you on the sidelines. Managing soreness is key to consistency. The Five Pillars of Prevention Effective soreness prevention rests on five core principles that work together. Weaving these into your routine builds a powerful defense against excessive post-workout pain. Dynamic Warm-Up: Prepare your muscles for work by increasing blood flow and firing up your nervous system. Think leg swings, arm circles, and torso twists. Strategic Hydration: Water is crucial. It helps transport nutrients to your muscles and flushes out metabolic waste products that contribute to soreness. Targeted Nutrition: Give your body the raw materials it needs to repair itself, providing protein for repair and carbohydrates for fuel replenishment. Active Recovery: Gentle movement on rest days boosts circulation, helping clear out soreness-causing byproducts while delivering fresh, oxygenated blood to tired muscles. Quality Sleep: Sleep is when your body maximizes the release of growth hormone, a critical player in muscle repair and inflammation control. To make this even simpler, here's a quick reference table that breaks down these core strategies. Core Strategies for Muscle Soreness Prevention Strategy What It Does When to Do It Dynamic Warm-Up Increases blood flow and prepares muscles for activity. Before every workout. Hydration Flushes out waste products and transports nutrients. Consistently, throughout the day. Nutrition Provides protein for repair and carbs for energy. Post-workout and in daily meals. Active Recovery Boosts circulation and aids in muscle repair. On rest days. Quality Sleep Maximizes growth hormone for tissue repair. Every night, aiming for 7-9 hours. This framework gives you the foundational strategies you need to make your fitness journey more consistent and enjoyable. When you can bounce back faster, you can train smarter and keep making progress without unnecessary downtime. Using Nutrition and Hydration to Fight Soreness What you put into your body before and after the gym is as important as the workout itself. Think of your muscles as a construction site; after a tough session, they need the right raw materials to rebuild stronger. Your body needs protein to repair muscle tears and carbohydrates to restock energy (glycogen). Skimping on either will slow your recovery and worsen next-day soreness. Timing Your Fuel for Optimal Repair The "anabolic window" right after you exercise is prime time for refueling. Getting a mix of protein and carbs into your system within an hour or two post-workout kickstarts the repair process. A simple, effective post-workout meal could be: A scoop of whey protein blended with a banana. Greek yogurt with berries and honey. Grilled chicken breast alongside a sweet potato. The goal is to give your muscles easily accessible nutrients so they can rebuild right away. For a deeper look at meal timing, check out our **guide to pre- and post-workout nutrition for maximum results** . The Power of Anti-Inflammatory Foods Beyond macros, certain foods have natural anti-inflammatory properties that can actively fight soreness. Key Takeaway: You can literally eat your way to less soreness. Foods packed with antioxidants and anti-inflammatory compounds help your body manage the inflammation that causes muscle pain. Some of the heaviest hitters include: Tart Cherries: Studies have shown that tart cherry juice can significantly cut down on muscle pain and strength loss after a tough workout (2). Turmeric: The active ingredient, curcumin, is a powerhouse anti-inflammatory. Fatty Fish: Salmon, mackerel, and sardines are loaded with omega-3 fatty acids, famous for their inflammation-fighting abilities. Nutritional strategies are becoming recognized for easing DOMS. Research points to compounds like omega-3s and polyphenols as being able to reduce soreness, with effects often kicking in during the 24 to 48-hour window when DOMS is at its worst. Why Hydration Is a Non-Negotiable Hydration is the unsung hero of muscle recovery. Water is crucial for getting nutrients to your cells and flushing out metabolic waste that builds up during exercise. Even slight dehydration can concentrate these waste products, making muscles feel more sore. Sip water all day, not just when you’re sweating. A pro tip is to weigh yourself before and after a hard session. For every pound you lose, aim to drink about 16-24 ounces of fluid to rehydrate properly. Rethinking Your Warm-Up and Cool-Down Routine A solid warm-up is your first line of defense, preparing your muscles to perform and resist damage. The key is dynamic stretching, active movements that get your body ready for work. They increase blood flow, raise core temperature, and prime the exact movement patterns you’ll be using. Priming Your Muscles for Action Mimicking workout movements at a lower intensity tells your muscles and nervous system what’s coming. For example, before lifting weights, try: Leg Swings: Opens up hips and wakes up hamstrings. Arm Circles: Prepares shoulder joints. Bodyweight Squats: Gets glutes, quads, and core firing. For a run, walking lunges or high knees will do the trick. To dive deeper into improving your functional range of motion, our article on **what mobility training can do to boost your performance** is a great start. The Truth About the Cool-Down The cool-down's main job is to gently bring your heart rate and breathing back to normal. A slow jog or a casual walk for five to ten minutes is perfect. What about static stretching—holding a stretch for 20-30 seconds ? Its role in preventing muscle pain is often overstated. While stretching is fantastic for long-term flexibility, science shows its direct impact on next-day soreness is minimal. Think of it as one small piece of the recovery puzzle, not the whole picture. Research is clear that stretching before or after a workout has a surprisingly small effect on soreness. A major meta-analysis found that stretching only reduced muscle soreness by about 2% in the 72 hours after exercise (3). The takeaway? Stretching is a tool, but it shouldn't be your only strategy for fighting DOMS. Advanced Recovery Methods That Deliver Real Results When your usual cool-down isn't enough, it’s time for advanced recovery methods. One of the most powerful tools is massage therapy. A good massage boosts circulation, helping flush out metabolic waste while delivering oxygen and nutrients your muscles need to repair. A deep tissue massage is one of the most effective ways to head off muscle soreness. A meta-analysis confirmed that massage consistently dials down the intensity of DOMS and fatigue, outperforming methods like stretching or compression wear (4). Self-Myofascial Release With Foam Rolling Since a professional massage isn't always practical, a foam roller is your next best friend. This practice, known as self-myofascial release , lets you apply deep, targeted pressure to your muscles to break up knots and ease tension. After a heavy squat day, slowly roll over quads and glutes for 30-60 seconds each to help restore blood flow and range of motion. Go slow, pause on tender spots, and breathe to help the muscle release. Comparison: Foam Rolling vs. Cryotherapy Foam Rolling : Focuses on mechanical release of muscle fascia. It's accessible, affordable, and targets specific muscle knots. Best for immediate post-workout use to reduce stiffness. Cryotherapy (Cold Therapy) : Involves exposing the body to extremely cold temperatures for a short period. It aims to reduce systemic inflammation and muscle metabolism. While some athletes swear by it for rapid recovery, scientific evidence is still emerging and it is less accessible than foam rolling. Leveraging Temperature and Pressure Contrast Water Therapy: Alternating between hot and cold water. Try one minute cold followed by two minutes warm, repeating for 10-15 minutes . The switch from vasoconstriction to vasodilation creates a "pumping" action that helps flush out metabolic byproducts. Compression Wear: Slipping into compression garments after a workout applies gentle pressure, supporting your circulatory system to reduce swelling and clear waste more efficiently. The real magic of these advanced techniques is how they supercharge your body's natural healing processes. They help your body recover faster on a cellular level. The Hidden Power of Sleep and Active Recovery Two of the most powerful tools for fighting muscle soreness are free: sleep and active recovery. They work behind the scenes to repair tissue and flush out metabolic waste. Many people obsess over training and nutrition but treat sleep as an afterthought. Deep sleep is when your body releases a surge of human growth hormone (HGH), which is essential for repairing microscopic muscle tears and controlling inflammation. Getting Your Sleep Dialed In for Better Recovery Skimping on quality sleep short-circuits your recovery. Improving sleep hygiene is a direct investment in your physical performance. A few simple tweaks can make a world of difference: Stick to a Routine: Go to bed and wake up around the same time daily. Create the Perfect Cave: Keep your bedroom cool (around 65°F / 18°C ), dark, and quiet. Power Down: Put away all devices at least an hour before bed. Think of sleep as the final, most crucial rep of your workout. It’s when all that hard work actually turns into stronger, more resilient muscle. Why Your Rest Days Should Still Involve a Little Movement Instead of being sedentary, embracing active recovery can dramatically speed up healing and reduce soreness. Active recovery is low-intensity movement that gets your blood flowing without putting more stress on your muscles. This gentle activity acts like a pump for your circulatory system, delivering fresh, oxygen-rich blood to tired muscles while helping clear out metabolic byproducts like lactate. Some great active recovery options are: A brisk walk or a light jog A casual swim A gentle yoga or stretching session A relaxed bike ride Common Questions About Muscle Soreness Getting a better handle on the different kinds of aches and pains will help you make smarter calls on your training and recovery. How Do I Know if It Is Soreness or an Injury? The answer comes down to what the pain feels like. DOMS is a dull, spread-out ache across the muscle that peaks 24 to 48 hours post-workout and then fades. An injury is often a sharp, specific pain that appears suddenly during a movement. Other red flags for injury include: Obvious swelling or bruising in one spot. A noticeable drop in strength or inability to bear weight. Pain that gets worse over days instead of better. If the pain is sharp or stops you from doing daily activities, get it checked out by a professional. Should I Use Ice or Heat for Sore Muscles? Ice and heat are great tools for different jobs. Think of it this way: ice for immediate damage control, and heat for soothing stiffness later on. Ice is for right after a brutal workout or a suspected tweak. It constricts blood vessels to reduce inflammation. Heat is for general muscle tightness that has already settled in. A warm bath or heating pad increases blood flow to relax tight muscles. Can I Work Out When I Am Still Sore? If it’s a mild ache, light activity or training a different muscle group is fine (active recovery). But if you're so sore it's messing with your range of motion, rest. Pushing through severe muscle damage increases injury risk and slows healing. Listen to your body. Are BCAA Supplements Worth It for Soreness? The science behind Branched-Chain Amino Acids (BCAAs) and their effect on soreness is mixed. They might offer a slight edge if your protein intake is low, but the effect is minimal for most. Your first defense should be high-quality protein from food. Supplements with more solid backing, like creatine and whey protein, will indirectly do more to help manage soreness long-term. Top Athletic Shoe Reviews The right footwear is a crucial, often overlooked component of preventing muscle soreness. Proper shoes provide support, absorb impact, and promote correct biomechanics, reducing the stress on your muscles and joints. For Women : Hoka Clifton 9 : Known for its maximalist cushioning, this shoe is excellent for long-distance runners or anyone needing superior shock absorption. The plush feel minimizes impact forces, which can lead to less soreness in the shins and calves. Brooks Ghost 15 : A versatile, neutral daily trainer that offers a perfect balance of softness and responsiveness. It's a workhorse shoe ideal for varied workouts, providing reliable support that helps prevent foot and leg fatigue. For Men: Nike Pegasus 40 : A legendary all-rounder, the Pegasus provides a snappy, responsive feel thanks to its Zoom Air units. It's great for runners who want a shoe that feels fast but still offers enough cushioning to protect muscles during daily training runs. New Balance Fresh Foam X 880v13 : This shoe is the definition of a reliable daily trainer. Its Fresh Foam X midsole is engineered for a soft yet stable ride, making it suitable for high-mileage weeks and helping to reduce accumulated muscle strain. References Cheung K, Hume P, Maxwell L. Delayed onset muscle soreness : treatment strategies and performance factors. Sports Med . 2003;33(2):145-64. doi: 10.2165/00007256-200333020-00005. Kuehl KS, Perrier ET, Elliot DL, Chesnutt JC. Efficacy of tart cherry juice in reducing muscle pain during running: a randomized controlled trial. J Int Soc Sports Nutr . 2010;7:17. Published 2010 May 7. doi:10.1186/1550-2783-7-17. Herbert RD, de Noronha M, Kamper SJ. Stretching to prevent or reduce muscle soreness after exercise. Cochrane Database Syst Rev . 2011;(7):CD004577. Published 2011 Jul 6. doi:10.1002/14651858.CD004577.pub3. Guo J, Li L, Gong Y, et al. Massage Alleviates Delayed Onset Muscle Soreness after Strenuous Exercise: A Systematic Review and Meta-Analysis. Front Physiol . 2017;8:747. Published 2017 Sep 27. doi:10.3389/fphys.2017.00747. At Flourish-Everyday , we believe that the right gear and knowledge are key to a consistent and enjoyable fitness journey. Explore our expert reviews on the best cross-training and running shoes to support your every move. Find your perfect pair and elevate your training today .
- 7 Best Workout Shoes for Plantar Fasciitis in 2025
Plantar fasciitis can turn every step of your workout into a sharp, painful challenge. That persistent, stabbing pain at the base of your heel doesn't have to derail your fitness ambitions. The right footwear is a critical component of managing this condition, providing the necessary support and cushioning to alleviate stress on the plantar fascia ligament. Finding the 7 best workout shoes for plantar fasciitis means looking for specific features like superior arch support, deep heel cups for stability, and ample shock absorption to soften the impact of each movement. This guide is designed to cut through the confusion in a crowded market. We'll break down what makes a shoe effective for heel pain relief and provide a curated list of top-performing models for various activities, from running to cross-training. Article Index Understanding Plantar Fasciitis: The Role of Footwear Key Features to Look For in a Workout Shoe Top Athletic Shoe Reviews for Plantar Fasciitis * Individual Brand Shoe Reviews * Comparison: Men's vs. Women's Top Picks Informative Health Information: Beyond the Shoe * Stretches and Exercises for Relief * The Role of Insoles and Orthotics Comparison Reviews: Wellness Trends and Methods for Foot Health References Understanding Plantar Fasciitis: The Role of Footwear Plantar fasciitis is the inflammation of the plantar fascia, a thick band of tissue that connects your heel bone to your toes. This condition is one of the most common causes of heel pain. Key risk factors include high-impact activities, prolonged standing, obesity, and improper footwear (Buchbinder, 2004). Proper footwear plays a crucial role in both managing and preventing plantar fasciitis. A well-designed workout shoe can: Distribute Pressure: By providing adequate arch support, the shoe helps distribute your body weight evenly across your foot, reducing concentrated stress on the heel. Absorb Shock: Cushioning in the midsole and heel absorbs the impact of activities like running or jumping, protecting the inflamed tissue. Control Motion: Features like a firm heel counter and stability technologies help prevent excessive foot motion (pronation), which can strain the plantar fascia. Key Features to Look For in a Workout Shoe When searching for the best workout shoes for plantar fasciitis, prioritize these features: Superior Arch Support: The shoe should have a well-defined, supportive arch that matches your foot's natural contour. This prevents the arch from collapsing and overstretching the plantar fascia. Deep, Cushioned Heel Cup: A deep heel cup helps stabilize the heel and prevent it from rolling, while ample cushioning absorbs impact directly where the pain is most acute. Firm Midsole: A shoe that bends easily in the middle offers little support. Look for a shoe that is firm through the arch and only flexes at the ball of the foot. Rocker Sole Geometry: Brands like HOKA utilize a rocker-shaped sole, which helps guide the foot through a natural gait cycle, reducing strain on the heel and Achilles tendon (Sobhani et al., 2017). Removable Insoles: This allows you to replace the factory insole with a custom orthotic or a higher-quality over-the-counter insert for personalized support. Top Athletic Shoe Reviews for Plantar Fasciitis Individual Brand Shoe Reviews: Choosing the right brand is often the first step. Different brands specialize in certain features, from maximalist cushioning to structured stability. 1. HOKA: Known for its maximalist cushioning and Meta-Rocker sole, HOKA is a top choice for pain relief. Best Model: HOKA Bondi. It offers exceptional shock absorption, making it ideal for running and long walks. Key Advantage: The thick, plush midsole minimizes impact forces on the heel with every step. Website: https://www.hoka.com 2. Brooks: A leader in stability and support, Brooks offers trusted models for runners and walkers. Best Model: Brooks Adrenaline GTS. Its GuideRails® technology provides holistic support that guides your entire body into its natural motion path. Key Advantage: Balances soft cushioning with reliable support, making it versatile for various workouts. Website: https://www.brooksrunning.com 3. Orthofeet: A brand that specializes in orthopedic and therapeutic footwear. Best Model: Orthofeet Coral Stretch Knit. Designed specifically for foot pain, it includes premium orthotic insoles. Key Advantage: Focuses on a non-binding fit with a wide toe box and ergonomic sole, directly addressing common pain points. Website: https://www.orthofeet.com Where to Buy: Amazon: https://www.amazon.com - Offers a vast selection and competitive pricing. Zappos: https://www.zappos.com - Known for excellent customer service and a generous 365-day return policy. Running Warehouse: https://www.runningwarehouse.com - A specialty retailer with expert reviews and a 90-day free return policy. Road Runner Sports: https://www.roadrunnersports.com - Offers a VIP membership with a 90-day "Perfect Fit Guarantee." Comparison: Men's vs. Women's Top Picks While many models are available for both men and women, there are subtle design differences. Women's shoes are typically built on a narrower last and may have different midsole densities to account for biomechanics differences, such as a wider Q-angle (the angle of the thigh bone). Feature Top Men's Pick (Example) Top Women's Pick (Example) Key Consideration Cushioning HOKA Bondi 8 Brooks Glycerin 20 Both offer maximum cushioning to absorb heel impact. Stability Brooks Adrenaline GTS 23 ASICS GEL-Kayano 30 Both provide excellent motion control for overpronation. Versatility New Balance Fresh Foam 880 Saucony Ride 16 Great for a mix of activities from running to gym workouts. Ultimately, the best shoe is the one that fits your individual foot shape, support needs, and activity type, regardless of gender labels. Choosing a proper fit is paramount; you can learn more about how the right gear helps prevent injuries on flourish-everyday.com . Informative Health Information: Beyond the Shoe While the right shoe is foundational, a comprehensive approach to managing plantar fasciitis yields the best results. Stretches and Exercises for Relief Consistent stretching is key to recovery. Focus on these two areas: Plantar Fascia Stretch: Sit down and cross the affected foot over the other knee. Gently pull your toes back toward your shin until you feel a stretch in the arch of your foot. Hold for 30 seconds and repeat 3-5 times. Calf Stretches: Tight calf muscles can worsen plantar fasciitis. Perform a standard runner's stretch against a wall, holding for 30 seconds on each leg. The Role of Insoles and Orthotics For many, over-the-counter insoles or custom orthotics provide an essential layer of support. Over-the-counter (OTC) Insoles: Brands like Superfeet and Powerstep offer excellent arch support and heel cushioning. They are a great starting point for enhancing the support of any shoe. Custom Orthotics: Prescribed by a podiatrist, these are molded specifically to your feet. They provide the highest level of correction and support, although they come at a higher cost. Comparison Reviews: Wellness Trends and Methods for Foot Health Managing plantar fasciitis often involves a multi-faceted approach. Here’s how different wellness methods compare: Method Description Pros Cons Best For Supportive Shoes Wearing shoes with proper arch support, cushioning, and stability. Provides constant support during activity; non-invasive. Can be expensive; requires finding the right fit. Everyone with plantar fasciitis, especially during workouts. Stretching Routine Daily stretching of the plantar fascia and calf muscles. Free; highly effective for pain relief and prevention. Requires consistency; results are not immediate. Reducing morning pain and improving long-term flexibility. Icing Applying ice to the heel for 15-20 minutes after activity or at the end of the day. Reduces inflammation and provides immediate pain relief. Temporary solution; doesn't address the root cause. Managing acute pain flare-ups after a workout. Night Splints A device worn overnight that keeps the plantar fascia and Achilles tendon stretched. Effectively reduces the sharp morning heel pain. Can be uncomfortable to sleep in. Individuals with severe, stabbing pain upon waking. Combining these methods is often the most effective strategy. Start with supportive shoes and a daily stretching routine, and add icing or other therapies as needed to manage symptoms. Proper footwear is also critical for related conditions; see our guide on workout shoes for flat feet or what to look for in comfortable walking footwear . By making informed choices about your footwear and adopting complementary health practices, you can effectively manage plantar fasciitis and get back to a pain-free, active lifestyle. References Buchbinder, R. (2004). Plantar fasciitis. New England Journal of Medicine, 350 (21), 2159-2166. Martin, J. E., et al. (2014). Heel pain—plantar fasciitis: revision 2014. The Journal of Orthopaedic and Sports Physical Therapy, 44 (11), A1-A33. Sobhani, S., et al. (2017). The effect of rocker shoes on walking and running kinematics and kinetics. Journal of Biomechanics, 53 , 1-9. Ready to take a holistic approach to your well-being beyond just footwear? At Flourish-Everyday , we provide resources and guides to help you integrate wellness into every aspect of your life. Discover more ways to support your active lifestyle and heal from within at Flourish-Everyday .
- Strength Training for Women: A Practical Guide
New science is emphasizing the inportance of strength training. Lifting that heavier weight on a regular basis is essential to overall health. I frequently perform a farmer's walk using extremely heavy weights to enhance overall body strength, particularly focusing on grip and upper back muscles. This exercise improves posture, athletic ability, and resistance to injuries. Strength training is more than lifting weights; it's a powerful investment in your long-term health and vitality. This guide will show you how to build denser bones, boost your metabolism with lean muscle, and unlock the mental fortitude and confidence that comes from being strong. Introduction This guide provides a comprehensive overview of strength training for women, from the foundational science to practical workout plans. We will cover the essential benefits, how to structure your workouts, mastering key exercises, and the principles of nutrition and recovery that fuel progress. Index of Sections The Real Reasons Strength Training Is Essential for Women Building Your First Effective Workout Plan Mastering Form on Foundational Exercises How to Consistently Get Stronger and Avoid Plateaus Fueling Your Body for Strength and Recovery Answering Your Biggest Strength Training Questions References The Real Reasons Strength Training Is Essential for Women For too long, the fitness conversation for women was dominated by cardio. While important, lifting weights offers profound benefits for physical and mental wellness, dismantling outdated myths that the weight room isn't for women. The science is compelling. Half of all women over 50 will break a bone due to osteoporosis. Heavy weight training can boost hip and spine bone density by 2–5% in just a year, acting as a powerful defense. Additionally, research shows that after 15 weeks of a structured lifting program, women can add about 1.45 kg ( 3.2 lbs ) of lean muscle and increase muscular strength by up to 25% . You can read more about these strength training findings to see the full picture. Here's a quick rundown of the key benefits: Benefit Category Specific Advantage Long-Term Impact Skeletal Health Increased Bone Mineral Density Significant reduction in osteoporosis and fracture risk, especially post-menopause. Metabolic Boost Higher Resting Metabolic Rate (RMR) Easier long-term weight management and improved body composition. Physical Strength Enhanced Muscle Mass and Power Greater independence and ease with daily activities. Mental Well-being Reduced Anxiety and Stress Improved mood, self-esteem, and mental resilience. Hormonal Balance Improved Insulin Sensitivity Lower risk of type 2 diabetes and better energy regulation. These are fundamental improvements for a stronger, more vibrant future. Building a Stronger Foundation for Life Building strong bones now is one of the most important things you can do for your future self. The mechanical stress from lifting weights signals your body to fortify its skeletal structure, stimulating bone-forming cells to create denser, tougher bones. This is a proactive strategy against osteoporosis, which disproportionately affects women. Igniting Your Metabolic Engine Muscle tissue is a calorie-burning powerhouse, burning more calories than fat, even at rest. Consistent strength training rewires your body's energy system to support a higher resting metabolic rate 24/7. This is the secret to sustainable weight management. You're building a body that uses energy more efficiently, making it easier to maintain a healthy weight without extreme diets. This is also how you achieve a "toned" look, by building lean muscle and reducing body fat. The Mental and Emotional Payoff The mental benefits of strength training are immense. Seeing yourself get progressively stronger builds a powerful sense of accomplishment. Stress Reduction: Resistance training is proven to lower cortisol (the body's stress hormone) and boost feel-good endorphins. Improved Mood: It can be as effective as other therapies for managing symptoms of anxiety and depression. Unshakable Confidence: Mastering physical challenges in the gym translates directly into mental toughness that spills over into your career, relationships, and daily life. Ultimately, strength training empowers you to feel capable, resilient, and in control of your well-being. Building Your First Effective Workout Plan Starting a strength training program can seem complicated, but the secret is building a simple, sustainable routine that fits your life and goals. The first choice is between a full-body or split routine. For beginners, a full-body workout is the most efficient and effective option. You'll train every major muscle group two to three times a week, which is ideal for building a solid foundation without living in the gym. A split routine requires more weekly gym days to be effective. For beginners, consistency with 2-3 full-body sessions per week is the smartest way to see progress and avoid burnout. This image shows a foundational dumbbell squat, a perfect example of an efficient compound exercise. Proper form is the cornerstone of any good strength plan. It ensures safety and maximizes the effectiveness of every repetition. Designing Your Program with Compound Exercises The heart of a great beginner plan is built on compound exercises. These multi-joint movements work several muscle groups at once, giving you the most bang for your buck. Your workouts should revolve around these key patterns: Squat: Works quads, glutes, hamstrings, and core (e.g., Goblet Squats, Bodyweight Squats). Hinge: Targets the posterior chain—glutes, hamstrings, lower back (e.g., Romanian Deadlifts, Glute Bridges). Push: Strengthens chest, shoulders, and triceps (e.g., Push-ups, Dumbbell Bench Press). Pull: Builds a strong back and biceps (e.g., Dumbbell Rows, Inverted Rows). Choosing one or two exercises from each category creates a powerful, balanced full-body workout. Understanding Sets, Reps, and Rest Once you have your exercises, you need structure. Sets, reps, and rest periods tailor the workout to your specific goals. Your goal dictates the structure. For pure strength, you'll lift heavier for fewer reps. For muscular endurance, you'll lift lighter for more reps. Here’s a simple breakdown: For Building Strength: Aim for 3-5 sets of 4-8 reps . The weight should be challenging but allow for good form. Rest 90-120 seconds between sets. For Muscular Endurance: Go for 2-3 sets of 10-15 reps . Use a lighter weight and rest for 45-60 seconds between sets. Start with one goal, but feel free to mix training styles. The key is consistent, progressive challenge. Mastering Form on Foundational Exercises Excellent results are built on a foundation of proper form. Nailing the correct technique maximizes effectiveness and is your best defense against injury. Mastering fundamentals from the start sets you up for long-term success. We'll focus on four essential compound exercises. These movements work multiple muscle groups at once, making workouts incredibly efficient. For more detail, see our ultimate guide to compound exercises for beginners . The Goblet Squat The Goblet Squat is a fantastic way to learn proper squat mechanics, engaging your quads, glutes, and core. How to Do It: Hold one end of a dumbbell vertically against your chest. Set your feet shoulder-width apart, toes slightly out. The Movement: Keeping your chest high and back straight, sink your hips down and back as if sitting in a chair. Aim for thighs parallel to the floor or lower. The Return: Drive through your heels to stand back up, squeezing your glutes at the top. Pro-Tip: A common mistake is letting knees collapse inward. Actively push your knees out over your feet to engage your glutes and protect your knees. Bodyweight Alternative: Perform a standard bodyweight squat, focusing on the same form cues. The Romanian Deadlift (RDL) The RDL is a game-changer for your posterior chain (hamstrings, glutes, lower back), emphasizing a hip hinge motion. How to Do It: Hold a dumbbell in each hand in front of your thighs, feet hip-width apart with a soft knee bend. The Movement: Push your butt back, hinging at your hips while keeping your back flat. Lower the dumbbells toward the floor, keeping them close to your shins. The Return: When you feel a deep stretch in your hamstrings, drive your hips forward and squeeze your glutes to return to standing. Bodyweight Alternative: A Glute Bridge. Lie on your back with knees bent, feet flat. Lift your hips to the ceiling, pause, and lower. The Dumbbell Bench Press This classic upper-body exercise builds strength in your chest, shoulders, and triceps. Dumbbells help identify strength imbalances. How to Do It: Sit on a flat bench with a dumbbell in each hand. Lie back, bringing the dumbbells to the sides of your chest, palms facing forward. The Movement: Press the dumbbells straight up until your arms are fully extended but not locked. The Return: Slowly lower the weights back to the start with full control. Bodyweight Alternative: The classic push-up. Modify by performing them on your knees or against a wall if needed. The Bent-Over Row The Bent-Over Row is non-negotiable for a strong, defined back and better posture, targeting your lats, rhomboids, and biceps. How to Do It: Hold a dumbbell in each hand, palms facing your body. Hinge forward at the hips until your torso is nearly parallel to the floor, back flat. The Movement: Squeeze your shoulder blades together and pull the dumbbells up toward your chest, keeping your elbows close to your body. The Return: Slowly lower the dumbbells back to the starting position. Bodyweight Alternative: An Inverted Row using a sturdy table or a low bar in a squat rack. How to Consistently Get Stronger and Avoid Plateaus If you feel stuck at the gym, the reason is likely a lack of progressive overload . This is the cornerstone of getting stronger. To continue seeing results, you must consistently make your workouts slightly harder over time. Your muscles adapt to stress by rebuilding stronger. If you perform the same workout repeatedly, your body gets used to it and has no reason to change. You must introduce a new challenge to spark adaptation and growth. Practical Ways to Apply Progressive Overload Progressive overload isn't just about adding more weight. Several smart strategies can keep challenging your body: Increase the Weight: The most obvious method. If you completed your target reps and sets, try increasing the weight by a small amount (e.g., 2.5 or 5 pounds). Increase the Reps: With the same weight, aim for more repetitions. Once you can comfortably hit the top of your target rep range with good form, it's time to increase the weight. Increase the Sets: Adding another set to an exercise increases your total workout volume, forcing your muscles to do more work. These methods are geared toward building lean muscle. For more on the science, see our guide on strategies for increasing lean muscle mass backed by clinical research . The Power of Tracking Your Workouts You can't improve what you don't measure. Tracking your workouts is non-negotiable for getting stronger. It removes guesswork and allows you to plan how to beat your previous performance. A training log is your roadmap to success. It provides objective data, holds you accountable, and shows clear evidence of progress, which is a massive motivator. A simple notebook works perfectly, or you can use a fitness app. Whatever you choose, be consistent. Log the following for each exercise: Exercise Name Weight Used Reps Completed per set Sets Performed This simple habit empowers you to enter every session with a clear plan. It's no wonder women’s participation in strength training has jumped by over 30% in the last decade. Fueling Your Body for Strength and Recovery Progress isn't just made in the gym. Workouts break muscles down; nutrition and rest build them back up, stronger than before. Smart nutrition is non-negotiable for getting stronger. This is about giving your body the right fuel to power workouts, repair muscle, and support overall health. Macronutrients for Muscle and Energy The big three—protein, carbohydrates, and fats—each play a vital role. Protein Is Your Priority After a workout, muscle fibers have microscopic tears. Protein provides the amino acids to repair them and spark growth. Without enough protein, you risk muscle loss and slow recovery. How Much You Need: Target 1.6 to 2.2 grams of protein per kilogram of body weight daily. Easy Sources: Lean meats, fish, eggs, Greek yogurt, tofu, lentils, and quality protein powder. Carbohydrates Are Your Fuel Carbohydrates are your number one energy source for strength training. They refill muscle glycogen stores—the fuel you burn during heavy lifting. For more on timing, see our guide to pre-and-post-workout nutrition . Healthy Fats for Hormonal Health Dietary fats are crucial for producing hormones that manage metabolism and muscle growth. Choose smart sources like avocados, nuts, seeds, and olive oil. The rise of strength training for women is a major fitness trend. In the UK, 26% of women who exercise alone use weights, and 13% of female gym members aim to build muscle, a shift especially strong among younger women. Explore more about these demographic shifts in women's fitness . Sample Meal Timing for a Training Day Meal Timing Meal/Snack Idea Key Nutrients Provided Breakfast (7 AM) Oatmeal with berries, nuts, and protein powder. Complex carbs for energy, protein for muscle maintenance. Pre-Workout (11 AM) A banana and a small handful of almonds. Simple carbs for a quick energy boost. Workout (12 PM) Your strength training session. N/A Post-Workout (1:30 PM) A protein shake with Greek yogurt. Fast-digesting protein and carbs to kickstart recovery. Lunch (2:30 PM) Grilled chicken salad with quinoa and veggies. Lean protein, fiber, and complex carbohydrates. Dinner (6 PM) Baked salmon with sweet potato and broccoli. Protein, healthy omega-3 fats, and nutrient-dense carbs. Adjust your timing and food choices based on what makes you feel your best. Recovery Is Where the Magic Happens You get stronger when you recover. Pushing yourself daily without proper rest leads to burnout and injury. Quality sleep is your most powerful recovery tool. Aim for 7-9 hours a night. During deep sleep, your body releases human growth hormone, essential for muscle repair. Managing stress is also key. High cortisol levels can interfere with muscle growth. Find what works for you, such as meditation, yoga, or a quiet walk. Finally, embrace active recovery days . Gentle movement like a long walk, stretching, or a light bike ride increases blood flow to your muscles, easing soreness and aiding recovery. Answering Your Biggest Strength Training Questions Diving into a new routine brings questions. Let's clear the air on common concerns about strength training for women. The number one question is: “Will lifting weights make me look bulky?” The answer is a hard no . Building a "bulky" frame requires a specific combination of genetics, high testosterone, and a massive, prolonged calorie surplus. For most women, strength training creates a strong, defined, "toned" look. You'll build lean muscle, which is denser and takes up less space than fat, resulting in a leaner appearance. So, How Often Should I Be In The Gym? More isn't always better. The magic happens during recovery. Starting with five or six sessions a week is a recipe for burnout or injury. A smarter approach is 2-3 full-body workouts per week . This provides the perfect balance of muscle stimulation and recovery time. This frequency is the gold standard for building lasting habits and seeing real progress. What Equipment Do I Really Need to Start? You don't need a fancy gym membership to begin. You can build incredible strength with a few key pieces of equipment at home. All you really need are: A Set of Dumbbells: Adjustable dumbbells are a great investment. Otherwise, a few fixed-weight sets will work. Resistance Bands: These are versatile, affordable, and perfect for adding a challenge to bodyweight exercises. With these simple tools, you can get an incredibly effective workout. Focus on mastering form on foundational movements, and you can explore a gym later if you choose. At Flourish-Everyday , we believe the right gear can empower your fitness journey. Whether you're lifting at home or hitting the gym, the right shoes make a huge difference in your performance and safety. Find expert reviews on the best cross-training and running shoes to support every squat, lift, and run over at https://www.flourish-everyday.com . References Mosti, M. P., & Hoff, J. (2014). High-intensity strength training in women. Journal of Strength and Conditioning Research , 28 (9), 2733–2739. Retrieved from https://www.ncbi.nlm.nih.gov/pmc/articles/PMC3940502/ Flourish-Everyday. (n.d.). Compound Exercises for Beginners: Your Ultimate Fitness Guide . Retrieved from https://www.flourish-everyday.com/post/compound-exercises-for-beginners-your-ultimate-fitness-guide Flourish-Everyday. (n.d.). Increasing Lean Muscle Mass: Strategies Backed by Clinical Research . Retrieved from https://www.flourish-everyday.com/post/increasing-lean-muscle-mass-strategies-backed-by-clinical-research Flourish-Everyday. (n.d.). Guide to Pre-and-Post-Workout Nutrition for Maximum Results . Retrieved from https://www.flourish-everyday.com/post/guide-to-pre-and-post-workout-nutrition-for-maximum-results YouGov. (2024). Meet GB women focused on building strength, and how to reach them . Retrieved from https://business.yougov.com/content/52782-meet-gb-women-focused-on-building-strength-and-how-to-reach-them Flourish-Everyday. (n.d.). Home . Retrieved from https://www.flourish-everyday.com
- Top 7 Kettlebell CrossFit Workouts for 2025 Fitness Gains
In the world of high-intensity training, few tools are as versatile and brutally effective as the kettlebell . It's an area that I am beginning to become more interested in. I have always been a core-focused exerciser, but I have never used kettlebells. I wanted to give this workout method a deeper dive and concentrate on the top 7 kettlebell CrossFit workouts for 2025 for fitness gains. It's unique core focus challenges your stability, strength, and power in a way that dumbbells and barbells simply cannot replicate. For CrossFit athletes, this makes it an indispensable asset for building the kind of functional, well-rounded fitness that defines the sport. By combining dynamic, full-body movements with relentless metabolic conditioning, kettlebell CrossFit workouts forge resilience, boost cardiovascular endurance, and develop raw, explosive power. This article cuts straight to the chase, providing a curated list of challenging and scalable kettlebell WODs (Workouts of the Day) designed to push your limits. We will move beyond generic swings and get into structured workouts that you can implement in your next training session. You will find specific workout protocols, movement standards, and scaling options to match your current fitness level. Whether you're looking to crush a classic benchmark or find a new metcon to test your grit, these workouts deliver. Article Index The Karen Kettlebell : A spin on a classic CrossFit benchmark. Kettlebell Complex for Time: Unbroken sequences to test strength and stamina. EMOM (Every Minute On the Minute) Variations: Building capacity under controlled fatigue. Kettlebell Tabata Circuits: High-intensity interval training for maximum calorie burn. The Kettlebell Chipper: A mental and physical grind against a long list of reps. Kettlebell Ladder Workouts: Ascending and descending rep schemes to challenge your pacing. Kettlebell AMRAP (As Many Rounds As Possible): A race against the clock to maximize your work output. Comparison of Kettlebell CrossFit Workouts Integrating Kettlebells into Your CrossFit Journey References 1. The Karen Kettlebell The "Karen Kettlebell" is a formidable twist on the classic CrossFit benchmark workout, "Karen." The original WOD (Workout Of the Day) is a grueling test of 150 wall balls for time. This adaptation swaps the medicine ball for a kettlebell, challenging athletes to complete 150 kettlebell swings as fast as possible. This simple change transforms the workout into a pure test of hip hinge power, posterior chain endurance, and grip strength, making it one of the most effective and accessible kettlebell CrossFit workouts. This workout is exceptional for developing cardiovascular endurance and full-body power. The ballistic nature of the kettlebell swing engages nearly every muscle, from your glutes and hamstrings to your core and lats. It’s a favorite among CrossFit Games athletes using heavy weights (32kg for men, 24kg for women) and has been adopted by military fitness programs for its effectiveness in building combat-ready conditioning. How to Approach The Karen Kettlebell Success in this workout depends on strategy and impeccable form. Pacing is critical to avoid burnout. Instead of attempting a single unbroken set, break the 150 reps into smaller, manageable chunks with short rests. Pacing Strategy: A common approach is a descending rep scheme, such as 30-25-20-15-10-10-10-10-10. This allows for mental wins as the sets get smaller. Technique Focus: Prioritize a powerful hip drive. The movement should originate from your hips, not your arms. Maintain a neutral spine throughout to protect your lower back and maximize power transfer. Engaging your core is crucial for stability; for more insights, you can explore the best core workouts for a stronger midsection . Grip Management: Your grip will likely be the first thing to fail. Use chalk from the start, and if necessary, consider lifting straps to ensure your posterior chain is the limiting factor, not your hands. This infographic provides a quick summary of the key metrics for The Karen Kettlebell. The data highlights the workout's scalable intensity, with a broad completion time that accommodates various fitness levels and weight choices. Aim to select a weight that allows you to complete the workout within this window while maintaining excellent form. 2. Kettlebell Complex for Time A kettlebell complex is a series of different exercises performed back-to-back with one or two kettlebells, without putting the weight down until all repetitions of every movement are completed. This sequence, or "complex," constitutes one round, and the workout is typically performed for multiple rounds for time. This method is a staple in the world of kettlebell CrossFit workouts because it builds incredible strength endurance, metabolic conditioning, and mental toughness. Popularized by renowned strength coach Dan John and embraced by Kettlebell Sport athletes and CrossFit competitors, this workout style forces your body to transition seamlessly between different movement patterns under load. It challenges coordination, grip strength, and cardiovascular fitness simultaneously. A typical complex might involve a swing, a clean, a press, and a squat, hitting nearly every major muscle group in a single, fluid sequence. The continuous tension and lack of rest create a significant metabolic demand, making it a highly efficient tool for fat loss and conditioning. How to Approach a Kettlebell Complex Success with a kettlebell complex hinges on selecting the right weight and mastering the transitions between movements. The weight should be dictated by your weakest lift in the sequence, ensuring you can maintain form throughout the entire round without compromising safety. Master the Basics First: Do not attempt a complex until you are proficient in each individual exercise. Practice the swing, clean, press, and squat separately to build a solid technical foundation. Choose Weight Wisely: Select a kettlebell weight that you can comfortably press for the required number of reps. The press is often the most challenging part of a complex, so it's the best movement to base your weight selection on. Practice Transitions: The flow between exercises is crucial. Practice moving slowly from a swing to a clean, and then from a clean to a press. Smooth transitions save energy and prevent injury. Breathe Rhythmically: Coordinate your breathing with each movement. Typically, you'll exhale on the exertion (the press or the upward phase of the swing) and inhale during the recovery phase. This helps manage fatigue and maintain a steady pace. Scale Intelligently: If you're new to complexes, start with fewer reps per movement or fewer total rounds. A good starting point could be 5 rounds of a complex consisting of 5 reps of each exercise. Focus on quality over speed. 3. EMOM (Every Minute On the Minute) Kettlebell Variations EMOM, which stands for "Every Minute On the Minute," is a highly versatile and effective training protocol popular in the CrossFit community. The structure is simple: you perform a prescribed set of exercises at the start of each minute for a set total duration. The time remaining within that minute is your rest period before the next minute begins. This format transforms kettlebell training into a powerful conditioning tool, perfect for building work capacity, honing technique under fatigue, and managing intensity. It's a fantastic example of structured kettlebell CrossFit workouts that force you to pace yourself effectively. This style of workout is exceptional for developing both anaerobic and aerobic endurance. By demanding consistent effort with built-in rest, it teaches athletes how to recover quickly and manage their output over time. EMOMs are celebrated by strength coaches like Ben Bruno for their ability to accumulate significant training volume in a short, structured period. They are infinitely scalable, making them suitable for everyone from beginners learning new movements to elite athletes pushing their limits with heavy loads. How to Approach Kettlebell EMOMs The key to a successful EMOM is choosing a workload that challenges you without leading to complete failure before the workout ends. The goal is consistency across all rounds. Pacing Strategy: Aim for a rep scheme that allows for at least 15-20 seconds of rest each minute. If your work time consistently creeps past 45 seconds, the intensity is likely too high. A great starting point is an alternating movement EMOM, such as a 16-minute EMOM alternating between 15 kettlebell swings on odd minutes and 10 goblet squats on even minutes. Technique Focus: Use the rest periods to reset mentally and physically. Before each minute starts, take a deep breath, brace your core, and focus on executing the first rep with perfect form. Poor form is often the first sign of excessive fatigue, so prioritize movement quality over speed. Progressive Overload: To make EMOMs more challenging over time, you can increase the reps per minute, add weight to the kettlebell, or extend the total duration of the workout. For beginners, starting with longer intervals, such as "Every 90 Seconds On the 90 Seconds," can provide more rest and make the format more accessible. 4. Kettlebell Tabata Circuits Kettlebell Tabata Circuits take high-intensity interval training (HIIT) to another level, leveraging the explosive power of the kettlebell within the demanding Tabata protocol. This scientifically proven format, developed by Dr. Izumi Tabata, consists of eight rounds of 20 seconds of maximum effort work followed by 10 seconds of rest (1). The entire workout lasts only four minutes but delivers a massive cardiovascular and metabolic punch, making it one of the most efficient kettlebell CrossFit workouts available. The beauty of this format lies in its versatility. A Tabata can be performed with a single movement, like kettlebell swings, for a focused challenge, or it can rotate between several exercises, such as snatches, goblet squats, and cleans, to target different muscle groups and keep the intensity sky-high. This adaptability makes it a favorite among CrossFit coaches and fitness enthusiasts looking to maximize results in minimum time. Its emphasis on functional, compound movements aligns perfectly with modern fitness principles; you can discover the secrets of functional fitness with these proven exercises to see how it builds real-world strength. How to Approach Kettlebell Tabata Circuits Success in a Kettlebell Tabata Circuit is all about maintaining intensity and form under fatigue. The short rest periods are designed to push your limits, so a solid strategy is essential to complete all eight rounds effectively. Pacing Strategy: The goal is maximum consistent effort. Aim for a rep count in the first round that you can realistically maintain or come close to in the later rounds. For example, if you hit 10 kettlebell swings in round one, try to hold 8-10 reps for the remaining seven rounds. Technique Focus: Choose a lighter weight than you would for a standard strength workout. The focus here is on speed and metabolic conditioning, not maximal load. Prioritize crisp, clean reps to prevent injury and ensure you are targeting the right muscles. Exercise Selection: Select exercises that allow for quick transitions and don't require complex setups. Combining a hip-dominant move (swings) with a knee-dominant one (goblet squats) is a popular and effective pairing. For example, you could alternate between kettlebell swings and goblet squats for the eight rounds. 5. The Kettlebell Chipper "The Kettlebell Chipper" is a long-format workout designed to test an athlete's mental fortitude and muscular endurance. The term "chipper" refers to the workout structure where you "chip away" at a large volume of reps across several movements, completing all reps of one exercise before moving to the next. A typical chipper might include 100 kettlebell swings, 75 goblet squats, 50 clean and presses, and 25 Turkish get-ups, all performed for time. This style transforms the session into a strategic test of pacing and resilience, making it a staple among advanced kettlebell CrossFit workouts. This workout is exceptional for building a massive work capacity, mental toughness, and full-body conditioning. Chippers are frequently used in CrossFit Games programming and tactical fitness circles because they simulate the long, grinding efforts required in high-stakes environments. The sheer volume forces athletes to manage their energy, maintain solid form under fatigue, and push through psychological barriers. The variety of movements ensures a balanced, total-body stimulus that challenges everything from your grip to your core stability. How to Approach The Kettlebell Chipper Success in a chipper is less about blistering speed and more about relentless forward progress. The key is to break down the monumental task into small, achievable victories to avoid redlining too early. Pacing Strategy: Do not start too fast. For large sets like 100 swings or 75 squats, pre-plan your breaks. A strategy of 10 sets of 10 for the swings, or 5 sets of 15 for the squats, can keep you moving consistently without hitting a wall. The goal is to minimize rest time by making it structured and intentional. Technique Focus: Form degradation is the biggest risk in a long workout. Focus on one key technical cue for each movement, such as driving with the hips on the swing or keeping your chest up during goblet squats. This mental focus helps maintain efficiency and prevent injury as fatigue sets in. While not a classic HIIT session, the principles of sustained effort are similar; you can learn more about how high-intensity training improves overall fitness to understand the conditioning benefits. Smart Scaling: The most important variable to scale is volume. If you are new to chippers, cut the reps in half across the board. It's better to finish a shorter version with good form than to struggle through the full workout with compromised technique. You can also scale the weight for each movement to suit your strength levels. 6. Kettlebell Ladder Workouts Kettlebell ladder workouts are a brutally effective training method that builds strength, endurance, and mental toughness through progressive repetition schemes. Popularized by strength coaches like Pavel Tsatsouline and Dan John, ladders involve performing sets of one or more exercises with either ascending (e.g., 1, 2, 3, 4...) or descending (e.g., 10, 9, 8, 7...) reps. This structure creates a unique challenge that makes it one of the most versatile kettlebell CrossFit workouts for athletes of all levels. The beauty of the ladder format lies in its simplicity and scalability. By manipulating the exercises, peak rep count, and rest periods, you can target specific fitness goals, from pure strength to metabolic conditioning. The incremental nature of the workout allows you to accumulate a high volume of work without feeling overwhelmed, as each "rung" of the ladder feels manageable. This method is excellent for mastering technique under fatigue and building serious work capacity. How to Approach Kettlebell Ladder Workouts The key to a successful ladder workout is smart programming and consistent execution. The goal is to maintain excellent form on every single rep, even as fatigue mounts in the higher rungs. Pairing complementary movements is a classic approach to ensure balanced development. Choose Your Structure: Decide if you will ascend, descend, or do a full pyramid (e.g., 1-2-3-4-5-4-3-2-1). An ascending ladder of 1-10 reps of kettlebell swings and push-ups is a classic conditioning test, while a descending ladder of 10-1 goblet squats and kettlebell snatches is a demanding full-body burner. Pair Complementary Movements: To create a well-rounded stimulus, pair exercises that work opposing muscle groups or movement patterns. For example, pair a lower-body pull (kettlebell swing) with an upper-body push (push-up) or a complex movement (Turkish get-up) with a simpler one (goblet squat). Manage Your Rest: A common strategy is to rest as needed between rungs. As you climb the ladder and the reps increase, your rest periods will naturally get longer. The goal is to rest just long enough to complete the next set with good form. For an added challenge, you can set a time cap to push your pace. 7. Kettlebell AMRAP (As Many Rounds As Possible) The AMRAP, or "As Many Rounds As Possible," is a foundational format in CrossFit that pairs perfectly with the versatility of a kettlebell. Instead of racing to finish a set number of reps, the goal is to complete as many rounds of a prescribed circuit as you can within a fixed timeframe. This structure turns the workout into a strategic battle against the clock, making it one of the most engaging and scalable kettlebell CrossFit workouts. This format is exceptional for building work capacity, mental toughness, and cardiovascular conditioning. By forcing you to maintain a consistent output over a set period, AMRAPs train your body to recover efficiently between movements and sustain effort. A common AMRAP could be 15 minutes of 10 kettlebell swings, 10 goblet squats, and 10 push-ups, repeated continuously. This structure is a favorite in CrossFit boxes worldwide for testing and improving an athlete's overall fitness baseline. How to Approach a Kettlebell AMRAP Success in an AMRAP is all about finding a sustainable pace from the very beginning. Going out too fast leads to inevitable burnout, while starting too slow leaves untapped potential. The key is to establish a rhythm you can maintain for the entire duration. Pacing Strategy: Your first round should feel controlled and almost too easy. Use it to establish a baseline time, and then aim to hit that same split for every subsequent round. A consistent pace will always outperform a "fly and die" approach. Technique Focus: Movement quality is paramount. As fatigue sets in, form is the first thing to degrade. Choose a weight that allows you to perform each movement with solid technique, even when you're tired. For example, in a kettlebell snatch, ensure you achieve full hip extension and a stable overhead lockout on every single rep. Strategic Rest: Don't wait until you're completely exhausted to rest. Plan short, deliberate breaks. A quick 5-10 second pause before starting your next set of swings can help you maintain unbroken sets and keep your overall pace higher than if you push to failure and need a full minute to recover. Comparison of Kettlebell CrossFit Workouts Workout Type Primary Goal Intensity Key Challenge The Karen Kettlebell Muscular Endurance & Cardio High Sustaining power output for 150 reps. Kettlebell Complex for Time Strength Endurance & Coordination Moderate-High Maintaining form through transitions without rest. EMOM Variations Work Capacity & Pacing Moderate-High Consistency and recovery within fixed intervals. Kettlebell Tabata Circuits Anaerobic Conditioning Very High Maximum effort with minimal rest. The Kettlebell Chipper Mental Toughness & Endurance Moderate Grinding through high-volume, sequential reps. Kettlebell Ladder Workouts Progressive Overload Variable Managing fatigue as rep counts change. Kettlebell AMRAP Cardiovascular Conditioning High Maintaining a consistent pace against the clock. Integrating Kettlebells into Your CrossFit Journey You’ve explored a powerful arsenal of kettlebell CrossFit workouts, from the relentless pace of a Kettlebell Tabata to the strategic endurance test of a Chipper. We've broken down everything from the high-volume sprint of "The Karen Kettlebell" to the disciplined structure of EMOMs and the raw intensity of AMRAPs. The common thread connecting them all is the unique ability of the kettlebell to forge a well-rounded, functionally powerful athlete. The true value of these workouts lies not just in their execution but in their application. Each format, whether it's the ascending challenge of a ladder or the structured intensity of a complex, targets your fitness from a different angle. This variety is the cornerstone of CrossFit's "constantly varied" philosophy and is crucial for preventing plateaus and building a truly resilient physique. Mastering these WODs means you're not just getting stronger; you're improving your engine, sharpening your mental toughness, and developing the kind of functional strength that translates directly into everyday life and other athletic pursuits. Your Actionable Next Steps To truly harness the power of these kettlebell CrossFit workouts, you need a plan. Don't just randomly pick a workout; be intentional with your training. Assess Your Goals: Are you aiming to build raw power, enhance your cardiovascular endurance, or improve your muscular stamina? * For Power: Focus on heavier Kettlebell Complexes and shorter, intense EMOMs. * For Endurance: Prioritize Kettlebell Chippers and longer AMRAP sessions. * For Stamina & Grit: Tabata circuits and Ladder Workouts are your best friends. Start with One: Choose one workout from this list that excites you and aligns with your current fitness level. Dedicate a session to mastering the movements, focusing on perfect form over speed. Log Everything: Track your chosen weight, time, and rounds. This data is not just for show; it is your roadmap. Seeing your numbers improve week after week provides undeniable proof of progress and is a powerful motivator. Key Takeaway: The kettlebell is more than just a piece of iron. It's a comprehensive training tool that builds strength, stability, and cardiovascular capacity simultaneously. By integrating these diverse WOD formats into your routine, you ensure a balanced development of your athletic potential. Embrace the challenge presented by these workouts. The discomfort you feel during a grueling AMRAP or the final reps of a ladder is where growth happens. This is the essence of CrossFit: pushing your limits to discover a new level of capability. The journey of fitness is a marathon, not a sprint, and each of these workouts is a significant step forward on your path. References Tabata, I., Nishimura, K., Kouzaki, M., Hirai, Y., Ogita, F., Miyachi, M., & Yamamoto, K. (1996). Effects of moderate-intensity endurance and high-intensity intermittent training on anaerobic capacity and VO2max. Medicine & Science in Sports & Exercise , 28(10), 1327–1330. Glassman, G. (2007). Understanding CrossFit. CrossFit Journal , (56), 1-2. To support your intense training and accelerate recovery, proper nutrition is non-negotiable. Fuel your body with the high-quality, clean ingredients it deserves with supplements from Flourish-Everyday . Their products are designed to complement a demanding fitness lifestyle, helping you replenish and rebuild after even the toughest kettlebell CrossFit workouts . Visit Flourish-Everyday to discover how premium nutrition can unlock your next level of performance.
- Top Running Shoes for Daily Training | Best Picks & Tips
Using running shoes for daily training is nothing new. It was so common place that the fitness industry took notice and started constructing cross purpose trainers. Your daily trainers are the absolute workhorses. Consider them the dependable base for all your training. They aren't designed for the rapid speed of race day, but they are crafted to absorb impact and provide steady comfort during your daily runs. They are, without a doubt, the most important pair of shoes you'll own. Article Index Why Your Daily Running Shoe Matters Most Decoding What Makes a Great Daily Trainer Finding the Right Support for Your Stride Top Running Shoe Brands Reviewed Top Daily Trainers for Men and Women Running Shoes and Your Health FAQ: Common Running Shoe Questions References Why Your Daily Running Shoe Matters Most Top Running Shoes for Daily Training | Best Picks & Tips focuses on picking the right daily training shoe, which is the most important gear decision a runner can make. This is more than comfort; it's an investment in the tool carrying you through the majority of your weekly mileage. A good daily trainer protects your body from repetitive stress and keeps running enjoyable. This focus on running wellness has sent the industry soaring. The global market for running shoes was valued at approximately $14.68 billion in 2022 and is projected to grow (Fortune Business Insights, 2023). This growth fuels the innovative technology in today's trainers. You can dig deeper into running shoe statistics from market research if you're curious. The Foundation of Your Training Your daily trainer is your primary partner for various runs: Easy recovery runs: Offering a soft, forgiving ride. Base-building mileage: For the steady miles that build endurance. Long runs: Providing durable cushioning to fight fatigue. Most everyday workouts: From a standard 5K jog to moderate-pace sessions. One study found that runners who rotated between at least two different pairs of shoes were 39% less likely to suffer a running-related injury (Malisoux et al., 2015). Your daily trainer is the cornerstone of that rotation. More Than Just Cushioning While a plush feel is great, a top-tier daily trainer brings much more to the table, like stability and serious durability. It’s designed to handle hundreds of miles before its supportive features start to break down. Think of it as your car's suspension, dependable for daily use, absorbing bumps for a smooth and predictable ride. Without this foundation, your training consistency and long-term health are at risk. Decoding What Makes a Great Daily Trainer A great daily trainer is an engineered system for logging comfortable miles. Understanding its core components helps you see past marketing and know how a shoe will perform. Every running shoe is built around three parts that must work together perfectly. The Midsole: The Engine of Comfort The midsole is the heart of any running shoe, a thick foam layer responsible for cushioning and shock absorption. It defines the shoe's ride—soft, firm, bouncy, or stable. Modern midsoles use various foam compounds: EVA (Ethylene Vinyl Acetate): The classic, lightweight foam known for a soft, plush feel. TPU (Thermoplastic Polyurethane): Often in pellet form (e.g., Adidas Boost), TPU is durable with a springy, responsive feel. PEBA (Polyether Block Amide): A premium super-foam (e.g., Nike ZoomX) that is extremely lightweight, soft, and bouncy. The Outsole: The Tires for Traction The outsole is the durable rubber layer that contacts the ground. Its main jobs are providing grip and protecting the softer midsole foam from premature wear. A good daily trainer has a tough outsole, often using harder carbon rubber in high-wear zones like the heel and softer blown rubber in the forefoot for better traction. The Upper: The Secure Chassis The upper is everything that wraps around your foot, acting as the shoe’s chassis to hold you securely. Most uppers are made from engineered mesh or knit materials that are breathable, flexible, and supportive. A well-designed upper locks your heel and midfoot down while giving your toes room to splay naturally. Understanding these parts is the first step to becoming a smarter shoe buyer. For more detail, you can learn what makes the best running trainers . Finding the Right Support for Your Stride A high-tech shoe is useless if it fights your foot’s natural movement. Proper support means matching the shoe's design to your biomechanics. The key is understanding your gait, and how your foot lands and rolls through each stride. Most runners fall into one of three categories: neutral, overpronation, or supination. The Simple Wet Test The "wet test" is a quick way to understand your arch type, a major factor in your gait. Pour water into a shallow pan. Step into the water with one bare foot. Step onto a dry piece of cardboard. Step off and examine the footprint. Connecting Your Foot Type to Shoe Support Your footprint reveals which support category is best for your running shoes for daily training. Neutral Pronation: Your footprint shows a clear curve along the inside. This typically means you have a normal-to-high arch and your foot rolls inward just enough to absorb shock naturally. You'll feel best in neutral shoes that focus on cushion over correction. Overpronation: If your footprint shows most of your foot, you likely have a flatter arch. This causes your ankle to roll too far inward, stressing your knees and hips. Stability shoes use features like a firmer medial post to guide your foot. Supination (Underpronation): Your footprint shows only the heel and ball of your foot. This indicates a high, rigid arch where the foot doesn't roll inward enough, concentrating impact on the outside edge. You'll want a flexible neutral shoe with ample cushioning. This detailed image shows the intricate layers of a running shoe's midsole and the patterned grip of its outsole, both essential for support and performance.The visualization highlights how foam density and rubber placement work together to guide the foot and provide lasting durability. Running Shoe Support Levels Explained Support Type Best For (Gait Type) Key Shoe Features Example Technologies Neutral Neutral, Supination Flexible design, uniform midsole foam, focuses on pure cushioning. Nike React, HOKA CMEVA, Brooks DNA LOFT Stability Mild to Moderate Overpronation Medial posts (firmer foam on the inside), guide rails, wider base. Brooks GuideRails, ASICS LITETRUSS, Saucony HOLLOW-TECH Motion Control Severe Overpronation Very stiff heel, dense medial posts, straight shoe shape (last). Brooks Beast, New Balance 1540 Choosing the right support level is your best defense against common running ailments. Knowing your gait is the first big step toward building a healthy shoe rotation. For those needing more protection, explore our guide to the best running shoe for heavy runners . Top Running Shoe Brands Reviewed Shopping for running shoes is like visiting a car dealership; each brand has its own philosophy and loyal following. This competition drives innovation in shoe technology. The market is expected to grow from $52.18 billion in 2024 to nearly $77.68 billion by 2032 (Maximize Market Research, 2023). You can view the full running shoe market forecast to see how fast things are moving. Understanding each brand's identity helps you find the right fit. Hoka: The King of Cushion Hoka redefined cushioning with its maximalist midsoles, huge stacks of foam delivering an ultra-soft and protective ride. Philosophy: More cushion doesn’t mean more weight. Hoka shoes are famously light. Signature Tech: The Meta-Rocker, a curved sole design that provides a smooth, rolling sensation. Ideal For: Runners prioritizing joint protection and a plush feel, especially for long distances. Brooks: The Reliable Workhorse Brooks focuses on making comfortable, dependable running shoes for daily training . They prioritize perfecting fit and feel for the everyday runner. Philosophy: Create shoes so comfortable you forget you're wearing them, using biomechanics and runner-focused research. Signature Tech: DNA LOFT and DNA AMP foams that adapt to a runner's stride, weight, and pace. Ideal For: Runners seeking a consistent, reliable, and comfortable shoe for weekly miles. ASICS: The Gel-Cushioning Legacy ASICS (an acronym for "a sound mind in a sound body") has a science-based approach centered on its iconic GEL cushioning technology . Philosophy: Combine scientific research with proven technology for a protective ride. Signature Tech: Visible gel pods in the heel and forefoot to absorb shock, often paired with stability systems like LITETRUSS. Ideal For: Runners who want a classic blend of soft cushioning and structured support. Top Daily Trainers for Men and Women Now, let's highlight specific models that excel as daily trainers. These are the workhorses of the running world, loved for their reliability and comfort. While many shoes look similar, brands often design gender-specific versions to account for differences in foot shape, hip angle, and weight distribution. Our Picks for Women Women's shoes often have a narrower heel, wider forefoot, and softer midsoles. Brooks Ghost : A legendary neutral trainer known for balanced cushioning and a smooth ride. It's versatile for everything from a 5K to a long run. Hoka Clifton : The iconic choice for a "walking on clouds" feel. It offers maximal cushioning in a lightweight package, perfect for joint protection on easy days. ASICS GEL-Kayano : A premier stability shoe for overpronators. It combines GEL cushioning with robust support for a secure, cushioned ride. Our Picks for Men Men's models are typically wider with firmer cushioning for higher average body mass. Saucony Ride : A versatile neutral trainer that balances responsive cushioning with enough energy for faster paces. A great do-it-all option. New Balance Fresh Foam X 880 : A reliable workhorse with a dual-layer midsole that balances soft landings and a springy toe-off. Built for high mileage. Brooks Adrenaline GTS : A top stability shoe using GuideRails technology. It provides unobtrusive support, like bumpers in a bowling lane, to keep excess motion in check. Comparison of Wellness Trends: Barefoot vs. Maximalist Running A key debate in running wellness is the ideal amount of cushioning. Barefoot/Minimalist: This trend emphasizes a natural stride by using shoes with minimal cushioning and zero drop (heel and toe at the same height). Proponents argue it strengthens foot muscles and improves form. However, it requires a gradual transition to avoid injury. Maximalist: Popularized by Hoka, this trend focuses on maximum cushioning to absorb impact and reduce stress on joints. This is often preferred for long distances and by runners prone to joint pain. The best approach depends on your body, running style, and injury history. Many runners find a balance, using different shoe types in a rotation to vary the load on their bodies. The Link Between Your Shoes and Your Health Your daily trainers are an active investment in your long-term health. They are your first line of defense, absorbing the pounding that travels up your legs with every stride. This shock absorption is critical, reducing stress on joints, muscles, and connective tissues. By softening daily impact, the right shoe helps prevent overuse injuries like shin splints, plantar fasciitis, and runner's knee. Preventing Injuries Before They Start A proper running shoe is a preventative tool. Its cushioning and support systems guide your foot through a smoother motion. When your feet are properly supported, your whole body maintains better alignment. This stability helps correct small biomechanical flaws that can snowball into chronic pain when repeated thousands of times on a run. To build a robust defense against common running pains, you can learn how to prevent running injuries with top tips for safe running . The Mental and Market Impact The right shoes also provide a psychological boost. Trusting your gear gives you the confidence to push yourself, making running more enjoyable and helping you stick to your training plan. This focus on health is a major driver of the footwear industry. The global sports footwear market, including daily trainers, is projected to grow substantially, as detailed in reports on the worldwide running footwear market . Still Have Questions About Your Running Shoes? Here are answers to some of the most common questions from runners. When Should I Get a New Pair? The general rule is to replace your daily trainers every 300-500 miles . However, the best guide is how they feel. If the cushioning feels flat or you start feeling new aches, it's time for a new pair. Listen to your body over your mileage log. Can I Use My Daily Trainers to Run a Race? Absolutely. Your daily trainers are designed for comfort and support, which is perfect for focusing on finishing your race, especially if you're new to racing. While dedicated racing flats are lighter, your trusty trainers will get the job done comfortably. What's the Real Difference Between Road and Trail Shoes? Think of it like car tires. Road shoes are like all-season tires with smoother outsoles for gripping pavement and ample cushioning. Trail shoes are like off-road tires with deep, aggressive lugs to grip dirt and mud, plus reinforced uppers to protect your feet from debris. References Fortune Business Insights. (2023). Running Shoes Market Size, Share & COVID-19 Impact Analysis . Retrieved from https://www.fortunebusinessinsights.com/running-shoes-market-103134 Malisoux, L., Ramesh, J., Mann, R., Seil, R., Urhausen, A., & Theisen, D. (2015). Can parallel use of different running shoes decrease running-related injury risk?. Scandinavian Journal of Medicine & Science in Sports , 25(1), 110-115. Maximize Market Research. (2023). Running Shoes Market - Global Industry Analysis and Forecast (2024-2030) . Retrieved from https://www.maximizemarketresearch.com/market-report/running-shoes-market/193998/ Statista. (2024). Running Footwear - Worldwide . Retrieved from https://www.statista.com/outlook/emo/fashion/footwear/running-footwear/worldwide At Flourish-Everyday , our goal is to give you the information you need to live a healthier, more active life. We believe the right gear can make all the difference. For more guides and our top product picks, head over to https://www.flourish-everyday.com .
- How to Warm Up Before Exercise for Peak Performance
A proper warm-up isn't about mindlessly holding a few stretches. It’s an active, dynamic process designed to gradually ramp up your heart rate and get your muscles firing for the real work ahead. I usually spend 30 minutes on the bike. You should do a smart sequence of mobility drills, muscle activation, and movements that directly mimic what you're about to do, setting you up for better performance and a lower risk of injury. Index Why a Smart Warm Up Is Your Secret Weapon Building Your Foundation with Dynamic Movement Activating the Right Muscles for Your Workout Priming Your Body for Specific Movements How to Tailor Your Warm Up for Any Goal Answering Your Top Warm-Up Questions References Why a Smart Warm Up Is Your Secret Weapon How to warm up before exercise for peak performance reduces injury and prepares your body for what's coming. Skipping your warm-up is like trying to start a road trip with a cold engine, it’s just not efficient, and you're asking for trouble. So many people walk into the gym and jump straight into their first set, thinking they're saving time. What they're actually doing is killing their performance and rolling the dice on getting hurt. Think of it this way: a proper warm-up is the non-negotiable foundation for every single successful training session. That crucial 10 minute investment does way more than just make you feel ready; it triggers real physiological changes that unlock your body's full potential. The Science Behind a Better Workout When you go through a dynamic warm-up, you're essentially priming your body for peak efficiency. This isn't just bro-science; there are key benefits that all work together to boost your performance and keep you safe. Increased Muscle Temperature : A good warm-up can raise your muscle temperature by a few degrees. This makes your muscles more elastic and improves how quickly they can contract. According to a study in the European Journal of Applied Physiology , this can boost your muscle's speed and force by up to 5% (McGowan et al., 2016). Enhanced Blood Flow : Those dynamic movements get your heart pumping, sending more oxygen-rich blood to the muscles you're about to demolish. It's like delivering the fuel right where it needs to go before the work begins. Improved Joint Mobility : Warming up lubricates your joints with something called synovial fluid, which is basically oil for your body's hinges. This helps your joints move smoothly through their full range of motion, cutting down on friction and stress. Activated Nervous System : This is a big one. The warm-up wakes up your mind-muscle connection, priming the neural pathways from your brain to your muscles. This improves your coordination and ensures the right muscles are firing at the right time. Think of your warm-up as a conversation with your body. You're gently telling it what's coming next, allowing it to transition from a resting state to a state of readiness, ensuring every part is online and prepared to work together. To help you structure this, I've put together a quick checklist. Your Essential Warm Up Checklist Here's a quick overview of the key phases for an effective warm up, what each achieves, and how much time to dedicate. Phase Primary Goal Example Movements Suggested Time General Mobility Increase blood flow and lubricate joints Foam rolling, cat-cow, leg swings 3-5 minutes Activation "Wake up" key stabilizer muscles Glute bridges, bird-dog, banded walks 2-3 minutes Specific Prep Mimic the main exercises of the day with low intensity Bodyweight squats, empty barbell deadlifts 2-3 minutes Following this simple structure ensures you're not just going through the motions. You’re systematically preparing for healthier movement patterns—not just for today's workout, but for the long haul. It’s an investment in your immediate performance and your fitness longevity. Building Your Foundation with Dynamic Movement Alright, now that you know why a proper warm-up is so crucial, let's get into the how. The initial part of the puzzle is dynamic movement, and I want to emphasize that this is vastly different from the traditional static stretching you likely remember from gym class. We're not holding anything here, instead, we're actively moving our bodies through their full range of motion. Consider this phase as an alarm for your entire system. These actions signal your muscles to prepare, enhancing their elasticity and getting them ready for the upcoming activity. It’s like greasing the gears, lubricating your joints, and gently waking up your muscles to build a solid base for the real work ahead. Why Dynamic Beats Static Pre-Workout So, what's the big difference? It all comes down to purpose. Static stretching, where you hold a stretch for 20-30 seconds , is fantastic for improving flexibility after a workout when your muscles are already warm and receptive. But doing it beforehand? Research actually shows it can temporarily sap your muscle power and hurt your performance. Dynamic stretching, on the other hand, is all about motion. It gets the blood flowing, raises your core body temperature, and dials in your coordination—all without taking away from your strength. The simple flow below shows how you can chain together a few key movements to hit the major muscle groups one after another. This is a smart progression, starting with the hips, moving up to the shoulders, and then hitting the core. It’s a balanced way to kick things off. Your Go-To Dynamic Warm Up Exercises The goal here isn't to get exhausted; it's to get ready. Focus on smooth, controlled movements, not speed. You should feel a nice, gentle stretch, never pain. Here are a few essential drills I always include. Leg Swings (Forward and Sideways): Aim for 10-12 swings per leg in each direction. This is one of the best ways to open up your hips and wake up your hamstrings and glutes. Feel free to hold onto a wall or a squat rack for balance. Arm Circles (Forward and Backward): Do 15 small circles, then 15 large ones, in both directions. It’s a simple but incredibly effective way to prep the entire shoulder complex, from your tiny rotator cuff muscles to your deltoids. Torso Twists: Stand with your feet shoulder-width apart, knees soft, and twist your upper body from side to side for 12-15 reps. This fires up your core and gets your spine moving, which is critical for stability in pretty much every exercise you can think of. Walking Lunges with a Twist: Step forward into a lunge, then twist your torso over your front leg. This is a super-efficient drill because it combines a lower-body stretch with spinal mobility. Go for 8-10 reps on each leg. These movements are foundational for improving your active range of motion. If you want to dive deeper into this topic, check out our guide on what is mobility training and how it can boost your flexibility and performance . By making these active drills a non-negotiable part of your routine, you're doing more than just stretching. You're rehearsing movement patterns. This primes your nervous system, improves how your joints function, and makes sure your muscles are ready to contract with power and safety from your very first set. Activating the Right Muscles for Your Workout Now that you've run through some dynamic movements, your body is feeling mobile and your joints are prepped for action. The next critical piece of the puzzle is muscle activation. This phase is all about waking up the specific muscles you’re about to train, making sure they’re ready to fire correctly and pull their weight. Think of it like establishing a clear phone line between your brain and your muscles. Trainers often call this the mind-muscle connection . Without it, your body might default to using dominant, overactive muscles to get the job done. This leads to compensation patterns that can cause imbalances and, down the road, injury. Learning how to warm up properly is about training smarter, not just harder. By running through a few slow, controlled activation drills, you tire the target muscles just enough to make them more receptive during your actual workout. This ensures the right players are on the field from the very first rep. Upper Body Activation Drills For workouts centered on pushing or pulling movements, such as bench presses, overhead presses, or rows, you should concentrate on engaging the muscles in your upper back, shoulders, and chest. These drills might look simple, but they are incredibly effective. Band Pull-Aparts: Grab a light resistance band with both hands, palms facing down and about shoulder-width apart. Keeping your arms straight, pull the band apart until it touches your chest. The key here is to really squeeze your shoulder blades together. Aim for 15-20 reps with a slow, deliberate pace. Scapular Push-Ups: Get into a high plank position. Without bending your elbows at all, pinch your shoulder blades together, letting your chest sink slightly. Then, push them apart, rounding your upper back. This tiny movement isolates the serratus anterior, a crucial muscle for shoulder stability. Knock out 10-12 reps . Activation isn’t about lifting heavy or moving fast. The entire goal is to feel the target muscle contracting. If you can't feel it, slow the movement down even more and really focus on that specific area. Lower Body Activation Drills Before a leg day filled with squats, deadlifts, or lunges, activating your glutes and hips is essential. So many of us deal with underactive glutes from sitting all day, which forces the lower back and hamstrings to work overtime. Glute Bridges: Lie on your back with your knees bent and feet flat on the floor. Drive through your heels to lift your hips up toward the ceiling, squeezing your glutes as hard as you can at the top. Hold that squeeze for a second before slowly lowering back down. Aim for 15 reps . Banded Lateral Walks: Place a mini-band around your ankles or just above your knees. Get into a slight squat position, keeping your hips back. Take 10-15 steps to the right, and then 10-15 steps back to the left. The trick is to maintain tension on the band the entire time. These targeted drills are a cornerstone of any smart training program. They prime your body for more complex movements, which is a key principle you can explore further in our article on the secrets of functional fitness and proven exercises to transform your body . By adding these brief but powerful exercises, you’ll not only improve your form and stability but also unlock greater power and reduce your risk of injury. It’s all about making sure every single workout is as effective as possible. Priming Your Body for Specific Movements Okay, so you've mobilized your joints and fired up your key muscles. Now it's time for the final, and maybe most important, piece of the puzzle. This last part is all about getting specific. Think of it as the bridge connecting your general prep to the actual work you’re about to do. It’s how you fine-tune both your body and your brain for the exact movements on today's training plan. This is where you start doing lighter versions of your main exercises. It’s like a dress rehearsal for your workout. You're giving your central nervous system a sneak peek of the movement patterns, which helps lock in good technique and sharpens your coordination before you even think about adding serious weight or speed. Real-World Examples for Different Workouts How you tackle this final stage is completely dependent on what you're doing that day. A universal approach is ineffective in this context. The main objective is to focus on practicing the particular skills required for the upcoming hour. Doing this primes the right motor pathways, making you feel stronger and more efficient from your very first real set. Let’s break it down with some practical examples. For the Weightlifter: Getting ready for a heavy squat day? Your specific warm-up is, you guessed it, squatting. Kick things off with a set of 10-12 bodyweight squats, really focusing on getting deep and keeping your form tight. After that, get under the bar and do two or three sets with just the empty barbell. Pay close attention to your tempo and breathing. For the Runner: Your specific prep just continues from that initial light jog. You'll want to move into more dynamic, running focused drills. Think high knees, butt kicks, and A skips. Each of these drills isolates and exaggerates a different part of your running stride, helping to build more efficient mechanics. For the HIIT Enthusiast: A high intensity interval session is usually packed with explosive movements. You'll want to prime your body by running through a few reps of each exercise on your list at about 50% of your max effort. If burpees are on the menu, do a few slow, controlled versions. For kettlebell swings, practice that hip-hinge pattern a few times with no weight before you grab the bell. The goal of this last step is simple: make your first working set feel like your second or third. You get rid of that initial awkwardness and hesitation, letting you hit the ground running with confidence and good form from the start. The Neuromuscular Advantage Practicing your specific movements beforehand isn't just about feeling ready, it's a huge factor in preventing injuries. By grooving these patterns at a low intensity, you’re seriously improving what’s known as neuromuscular control, which is just the fancy term for the communication highway between your brain and your muscles. This is absolutely critical in sports that involve quick direction changes, jumping, and landing. It's unsurprising that tailored neuromuscular warm-ups are essential for athletes in sports such as basketball and soccer. In fact, research from the Journal of Orthopaedic & Sports Physical Therapy shows that when athletes actually stick to these programs, they can slash their risk of lower-body injuries by a massive 30% to 40% (Hughes et al., 2023). By taking just a few extra minutes for this final phase, you’re not just setting yourself up for a better performance. You’re building a stronger, more resilient body for the long haul. You'll lock in better technique, sharpen your coordination, and get your head in the game to crush your workout safely and effectively. How to Tailor Your Warm Up for Any Goal Your warm-up routine should not be a fixed, universal script that you mindlessly adhere to each day. Its real power comes from its adaptability. A smart warm up is a living, breathing part of your training that shifts based on your workout, how your body feels, and your long term fitness goals. In the same way, your prep for a heavy squat day needs to look much different than your prep for a long, slow run. This idea of tailored preparation isn't just for the gym. The benefits are now being recognized in industrial workplaces, where companies are seeing better worker mobility and fewer days off from injuries by using warm-ups specific to job tasks. A study on the [National Library of Medicine's website](https://pmc.ncbi.nlm.nih.gov/articles/PMC7692815/) highlights the effectiveness of such programs in occupational settings (Nakhaee et al., 2020). Adjusting for Different Workout Types The biggest factor in designing your warm up is the workout itself. The whole point is to prime your body for the specific demands it's about to face. Let's break down a few common scenarios: Heavy Strength Training (Squats, Deadlifts): The focus here has to be on mobilizing the hips, ankles, and thoracic spine while firing up your core and glutes. Extra time spent on hip circles, deep bodyweight squats, and glute bridges will pay huge dividends once you get under the barbell. Upper Body Pushing/Pulling (Presses, Rows): Priority number one is shoulder health. Your routine needs plenty of band pull-aparts, scapular push-ups, and wall slides to get your shoulder blades moving correctly and wake up your rotator cuffs. Cardio Sessions (Running, Cycling): The emphasis shifts to dynamic leg movements and opening up the hips. Leg swings, walking lunges, and butt kicks are perfect for increasing blood flow to your legs and preparing your joints for all that repetitive motion. A great rule of thumb is to dedicate 60-70% of your warm up time to movements that directly prepare you for the main event. This focused approach makes your prep time incredibly efficient. Listening to Your Body’s Feedback Some days you walk into the gym feeling like a superhero. Other days, you feel like you've been hit by a bus. An intelligent warm up accounts for this daily variation and gives you a chance to do a quick self-assessment. If you have areas that are always tight, your warm up is the perfect time to give them some attention. Feeling Tight Hips? Spend a few extra minutes doing hip circles, frog stretches, or deep goblet squats with a light kettlebell. This will help you hit better depth and maintain solid form in your main lifts. Shoulders Feeling Stiff? Dedicate more time to T-spine rotations and band dislocates. Improving thoracic mobility can take a massive amount of stress off your shoulder joints, especially during any overhead pressing. Your warm up is more than just prep; it's a diagnostic tool. By paying attention to how these simple movements feel, you can catch potential issues before they become fully developed injuries, creating a routine that evolves right alongside your training. Answering Your Top Warm-Up Questions Even once you get the importance of a solid warm-up, a few questions always seem to linger. Let's clear those up. Getting straight answers helps you build a pre-workout routine that’s not just effective but also efficient, so you can train with confidence instead of guesswork. We'll tackle some of the most common questions I hear about warming up before exercise, so you can stop wondering and start moving better. How Long Should My Warm-Up Really Be? For most workouts, a good warm-up should last between 10 to 15 minutes . If you're just heading out for a light activity like a brisk walk, five minutes might be all you need to get going. However, if you're preparing for something more intense, such as heavy lifting or competitive sports, you should aim for around the 15-20 minute mark. This gives your body ample time to get fully prepped. The goal is simple: feel loose, warm, and mentally dialed in, but never tired before the real work begins. Is Static Stretching Before a Workout a Bad Idea? For the most part, yes. Holding those classic "reach and hold" static stretches for 30 seconds or more right before a workout can actually backfire, temporarily reducing your muscle power and performance. Instead, your pre-workout time is best spent on dynamic stretching. These are active movements like leg swings, torso twists, and arm circles that get your muscles ready for action. Reserve the prolonged static stretches for your cool-down session, as they are most beneficial for enhancing long-term flexibility at that time. Can I Use a Foam Roller in My Warm-Up? Absolutely! Foam rolling is a fantastic tool to add to your warm-up. Just spending 30-60 seconds on key muscle groups before you start your dynamic movements can help release tightness and unlock a better range of motion. It's an excellent way to address any knots or sticky spots, helping your muscles function more effectively during the workout without causing any pre-fatigue. Think of it as ironing out the wrinkles before you get started. This kind of targeted prep is a huge deal, especially for activities like running where certain muscles take a beating. Prepping them properly is a critical step, and you can dive deeper into this in our guide on how to prevent running injuries with top tips for safe running . What Is the Difference Between a Warm-Up and a Cool-Down? They serve opposite purposes, but both are equally vital for a well-rounded fitness plan. Warm-Up: Think of this as preparing your body for what's to come. It uses dynamic movements to gently raise your heart rate, push more blood to your muscles, and wake up your nervous system. Cool-Down: This is all about helping your body shift from workout mode back to a resting state. It usually involves light cardio (like walking) and static stretching to kickstart recovery, ease soreness, and improve flexibility. Here's the easiest way to remember it: a warm-up is the on-ramp to your workout, and a cool-down is the off-ramp. You need both to keep your fitness journey safe and effective. References Hughes, L., Rosenblatt, B., Paton, B., & Vicenzino, B. (2023). Most Noncontact and Indirect-Contact Anterior Cruciate Ligament Injuries in Professional Men's Soccer Occur in the First 15 Minutes and Last 15 Minutes of a Half: A Video Analysis of 53 Cases. Journal of Orthopaedic & Sports Physical Therapy , 53 (4), 188-195. https://www.jospt.org/doi/10.2519/jospt.2022.11526 McGowan, C. J., Pyne, D. B., Thompson, K. G., & Rattray, B. (2016). Warm-up stategies for sport and exercise: mechanisms and applications. European Journal of Applied Physiology , 116 (11-12), 2261–2275. https://link.springer.com/article/10.1007/s00421-016-3420-7 Nakhaee, Z., Fatahi, E., Miri, M., & Tabatabaee, S. S. (2020). The Effect of a Warm-Up Program on the Sitting-Rising Test in Industrial Workers: A Randomized Controlled Trial. The Malaysian Journal of Medical Sciences : MJMS , 27 (5), 108–117. https://pmc.ncbi.nlm.nih.gov/articles/PMC7692815/ At Flourish-Everyday , we believe that a smarter workout starts with smarter preparation. We provide the insights and shoe recommendations you need to support every step of your fitness journey, from your first warm up drill to your final cool-down stretch. Find everything you need to feel inspired and empowered at https://www.flourish-everyday.com .
- Find the Best Running Socks to Prevent Blisters Today
The secret to finding the best running socks to prevent blisters isn't complicated. It comes down to moisture and the process of drawing moisture away from your foot. What is important in a good athletic sock is the materials, a seamless fit, and the right amount of cushioning. You may think a nice cotton sock would be best. Forget cotton . Modern synthetics and merino wool are your best friends in the fight against friction and moisture. Your Path to Blister-Free Running There’s nothing worse than being in the zone on a run, only to be stopped by the sharp pain of a blister. It's a universal problem for runners that can turn a passion into a painful chore. Finding the best running socks to prevent blisters today is based on many factors. This guide is your roadmap to comfortable, uninterrupted miles. Your socks are a critical piece of gear, acting as a high-tech shield for your feet by managing sweat, heat, and friction. In This Guide Why Running Blisters Really Form The Anatomy of a Blister-Proof Sock Single Layer vs. Double Layer Socks How to Choose the Right Running Socks Common Questions on Blister Prevention References I will walk you through the science of how blisters form, break down the anatomy of a perfect anti-blister sock, and compare different technologies. The goal is to give you the confidence to pick the right pair every time. Knowing your gear is just one piece of the puzzle. For a broader look at staying healthy on the road, check out my guide on how to prevent running injuries . A blister is your body’s emergency alarm for excessive friction. The right sock proactively cuts the wires so that alarm never goes off. Let's get started on making every run a comfortable one. Why Running Blisters Really Form To find the right socks to prevent blisters, you must understand your opponent. A blister is the predictable result of a perfect storm—friction, moisture, and heat—brewing inside your shoe. Every time your foot hits the ground, it slides slightly. That rubbing is friction. When you add sweat, your skin softens and becomes far more vulnerable to damage. The constant rubbing against damp, weakened skin causes outer layers to pull away from inner ones. Your body rushes fluid into that gap to cushion the raw tissue, and you've got a blister. The Unholy Trinity of Blister Formation It's critical to see how these three enemies work together. Each one makes the others more powerful, creating a vicious cycle. Friction: The mechanical force doing the damage, caused by your foot shifting inside the shoe, especially at hotspots like the heel, toes, and ball of your foot. Moisture: Sweat softens the epidermis (the tough outer skin layer). Wet skin has a higher coefficient of friction than dry skin, meaning it "sticks" and rubs more easily. Heat: Running heats your feet, which increases sweat. This warmth also causes feet to swell slightly, intensifying friction and moisture. This cycle is relentless on long runs. A study on ultra-endurance athletes found that after four straight days of running, a staggering 76% of participants developed blisters (Mailler-Savage & Adams, 2014). The problem grew from 34% after day one to 72% by day three, proving a direct link between time on your feet and blister risk. You can learn more about the findings on ultra-endurance runners. Hotspots and Pressure Points Certain areas of your foot take most of the punishment, making them prime real estate for blisters. Blisters are a direct message from your feet: "There is too much friction here." A great running sock intercepts that message by managing moisture and minimizing movement. Common hotspots include: The back of your heel The tips and tops of your toes The sides of your big and little toes Under the arch of your foot Knowing your personal hotspots helps you pick socks with targeted features, like extra padding or a seamless toe box. By tackling the root causes—friction and moisture—you can stop blisters before they form. The Anatomy of a Blister-Proof Sock Choosing the right running socks to prevent blisters is like picking tires for a race car. You need the perfect blend of material, design, and performance. A great running sock manages the environment inside your shoe by controlling friction and moisture through a smart combination of materials and construction. The Power of Advanced Materials The fabric of your sock is your first line of defense. The wrong choice, like 100% cotton , acts like a sponge, soaking up sweat and holding it against your skin, making it weak and vulnerable. The right materials do the opposite. They pull moisture away from your skin, keeping your feet as dry as possible. This is called wicking . As you can see, merino wool and synthetic blends are engineered for performance. They actively manage moisture and temperature, while cotton is best left for casual wear, not for logging miles. Here's a quick comparison of top contenders. Running Sock Material Comparison for Blister Prevention Material Moisture-Wicking Breathability Durability Best For Merino Wool Excellent. Can absorb up to 30% of its weight in moisture. Very High. Naturally regulates temperature. Good. Modern blends have improved lifespan. Long-distance runs, trail running, and variable weather. Polyester Excellent. Hydrophobic fiber that pulls sweat away. High. Lightweight and allows for good airflow. Very High. Resists shrinking and abrasion. Everyday training, hot weather, and heavy sweaters. Nylon Good. Wicks moisture well and dries very quickly. Moderate. Often blended to boost airflow. Excellent. Extremely strong and resilient. Runners needing durable, high-mileage socks. Spandex/Lycra Low. Not a primary wicking fiber. Low. Its main role isn't breathability. Moderate. Provides stretch but can degrade. Small percentages in blends for a snug, no-slip fit. Ultimately, the best choice often comes down to personal preference and running conditions. Both merino wool and synthetics are fantastic at preventing blisters. Smart Construction and Fit Beyond material, how a sock is built plays a huge part in stopping friction. Even the most advanced fabric won't save you if the sock bunches up or has a thick seam. Look for these key construction details: Seamless Toe Box: The seam across the toes is a classic hotspot. A seamless, or "flat-knit," toe closure eliminates this irritation point. Anatomical Fit (Left/Right Specific): Anatomically designed socks are shaped for your left and right foot, providing a cleaner, more precise fit that prevents excess fabric from bunching up. Targeted Cushioning: Extra padding in high-impact zones—like the heel and ball of the foot—provides protection without adding bulk. Some socks also include compression; you can explore our review of Physix Gear Compression Socks to learn more. Single Layer vs. Double Layer Socks When choosing the best socks to stop blisters, one of the biggest choices is between a single-layer or a double-layer design. Both aim to eliminate friction but in different ways. Most high-performance running socks are single-layer . They rely on top-notch moisture-wicking materials and a dialed-in, anatomical fit. The idea is simple: if the sock hugs your foot perfectly and pulls sweat away, there’s no room for it to slip and rub. Less movement means less friction and no blisters. The Innovation of Double Layer Socks Double-layer socks are different. Think of them as two ultra-thin socks fused into one. The inner layer clings to your foot, while the outer layer moves with your shoe. This is a clever trick to redirect friction. Instead of your skin rubbing against the sock, the two layers of fabric rub against each other. The chafing and shear force that would normally damage your skin gets absorbed between the layers. This is an effective solution for runners who are highly prone to blisters, especially on long runs. The concept behind a double-layer sock is ingenious: move friction away from your skin. It’s a built-in protective shield that takes the beating so your foot doesn't have to. This isn't just a gimmick. U.S. military research found that soldiers wearing a thin liner sock under their standard ones had significantly fewer blisters. Studies with Marines on long-distance marches confirmed that a two-sock system drastically reduced blister risk. Making the Right Choice for You So, which one is right for you? It depends on your running habits, distance, and how prone you are to blisters. Choose Single-Layer Socks if: You prefer a close, minimalist feel and run short to medium distances. A good single-layer sock is a high-performance workhorse. Choose Double-Layer Socks if: You're an ultramarathoner, trail runner, or someone who always gets blisters. They offer superior protection, though they may feel thicker. Both are fantastic options. Think of the double-layer sock as your heavy-duty weapon for the toughest runs and a premium single-layer sock as your trusted daily driver. How to Choose the Right Running Socks Now that you know what makes a great running sock, it's time to find your perfect pair. This is about matching materials and design to your feet, your running style, and your environment. Consider Your Running Environment Where you run dramatically changes what you need from a sock. Road Running: Pounding pavement means repetitive impact. Look for socks with targeted cushioning under the heel and ball of the foot. Shorter, lower-cut socks work well. Trail Running: Trails consist of dirt, pebbles, and puddles. A higher sock cuff, such as crew or quarter-length, functions as a gaiter, preventing debris from entering and safeguarding your ankles. Treadmill Running: Indoors, it's all about managing heat and sweat. You'll want the most breathable, lightweight sock available to keep your feet cool and dry. Match the Sock to Your Distance How far are you going? A 5K and a marathon place different demands on your gear. For long hauls, you might appreciate socks with features like light compression or double-layer designs for maximum friction-fighting power. For shorter runs, a simple, lightweight, single-layer sock often feels more responsive. Choosing the right sock is about anticipating the challenges of your run. For a long trail race, you need armor. For a quick jog on the treadmill, you need ventilation. Find Your Perfect Fit and Height This is non-negotiable. A sock that doesn't fit right will cause blisters. Too big, and it will bunch up. Too small, and it can squeeze your toes. Always check the brand’s sizing chart. If you're between sizes, consider sizing down for a snug fit. Sock height is both functional and a matter of style preference. No-Show: Disappear into your shoe. Perfect for road running but offer no trail protection. Ankle/Quarter: Cover the ankle bone, preventing the shoe's heel tab from rubbing. A great all-around choice. Crew: Reach up the calf. The gold standard for trail runners, offering serious protection from scrapes and debris. Your socks and shoes are a team. For more on the other half of this equation, our guide on running shoes for everyday use offers practical insights . By thinking through these questions, you can confidently pick socks that will keep you moving forward, blister-free. Got Questions? Let's Talk Blister Prevention Even with excellent, questions can pop up. Tweaking your blister prevention plan often comes down to the small details. Here are answers to common questions runners ask. Are Thicker Socks Better for Preventing Blisters? Not always. While strategic cushioning is great, a sock that's too thick can be counterproductive. A bulky sock can make your shoes too tight, increasing pressure and friction . It also traps heat, causing more sweat which is a blister's best friend. The goal isn't thickness; it's strategic cushioning . Look for socks with targeted padding in high-impact zones without adding unnecessary bulk elsewhere. The best running socks balance protection and breathability. How Often Should I Replace My Running Socks? Your socks are high-performance gear, and like shoes, they have a shelf life. After miles of use and washing, materials break down. A good rule of thumb is to replace running socks every 300-500 miles , aligning with the lifespan of most running shoes. But also watch for visible signs of wear. Once a sock loses its shape and elasticity, it can't hug your foot securely. It will slip and bunch up inside your shoe—a direct invitation for blisters. Look for these red flags: Thinning fabric , especially in the heel or under the ball of your foot. Loss of elasticity , when the sock feels loose and no longer stays put. Visible holes or spots that are about to wear through. Swapping them out before they fail is a small investment in comfort and performance. Should I Wear Two Pairs of Socks? Doubling up is an old-school trick made mostly obsolete by modern sock technology. While the logic—socks rubbing each other instead of your skin—makes sense, it usually creates more problems. Wearing two standard socks traps heat, leads to moisture buildup, and crams your foot, creating new pressure points. A far better approach is a purpose-built double-layer sock. These are engineered to provide the friction-reducing benefit without the bulk and heat, giving you the best of both worlds. References Mailler-Savage, E. A., & Adams, B. B. (2014). Skin manifestations of running. Journal of the American Academy of Dermatology , 70 (4), 757-768. At Flourish-Everyday , we believe the right gear empowers you to push your limits comfortably. Explore our curated selections and in-depth guides to find everything you need for your fitness journey at https://www.flourish-everyday.com .
- Compound Exercises for Beginners: Your Ultimate Fitness Guide
If you're starting your fitness journey, or an expert, the most effective way to build strength is with compound exercises . These are multi-joint movements like squats, deadlifts, and push-ups that work several muscle groups simultaneously. They're incredibly efficient, delivering maximum results in minimum time. Warning, it is also exhausting and the only way I work out. I have seen great results. Focus on max reps till burnout on every exercise. If advanced, I challenge you to burnout on the set reps, then drop a weight and continue to secondary burnout. Oh man, that's a burn. Unlike isolation exercises that target one small muscle, compound lifts build functional strength for everyday life and boost your metabolism far more effectively. Table of Contents Why Smart Beginners Start with Compound Exercises Mastering the Four Foundational Lifts Your First Full Body Workout Plan Common Beginner Mistakes and How to Fix Them Fueling Your Body for Strength and Recovery Your Questions on Compound Training Answered References Why Smart Beginners Start with Compound Exercises Walking into a gym for the first time can be overwhelming. "Compound Exercises for Beginners: Your Ultimate Fitness Guide" will help you conquer your fears and make you look like an experienced gym-goer. With rows of machines and complex equipment, it's easy to feel lost. The truth is, the most powerful approach is often the simplest one: focus on the basics with compound exercises. These movements are the cornerstone of nearly every successful strength program. Think of your body as a coordinated team. A bicep curl, an isolation exercise, trains just one player. But a pull-up? That’s a compound exercise that forces your back, biceps, shoulders, and core to work together. This is how your body is designed to move, whether you're lifting a heavy box or playing in the park. The Science of Efficiency Compound exercises are powerhouse movements because they recruit multiple large muscle groups at once. This total-body activation is a superior method for promoting overall strength and muscle development. Research shows these lifts trigger the three key mechanisms for muscle growth: mechanical tension, muscle damage, and metabolic stress (Schoenfeld, 2010). Hitting all three is the secret for building a strong, capable body. You can find more great insights on compound training over at MensHealth.com . This efficiency means better results in less time. Instead of an hour of isolation exercises, you can get a powerful full-body workout with just a handful of these core lifts. A workout built around squats, deadlifts, presses, and rows will always be more effective for a beginner than a routine filled with machine-based isolation movements. Focus on getting strong in the basics first. To help you see the difference clearly, here's a quick comparison. Compound vs Isolation Exercises a Quick Comparison for Beginners This table breaks down the fundamental differences between compound and isolation exercises for a clear, at-a-glance understanding. Feature Compound Exercises (e.g., Squat) Isolation Exercises (e.g., Bicep Curl) Joints Involved Multiple joints at once (e.g., hips, knees, ankles). A single joint (e.g., the elbow). Muscles Worked Several muscle groups simultaneously. One primary muscle group. Primary Goal Build overall strength, muscle mass, and functional movement. Target and sculpt a specific muscle. Calorie Burn High, due to more muscle activation. Low, as fewer muscles are engaged. Time Efficiency Very high. A full-body workout in less time. Low. Requires many exercises for a full workout. Real-World Function Excellent. Mimics natural movements like lifting or pushing. Limited. Rarely do we use just one muscle in daily life. While isolation exercises have their place, beginners get the most benefit by building a solid foundation with compound movements first. Key Benefits for New Lifters For anyone new to lifting, the advantages of prioritizing compound exercises are immediate and impactful. Accelerated Strength Gains: Using more muscle fibers in a single lift lets you move heavier weights, the number one driver of getting stronger. Enhanced Calorie Burn: Working more muscles demands more energy. Compound exercises burn significantly more calories than isolation moves, both during and after your workout. Improved Coordination and Balance: These movements teach your muscles to fire together, improving stability and function. Better Hormonal Response: Big lifts like squats and deadlifts have been shown to trigger a greater release of muscle-building hormones, including testosterone and growth hormone (Kraemer & Ratamess, 2005). Mastering the Four Foundational Lifts Understanding why compound exercises are important is the first step. The real magic happens when you put that knowledge into action. This section breaks down the four foundational lifts that are the bedrock of any serious strength program: the Squat, Deadlift, Bench Press, and Overhead Press. For a beginner, mastering these moves is non-negotiable for building functional strength safely and seeing progress. As the visual shows, hitting multiple muscles at once leads to bigger strength gains. Those gains, in turn, boost your metabolism and calorie burn. It’s a win-win cycle. The Barbell Squat Known as the "king of all exercises," the barbell squat builds strong legs, a solid core, and serious stability. This strength translates directly into the real world. Proper Form Snapshot The Setup: Feet shoulder-width apart, toes angled slightly out. Rest the barbell across your upper back, on the "shelf" created by your trap muscles. The Movement: Take a big breath to brace your core. Push your hips back and down, like sitting in a chair. Keep your chest up and back straight. The Depth: Lower until your hip crease is below your knees. Drive through the middle of your feet to stand back up. A common mistake is letting your knees collapse inward. A great cue is to "spread the floor" with your feet to activate your glutes. Proper footwear is also critical for a stable base; check out our guide on good shoes for squats and deadlifts . The Deadlift The deadlift teaches you to lift heavy objects off the ground safely. It strengthens your entire posterior chain—hamstrings, glutes, and back muscles. It is arguably the most effective tool for building raw, head-to-toe strength. Proper Form Snapshot The Setup: Stand with the bar over the middle of your feet. Hinge at your hips, then bend your knees to grab the bar just outside your shins. Your back should be flat and chest up. The Lift: Brace your core. Think about driving the floor away with your legs, keeping the bar close to your body. As it passes your knees, drive your hips forward to lock out. Mind-Muscle Cue: Imagine pushing the entire planet away from you with your feet. Many beginners round their lower back. To avoid this, keep your chest puffed out and pull your shoulders back and down throughout the lift. The Bench Press The bench press is the king of upper-body pushing exercises. It's the go-to for building a powerful chest, strong shoulders, and triceps. Proper Form Snapshot The Setup: Lie on the bench with your feet planted firmly on the floor. Create a slight arch in your lower back, but keep your glutes on the bench. Grip the bar slightly wider than your shoulders. The Press: Lower the bar with control to your mid-chest. Tuck your elbows at a 45-75 degree angle. Press the bar back up explosively. The Breath: Inhale as the bar comes down, and exhale forcefully as you press up. A strong bench press is built on a stable foundation. Actively drive your feet into the floor and squeeze your shoulder blades together. This creates a solid base and turns the lift into a full-body effort. The Overhead Press Also called the military press, this lift is a true measure of upper body strength and core stability. It builds strong shoulders and a resilient core. Proper Form Snapshot The Setup: Stand with feet shoulder-width apart. Grip the bar just outside your shoulders, resting it on your upper chest. The Push: Squeeze your glutes and brace your core. Press the bar straight overhead until your arms are locked out. Common Mistake: Avoid leaning back too far, which stresses the lower back. Keep your core tight to stay upright and ensure your shoulders are doing the work. Your First Full Body Workout Plan Knowing the exercises is great, but organizing them into a solid plan is where the magic happens. This simple routine provides a clear roadmap. Perform this workout three times a week on non-consecutive days (e.g., Monday, Wednesday, Friday). This schedule provides the recommended 48 hours for muscle recovery , which is when growth and strength-building occur. The 3-Day Beginner Workout Routine Here's a sample full-body split. For each main exercise, aim for 3 sets of 8-12 repetitions , a sweet spot for both muscle growth and strength gains. Workout A Barbell Squats: 3 sets of 8-12 reps Bench Press: 3 sets of 8-12 reps Bent-Over Rows: 3 sets of 8-12 reps Plank: 3 sets, hold for 30-60 seconds Workout B Deadlifts: 3 sets of 5-8 reps (Lower reps due to high demand) Overhead Press: 3 sets of 8-12 reps Pull-Ups (or Lat Pulldowns): 3 sets of 8-12 reps Hanging Knee Raises: 3 sets of 10-15 reps Alternate these workouts. Your first week might be A-B-A, and the next B-A-B. This keeps training interesting while hitting all fundamental movement patterns. For more exercise options, our guide on the top resistance training exercises is packed with great ideas. As a beginner, your number one priority is form. It’s far better to lift a lighter weight with perfect technique than to ego-lift a heavy weight with sloppy form. Nail the movement first, then add weight. Rest and Progressive Overload Rest and progressive overload are crucial for progress. Rest for 60 to 90 seconds between sets on your main lifts. This allows your muscles to recover enough for the next set without letting your heart rate drop completely. The secret to long-term gains is progressive overload : gradually asking your body to do more. Here’s how: Add Weight: Once you can complete all sets and reps with clean form (e.g., 3 sets of 12 on bench press), add a small amount of weight ( 2.5 to 5 pounds ) for your next workout. Add Reps: If you're not ready for more weight, try to add one extra rep to each set. This structured approach removes guesswork from your training. Follow the plan, focus on getting a little stronger each week, and you’ll build an incredible fitness foundation. Common Beginner Mistakes and How to Fix Them Starting with compound exercises is a fantastic move, but common errors can slow progress or cause injury. The biggest mistake is ego lifting —using more weight than you can handle with good form. Sacrificing Form for Weight Proper technique is everything . Prioritizing weight over form risks injury and cheats you out of the exercise's benefits. A rounded back during a deadlift puts stress on your spine instead of your legs and hips. To fix this, start with an empty barbell or light dumbbells. Perfect the movement first. Film yourself on your phone to spot form breakdowns you might not feel. Your goal isn't just to lift the weight; it's to lift the weight correctly. Building a strong foundation with lighter weight will allow you to lift much heavier—and safer—in the long run. Neglecting the Warm-Up Skipping your warm-up is like racing a car with a cold engine. Your muscles, joints, and nervous system need preparation to perform safely. A simple warm-up is sufficient: General Warm-Up (5 minutes): Light cardio like rowing or jogging to raise your core temperature. Specific Warm-Up (5-10 minutes): Dynamic stretches and a few light sets of the day's main exercise, gradually increasing the weight. Focusing on the Wrong Exercises Another common trap is getting distracted by isolation exercises like bicep curls before building a solid base with big compound lifts. Compound exercises are superior for building overall strength and muscle. Beginners who stick to deadlifts and presses can handle heavier total loads, which drives faster strength gains. You can learn more about the key differences between compound and isolation exercises . Prioritizing multi-joint lifts ensures you get the most bang for your buck. Fueling Your Body for Strength and Recovery Hard work in the gym is the spark, but nutrition provides the building blocks for muscle. You can't separate training from nutrition and recovery. The Role of Protein in Muscle Repair Protein is the most critical nutrient for repairing and growing muscle. It delivers the amino acids needed to mend the microscopic tears in muscle fibers created during a workout, making them stronger. A simple strategy is to include a quality protein source in every meal: Breakfast: Eggs or Greek yogurt. Lunch: Grilled chicken or lentil soup. Dinner: Fish or lean beef. This ensures a steady supply of amino acids throughout the day, which is essential for building muscle. Carbs and Fats Are Your Allies While protein rebuilds, carbohydrates are your body's primary energy source. They fuel demanding exercises like squats and deadlifts. Healthy fats are also crucial, playing a role in producing hormones that support muscle growth. Good sources include avocados, nuts, seeds, and olive oil. You cannot out-train a bad diet. What you eat is just as crucial as how you lift. Prioritize whole foods, stay hydrated, and give your body the fuel it needs to recover and grow stronger. Sleep and Supplementation Recovery peaks while you sleep, when your body releases growth hormone and repairs damaged tissues. Aim for 7-9 hours of quality sleep per night. While whole foods should be your foundation, certain supplements can help. Creatine is one of the most researched supplements for improving strength. For more on this, our guide on creatine's secrets and essential do's and don'ts provides practical advice. Your Questions on Compound Training Answered https://www.youtube.com/embed/ZrNXcyoyoy8-w It's normal to have questions when starting with compound exercises. Let's tackle some of the most common ones. Can I Do Compound Exercises at Home? Absolutely. Some of the most effective compound movements require only your body weight. Squats, push-ups, lunges, and planks can create a powerful workout at home. As you get stronger, you can add simple tools like resistance bands, dumbbells, or a kettlebell to increase the challenge. How Do I Know When to Add More Weight? This relates to progressive overload . A great guideline is the "2-for-2 rule." If you can perform two or more reps beyond your target on your last set for two workouts in a row, it's time to increase the weight. Add a small amount— 2 to 5 pounds for upper body lifts and 5 to 10 pounds for lower body lifts. For more advice on structuring workouts, Nerd Fitness offers a great guide . What if an Exercise Feels Uncomfortable or Painful? It's critical to distinguish between muscle fatigue and pain. Muscle burn is a sign of hard work. Sharp, stabbing, or joint pain is not. Pain is your body's alarm system. Never push through sharp pain. Stop immediately. Reassess your form—filming yourself can help—and try again with a much lighter weight or a modified version of the exercise. If sharp pain persists, avoid that movement and consult a physical therapist or a qualified coach. How Often Should I Train with Compound Exercises? For beginners, a full-body routine two to three times per week on non-consecutive days is ideal. This balances stimulating muscle growth with providing ample recovery time. Remember, real progress happens during rest. Allowing at least 48 hours between full-body sessions is non-negotiable for results and avoiding burnout. References Kraemer, W. J., & Ratamess, N. A. (2005). Hormonal responses and adaptations to resistance exercise and training. Sports Medicine, 35 (4), 339-361. Schoenfeld, B. J. (2010). The mechanisms of muscle hypertrophy and their application to resistance training. Journal of Strength and Conditioning Research, 24 (10), 2857-2872. At Flourish-Everyday , we believe that having the right information is just as important as having the right gear. Explore our site for more expert fitness guides and reviews to support every step of your wellness journey. Find your inspiration at https://www.flourish-everyday.com .